 Ljubljana Castle above Old Town, Ljubljana, Slovenia "It's like living in a fairytale until you realize there isn't much to do," we were told by an older couple we met in Copenhagen. On the train, we mentioned to a German man that we were stopping in Ljubljana because we heard that it was nice. He paused and said, "Maybe." These experiences did not inspire confidence about our upcoming time in Ljubljana, but then we arrived. And we were greeted with the most charming city in the most charming country, and it became a highlight on our European Adventure. 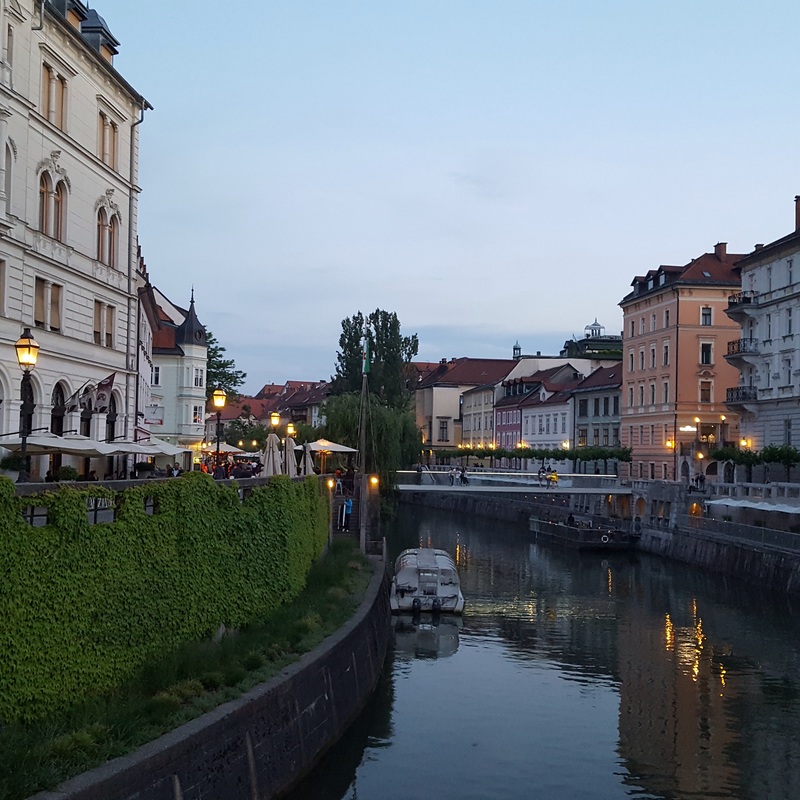 Ljubljanica River, Ljubljana, Slovenia Ljulbjana's Old TownLjubljana's Old Town is filled with picture perfect buildings and cobblestone streets. A number of bridges span the Ljubljanica River flowing through town. Along the river banks, cafe tables line the sidewalks and locals sit outside, sipping wine. The Old Town is small but fun to wander through, stopping in cafes, exploring shops, and walking along the river. We spent a couple of warm summer afternoons sitting outside at cafes, sampling Slovenian wine. A particular favorite was TOZD. The symbol of the city is a dragon. Local legend says that the founder of Ljubljana killed a dragon. There are dragons all over the city, including a Dragon Bridge, dragon statues, and dragon souvenirs. I though this was a fun quirk, something different than you encounter in other European capitals. Another thing I noticed in Ljubljana was the number of garbage cans. On the street, I saw receptacles lined up for various types of waste. I learned the Ljubljana was given the "European Green Capital Award" in 2016. The honor is awarded based on 12 environmental factors, including transport, green urban areas, waste production and management, nature and biodiversity, air, water consumption, and energy performance, among others. So, it makes sense that I saw evidence of Ljubljana's efficient waste management while walking the city streets. 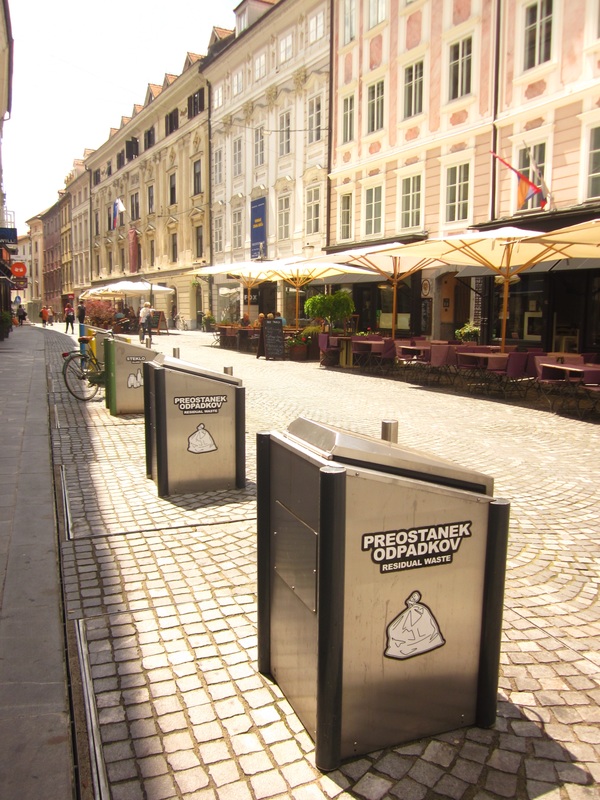 Evidence of the European Green Capital 2016 Award, Ljubljana, Slovenia 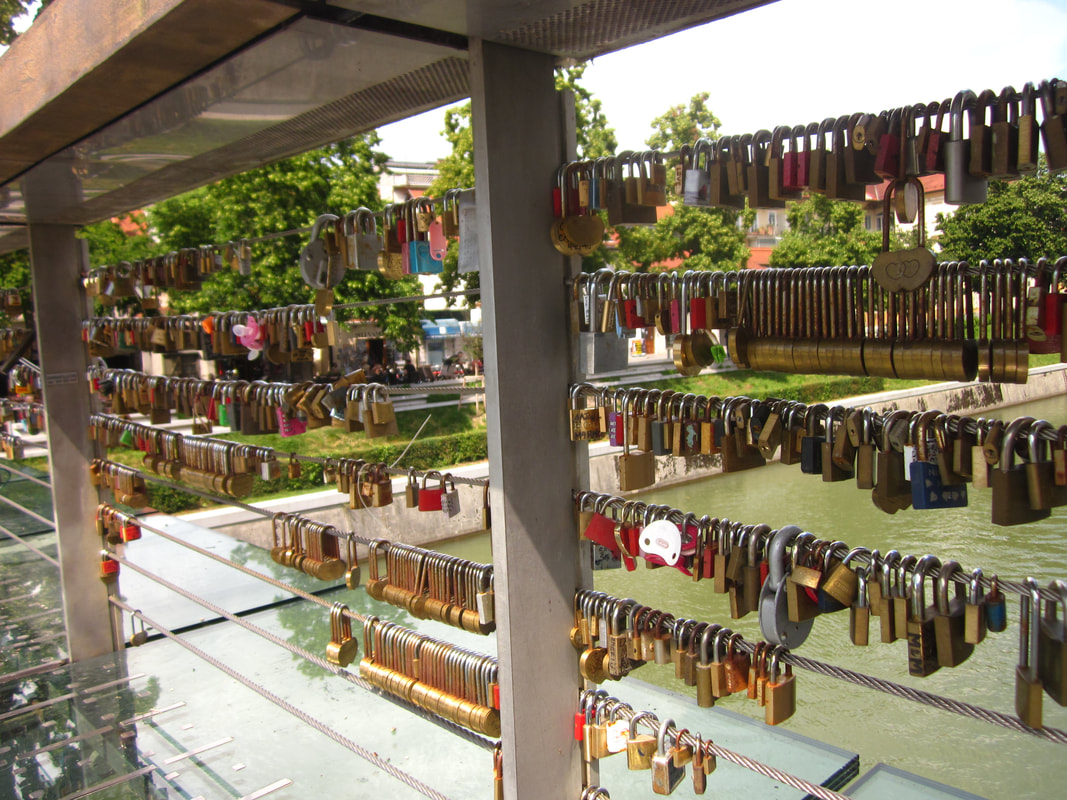 Lovers' Padlocks on Butchers' Bridge, Ljubljana, Slovenia 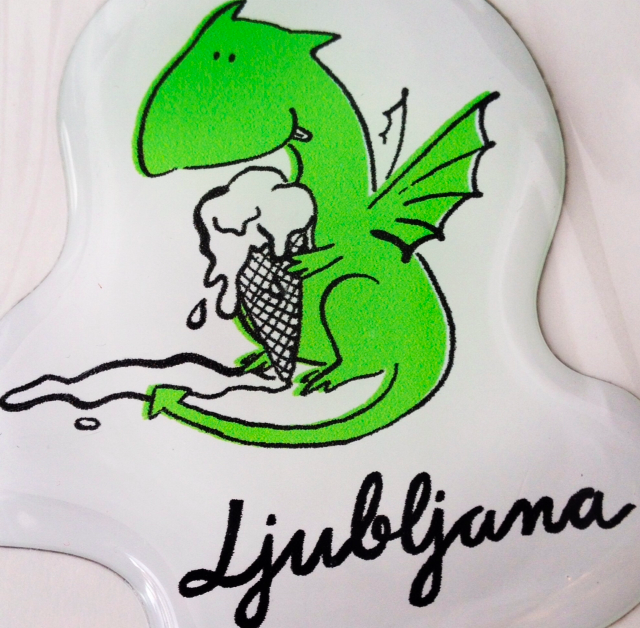 Dragon sticker, Ljubljana, Slovenia Ljubljana CastleWhat fairytale would be complete without its very own castle? Ljubljana Castle is perched on top of a hill in the middle of Old Town. It's a majestic stone structure, originally a medieval fortress. There is a funicular that ferries visitors up Castle Hill for a price, but we chose to walk up the hill, which ended up being a nice way to look out over the city. At the top, we did not end up paying the entrance fee, since we were able to look out from the castle walls, walk through the courtyard, and enter a small chapel without a ticket. Looking down over the red roofs of Ljubljana was quite a sight! 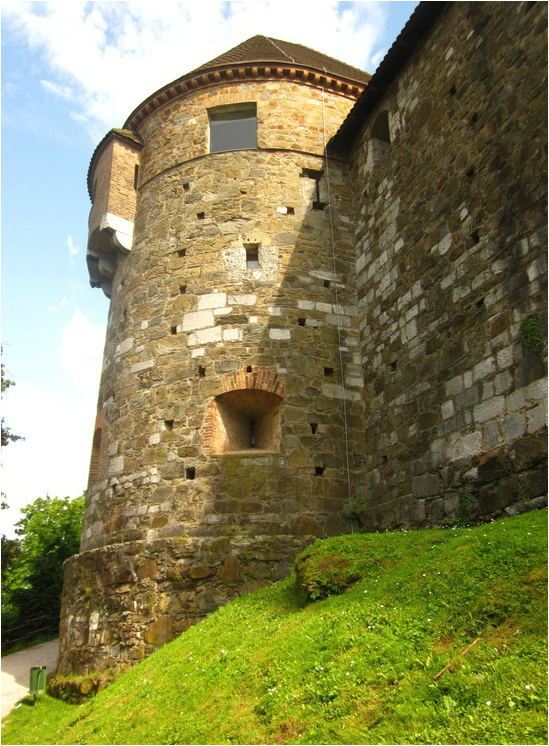 Ljubljana Castle, Ljubljana, Slovenia 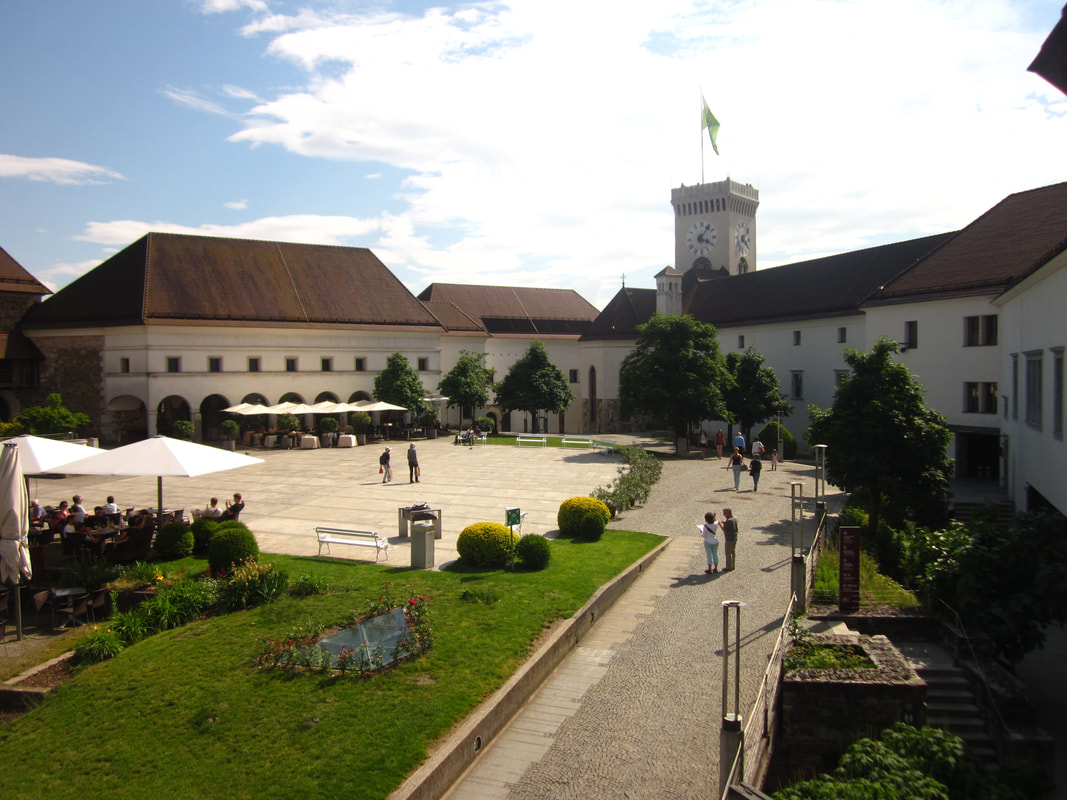 Courtyard of Ljubljana Castle, Ljubljana, Slovenia 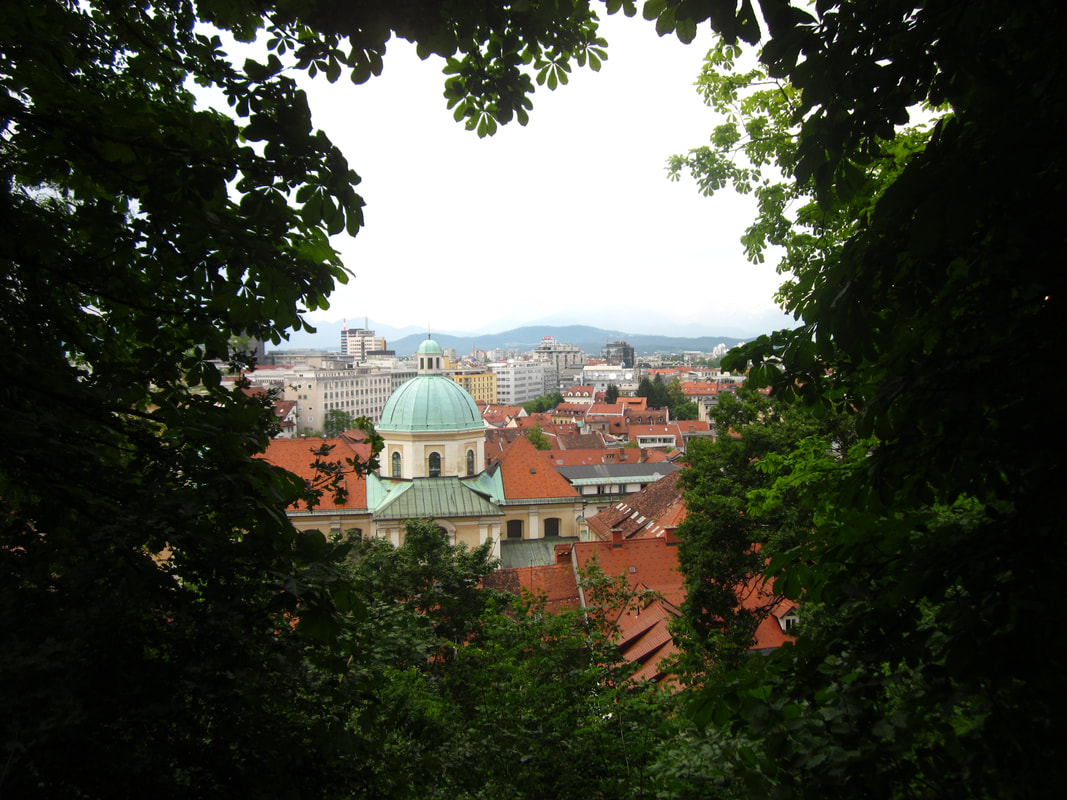 View from the climb to Ljubljana Castle, Ljubljana, Slovenia 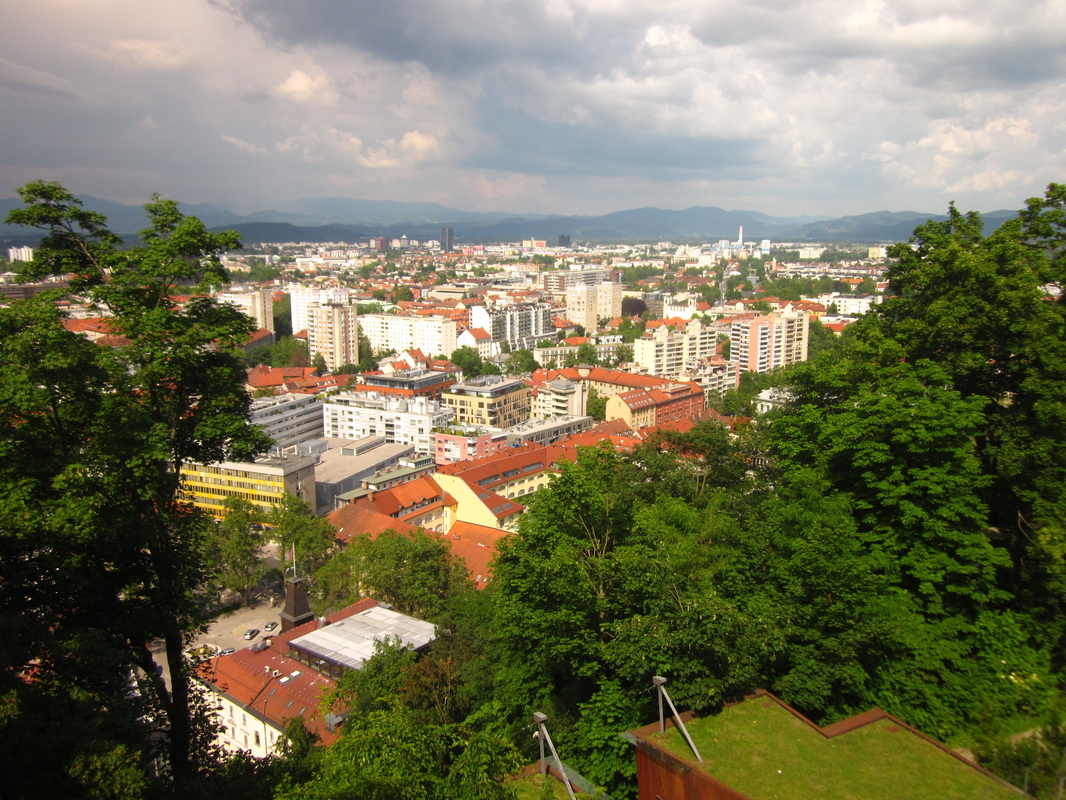 View from Ljubljana Castle, Ljubljana, Slovenia Ljubljanajam Food TourOne of the activities that we chose to pay for on our European Adventure was a food tour in Ljubljana with a company called Ljubljanajam. I HIGHLY recommend a food tour with Iva, who owns this company. She was very knowledgeable, was very accommodating to food allergies, and put together a lovely food tour that highlighted some traditional dishes from Slovenia. We went for the Ljubljana Essentials Tour, but tours focused on craft beer, Slovenian wine, and desserts are also offered! On our food tour, we stopped by the farmer's market and sampled bear sausage. We tried soup, pumpkin oil, a fish plate, a chicken dish, Slovenian liquor and wine, gelato, and coffee. For a longer summary of our Food Walk, read my full review here. 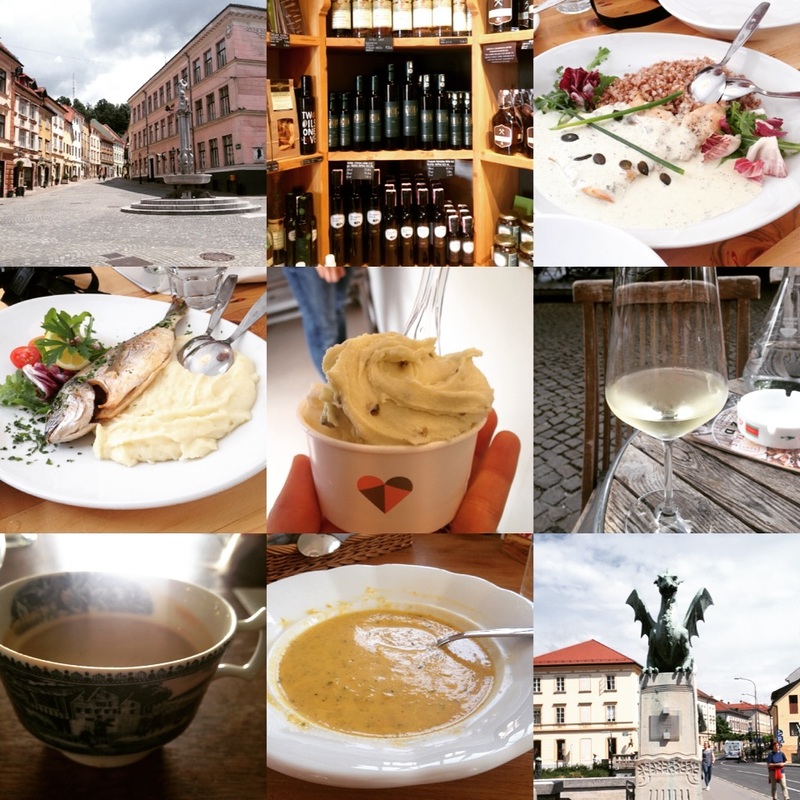 Images from our food walk with Ljubljanajam, Ljubljana, Slovenia 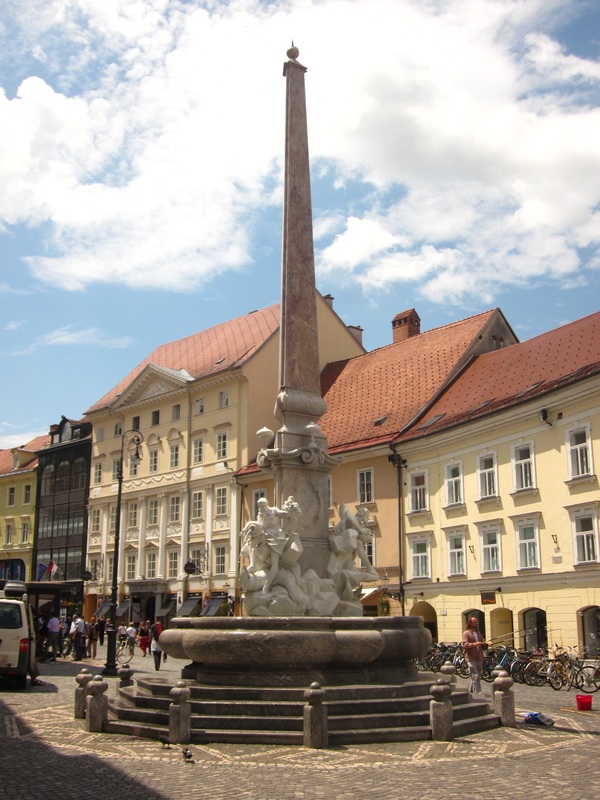 Old Town, Ljubljana, Slovenia Hanging with localsWe stayed in an Airbnb just across the river from Old Town Ljubljana, right across from the Rog Factory, an abandoned bicycle factory that is occupied by squatters and operates a variety of community spaces. We stayed there during protests in June 2016 against the demolition of the building, and we could hear protesters from our room throughout our stay. Our Airbnb was fantastic! We had lovely hosts who chatted with us, made us feel welcome, gave us a demo record (they were all dancers, artists, musicians), and even arranged for us to come to a small, local yoga class when we couldn't find a yoga class to attend on our own. Our apartment was located on Trubarjeva Cesta, just across the Dragon Bridge from Old Town. Trubarjeva Cesta was lined with shops and restaurants, most of the buildings colorfully adorned with graffiti. Shoes hung from a few of the telephone wires overhead. This street contrasted with the clean and tidy streets of Old Town. I liked the contrast and the visual interest of the graffiti along this street. 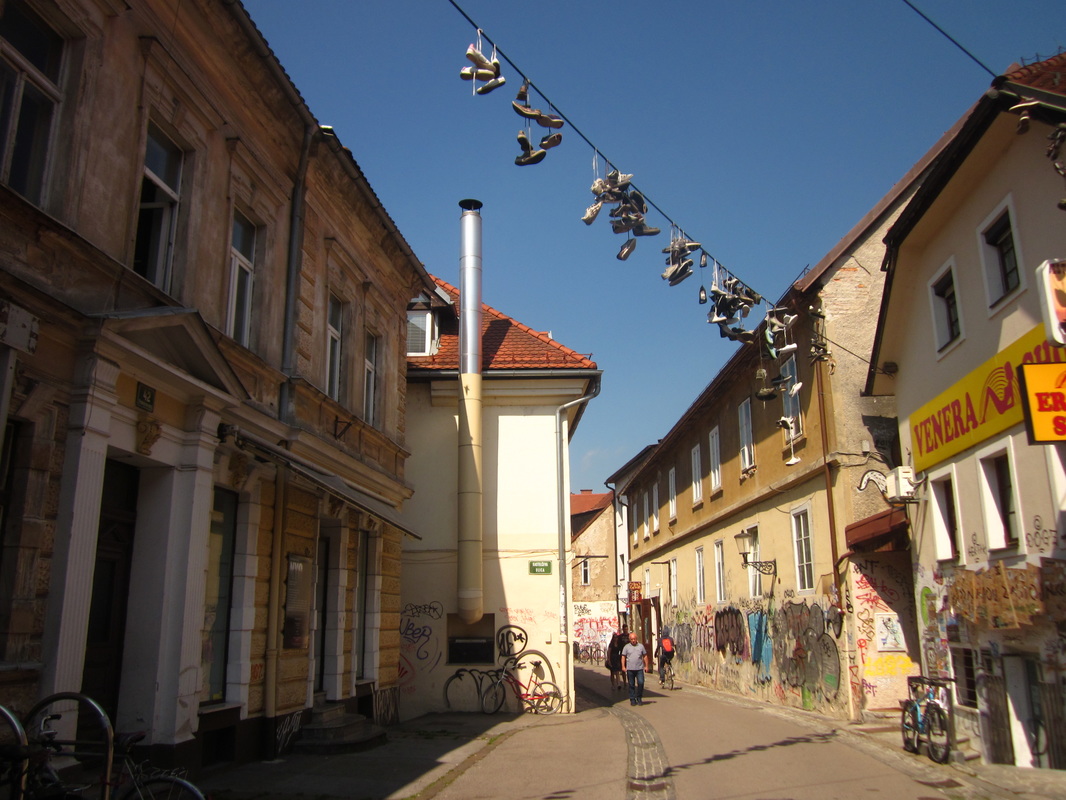 Shoes on wire, Trubarjeva Cesta, Ljubljana, Slovenia 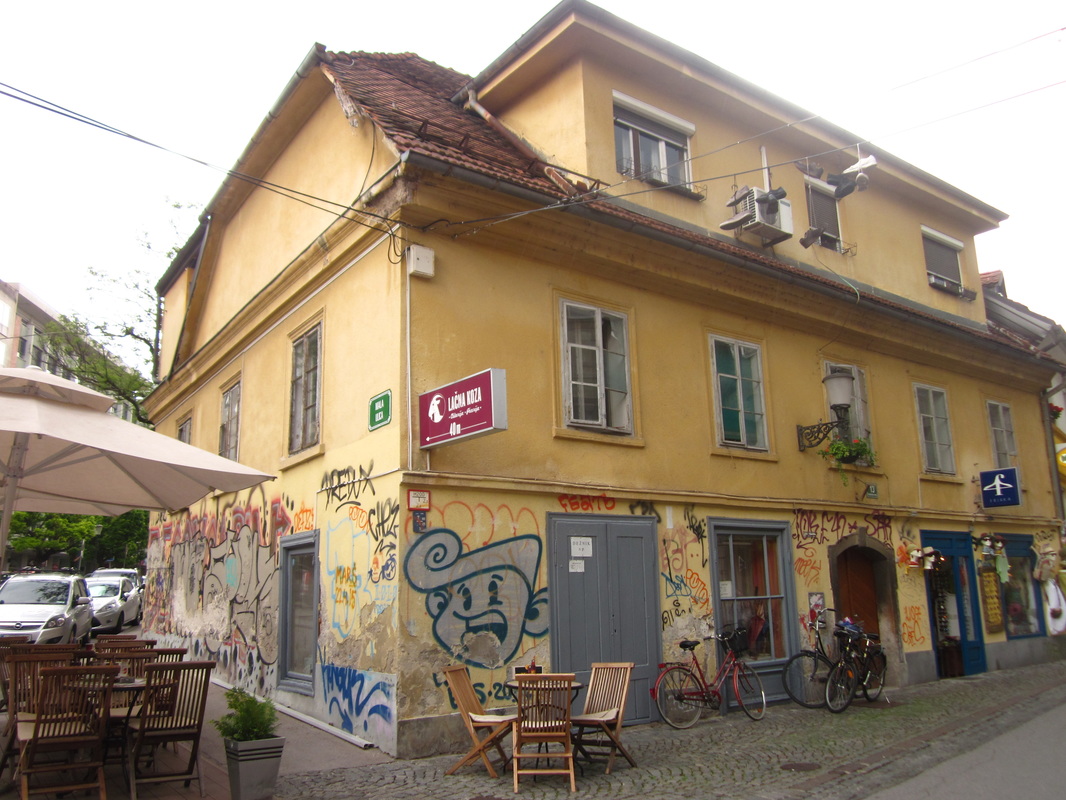 Trubarjeva Cesta, Ljubljana, Slovenia 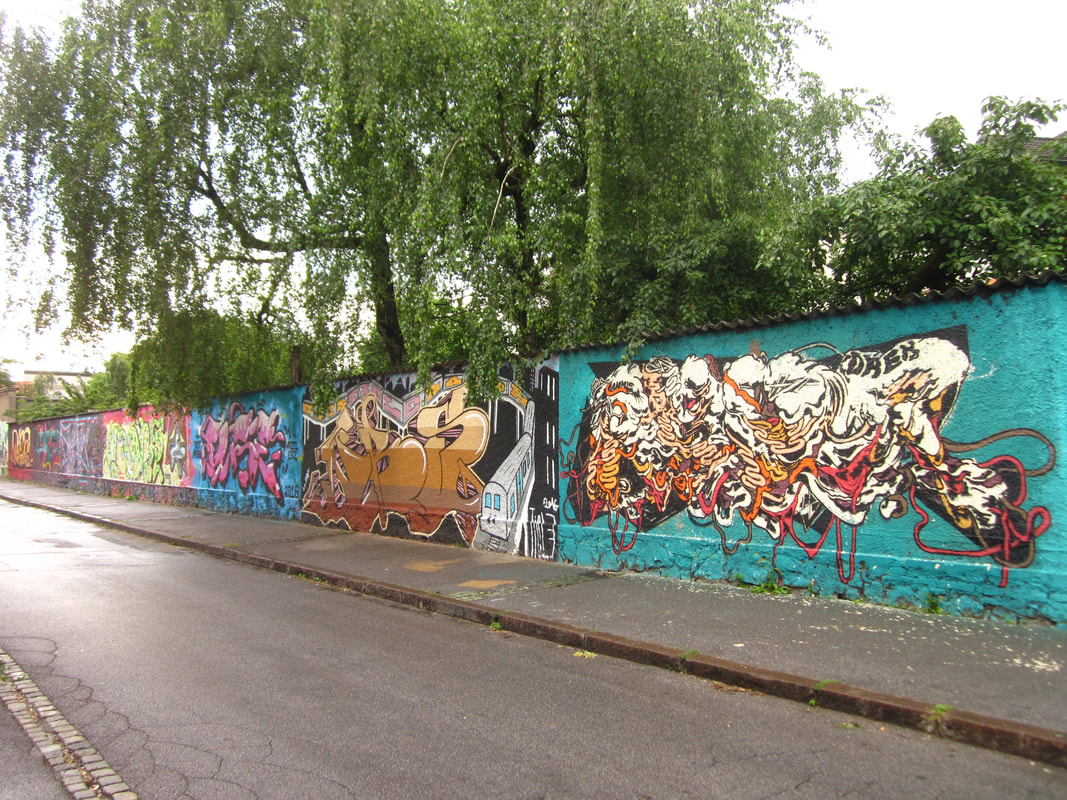 Boundary of Rog Bicycle Factory, Trubarjeva Cesta, Ljubljana, Slovenia ModernaIn our never-ending search for coffee, we ended up at Moderna, a minimalist coffee shop located inside the Museum of Modern Art. As we entered the building, we heard some other-worldly sounds, coming from a modern art exhibit, I presume. But Moderna was a lovely treat, with delicious, hand-poured coffee. Curiously, it was served in wine glasses. We spent a few hours relaxing in Moderna, drinking coffee and taking advantage of their wi-fi. If you are a modern art fan, I'm sure the museum would be a fun stop either before or after the coffee shop. 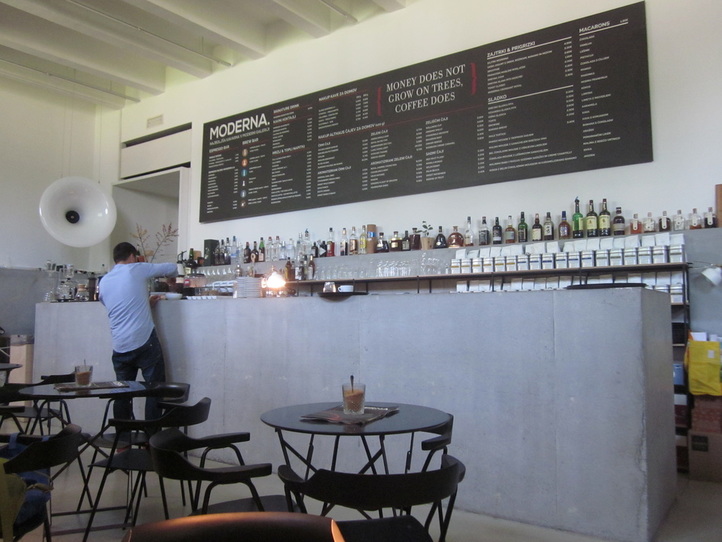 Moderna Coffee Shop, Ljubljana, Slovenia 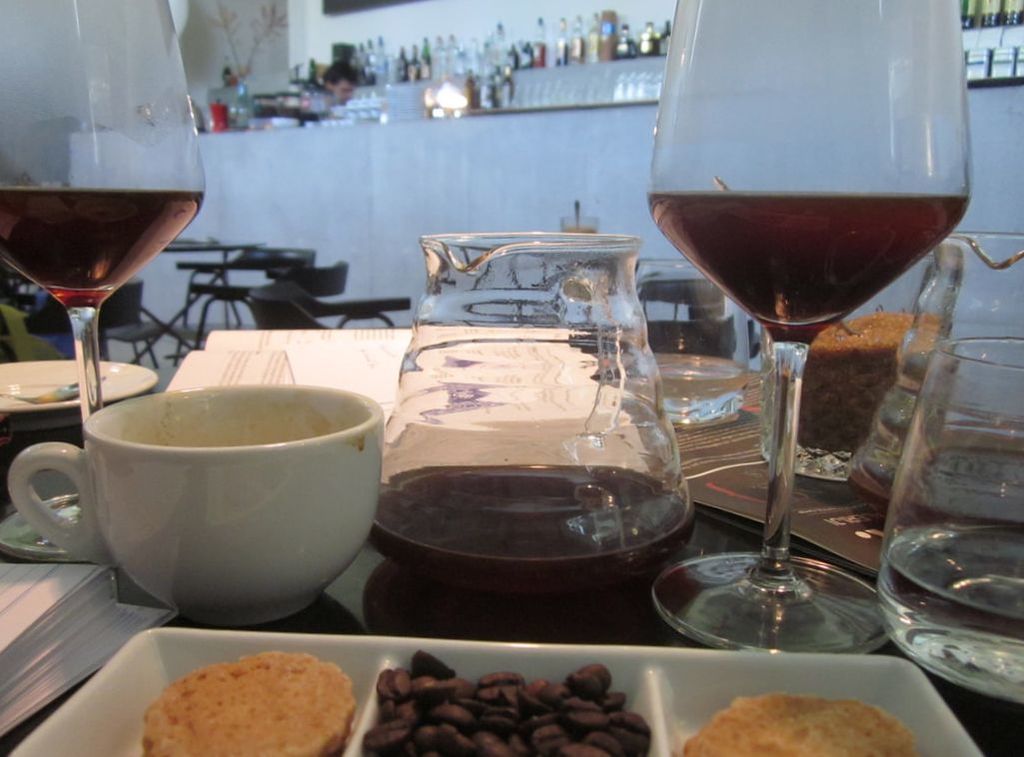 Coffee and sweets at Moderna, Ljubljana, Slovenia We spent two days in Ljubljana, which was enough to explore the central part of the city. The architecture was charming, and the people we met were friendly. There are not a ton of big "attractions" in the city, but we were happy enough wandering through the streets of Old Town and taking advantage of the cafes. The relaxed pace and small feel is a nice break from some of the bigger, busier cities in Europe. The wine is delicious. And there are dragons. Ljubljana is also a great jumping off point for heading into the Julian Alps. We took a bus to stunning Lake Bled, which took about an hour, but more about Lake Bled is coming in another blog post!  Farmer's Market, Ljubljana, Slovenia 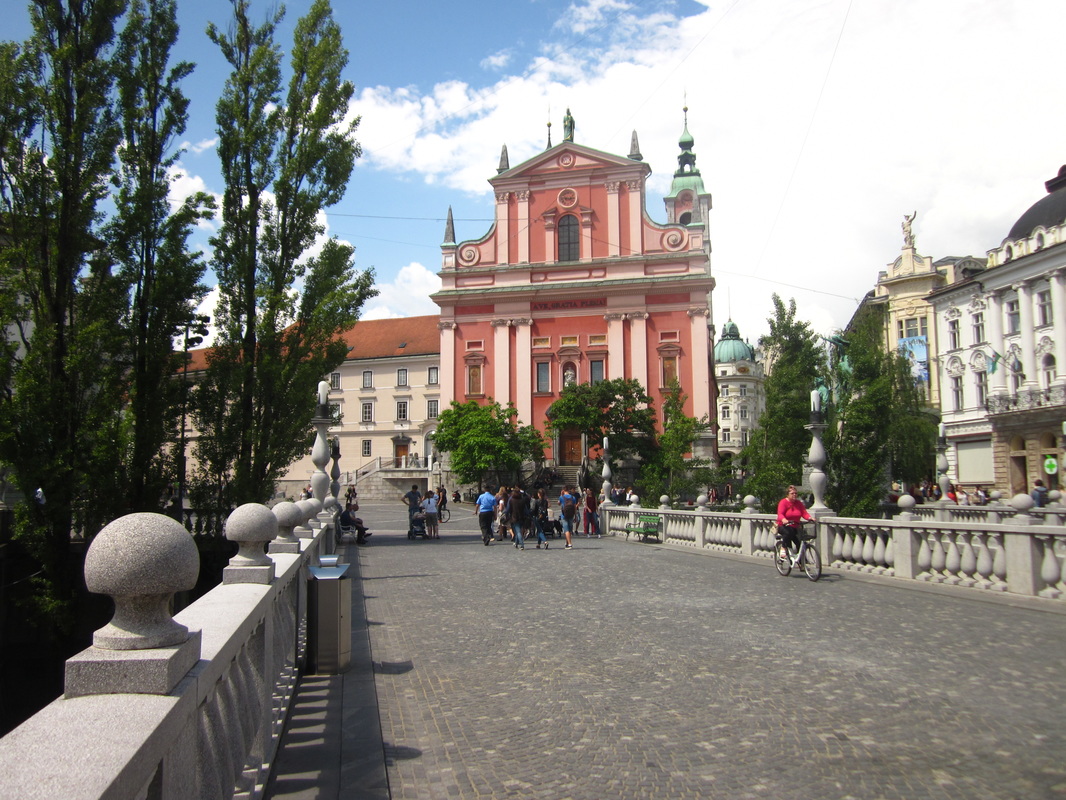 Triple Bridge, Ljubljana, Slovenia
1 Comment
Ahh, Dubrovnik. The "pearl of the Adriatic". I had heard so much about Dubrovnik before we visited. A co-worker told me it was one of her favorite places she's ever visited. A friend insisted that we HAD to go to Dubrovnik on our European trip. I heard rumors that some obscure television show is filmed there. (I actually don't watch Game of Thrones.) 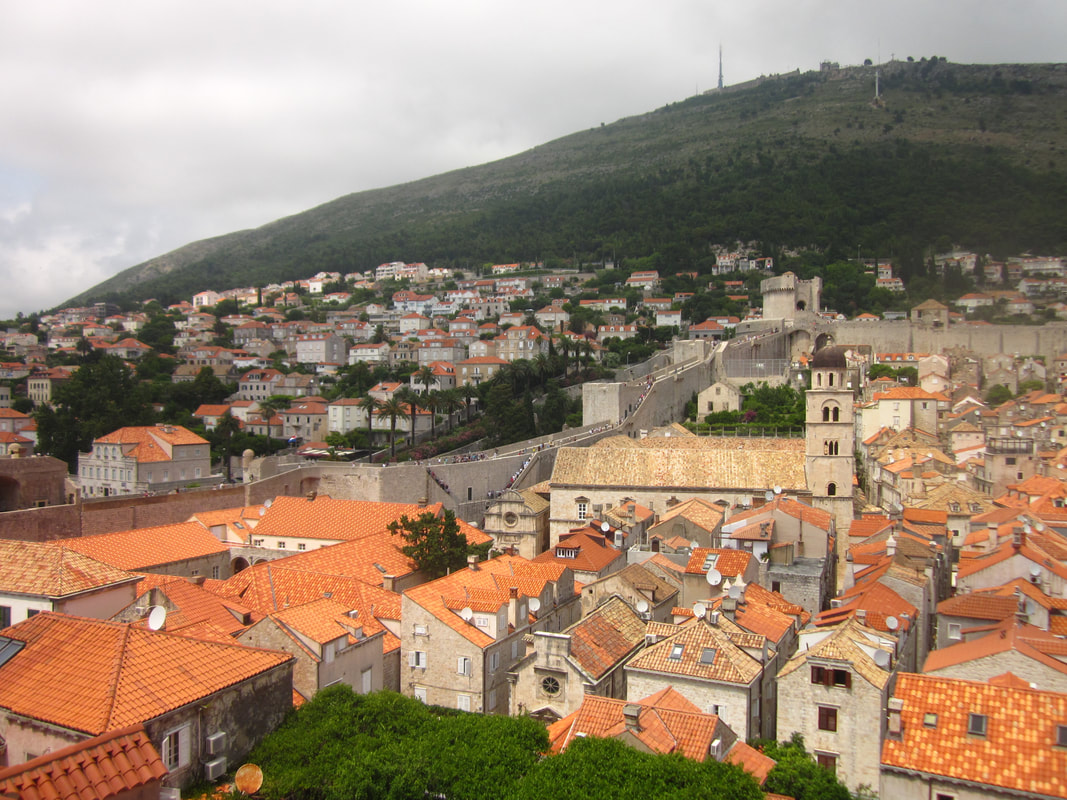 Looking over Dubrovnik from the Ethnographic Museum, Dubrovnik, Croatia  Old Town Staircases, Dubrovnik, Croatia But, when we arrived in Dubrovnik...I felt disappointed. The streets were packed with hordes of tourists who had docked for the day on cruise ships. I mean, packed. It was hard to take a picture of the beautiful medieval walls without a crowd in front. A steady stream of tourists were on the city walls, walking the perimeter like a line of ants, one right after the other. A late-2000s guidebook that my friend had given me listed admission to the city walls as 50 HRK (almost $8) per person. My husband and I felt that we could pay that for what we heard was a "must-do" attraction. And, it's not every day that you get to walk on medieval walls. We were shocked to learn that, in 2016, admission to the city walls had tripled to 150 HRK, which, at today's exchange rate is over $23 per person! On a backpacker's budget, we couldn't afford nearly $50 for one attraction. Nearly every restaurant inside the walled city of Dubrovnik had the same menu at higher prices than we had seen anywhere else in the Balkans, giving us very little choice in food or price point. Game of Thrones t-shirts waved from shops. I felt like we had arrived in a medieval theme park that had been set up for cruise ship visitors that docked during the day.
But, simultaneously, the fact that Dubrovnik exists is SO COOL. The Old Town is a UNESCO World Heritage Site and one of the best-preserved medieval walled cities in the world, despite being under siege during the Yugoslav Wars. Tiny pathways wind between stone buildings, and, once the masses of people re-board their cruise ships, you get this incredible feeling of being transported back in time. The architecture is stunning. The coastline is stunning. So, I can't really blame everyone for wanting to come here, dock here, and flood the city with tourists. What I learned from two days in Dubrovnik was that I had planned this part of the trip all wrong. And, I would like a do-over with Dubrovnik. I would do basically everything differently in order to better enjoy this lovely area. 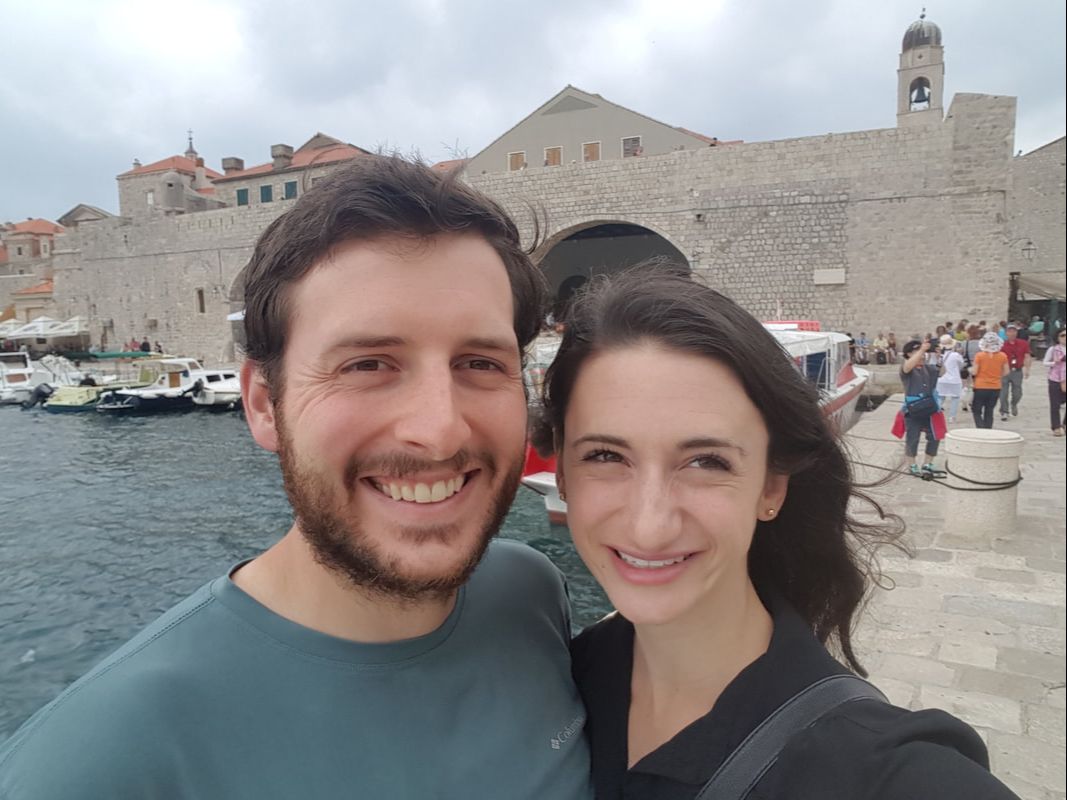 Brett and I outside Old Town, Dubrovnik, Croatia 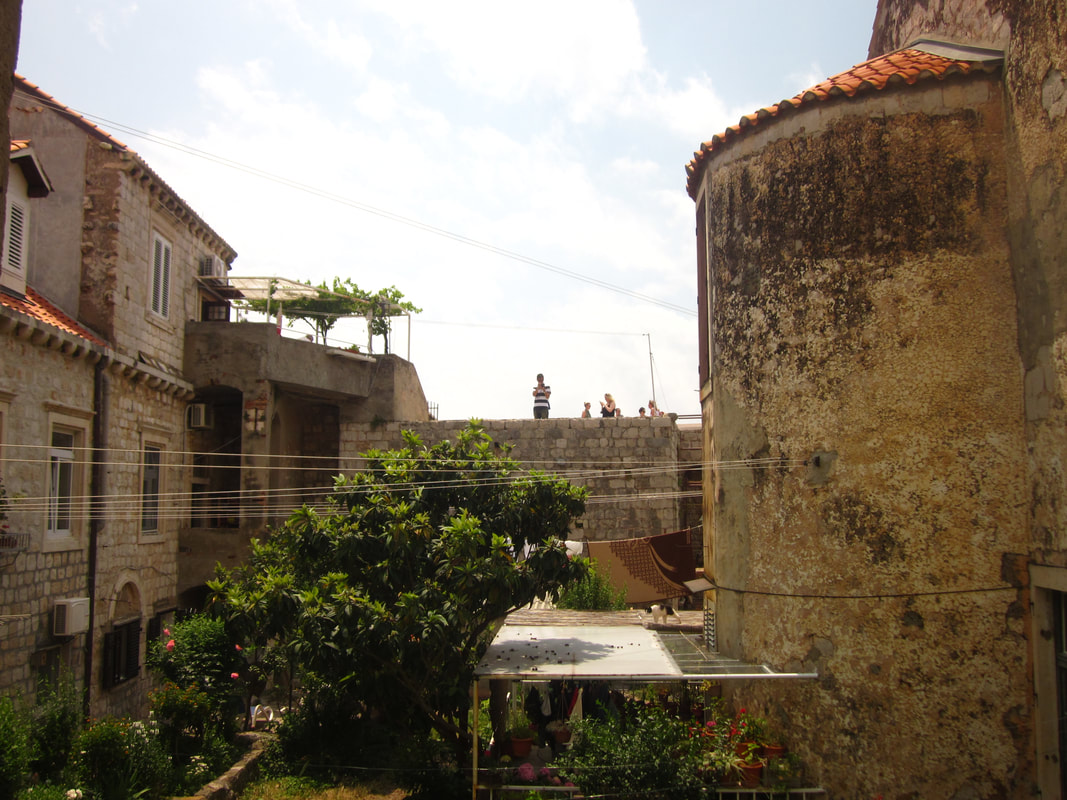 View from our window, Dubrovnik, Croatia 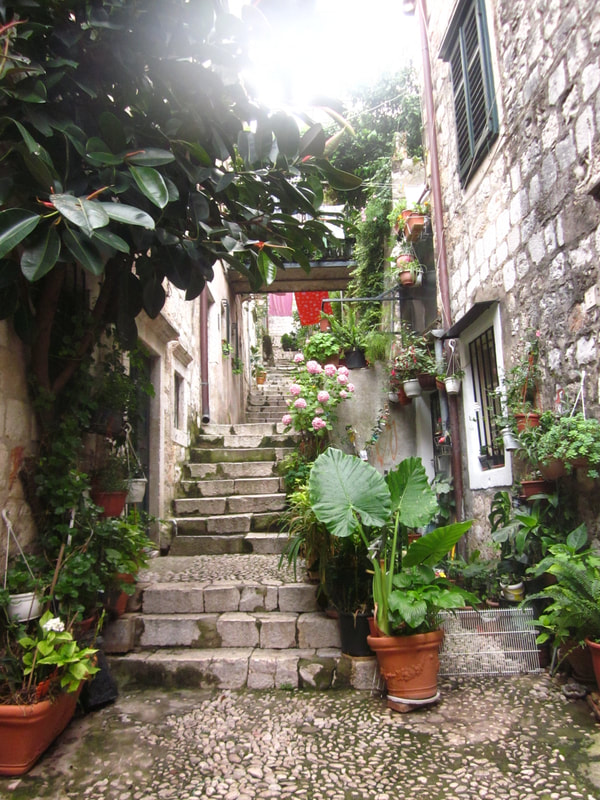 Lovely medieval streets in Old Town, Dubrovnik, Croatia What we did in dubrovnikCroatia was the last stop on our European adventure, and our wallets were feeling thin. We tried to be as cheap as possible and do free or cheap activities. Also, the weather was rainy during our time in Dubrovnik, so a few of our planned activities, like going to the beach or hiking up the mountain weren't possible. Walking the city streets - Always free. The tiny labyrinth of alleyways was fun to explore, and we came across charming houses with flowers spilling out of the windows and worn stone staircases. On the side streets, the crowds thinned out slightly, compared with the packed Stradun, the main path through Old Town. Cafe Buza - I expected this cliffside bar to be more crowded than it was, even though we stopped by mid-afternoon. This bar is situated on the other side of the medieval walls, on the edge of the cliff overlooking the ocean. When I stepped through the hole in the wall to enter Cafe Buza, I was rewarded with views of the ocean, the rocky coastline, the small island of Lokrum, and the outside of the walls. Various staircases lead down to additional seating areas. It was windy but a lovely spot to sit, and it only cost the price of a drink! 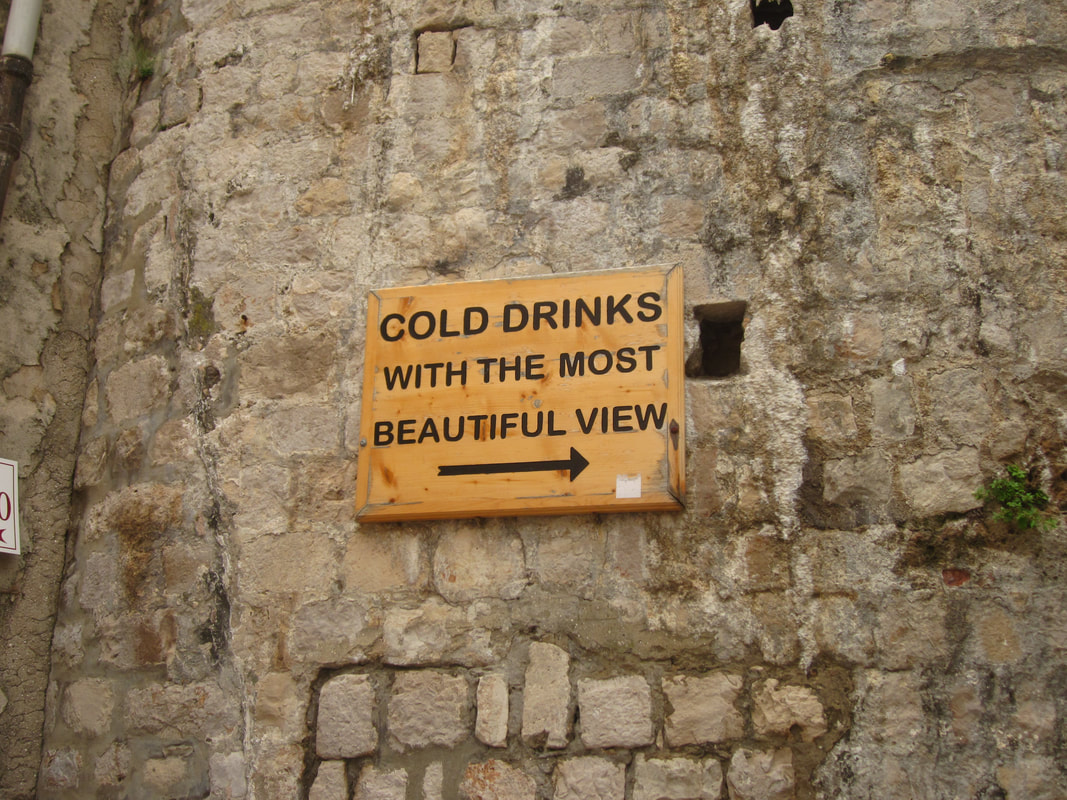 Sign to Cafe Buza, Dubrovnik, Croatia
Dubrovnik Museum Pass - We discovered that Dubrovnik offers a museum pass with admission to a variety of museums and historical houses. Brett and I aren't big on spending a lot of time in museums when we travel. However, I ended up being glad that we got this pass for a few reasons. First, it was rainy during our time in Dubrovnik, so outdoor activities were limited. Second, we were able to buy student tickets for 25 HRK (less than $4). Regular adult museum passes are 100 HRK (around $15). Third, it allowed us to explore some of the beautiful architecture of the Rector's Palace, and we unexpectedly got a view over the city at the Ethnographic Museum.
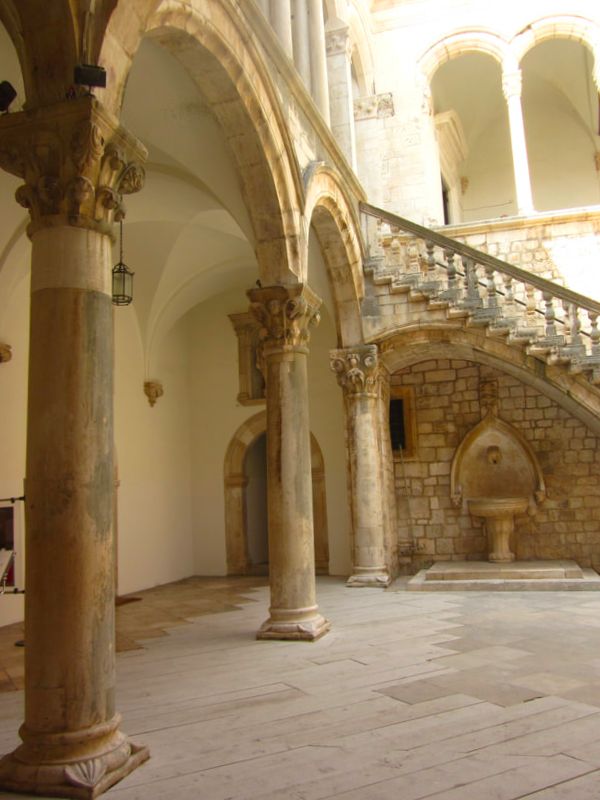 Rector's Palace, Dubrovnik, Croatia  Rector's Palace, Dubrovnik, Croatia  Stunning architecture, Dubrovnik, Croatia War Photo Limited - A photojournalism museum with a permanent exhibit called "The End of Yugoslavia", with images from the break-up of Yugoslavia and the wars in Croatia, Bosnia and Herzegovina, and Kosovo. It also contains rotating photojournalist exhibits. When we visited, there were two rotating exhibits: Under Siege: Dubrovnik, 1991 with images from the bombing of Dubrovnik during the Yugoslav Wars, and The Balkan Route, with images from refugees traveling across Eastern Europe. The admission price is 50 HRK ($7.73) for adults, and I highly recommend this museum for more insight into the recent history of the region. Watching Croatia in Euro Cup - Lucky for us, Croatia's soccer team was playing in the European Cup 2016 while we were there, which gave us an opportunity to sit at a cafe with a bunch of jersey-clad supporters to watch the match. This was exciting because a lot of the cafes with outdoor seating had large screens set up and large groups of people gathered to watch. We were able to take part in the excitement surrounding a big soccer game. Malvasija Wine Bar - Croatia has amazing wine. The country is filled with vineyards to visit and bottles of wine to sample. Without time to spend exploring Croatia's wine country, we found Malvasija Wine Bar in Dubrovnik, a little family-run gem tucked into a side street in Old Town. We spent our last night in Dubrovnik sipping wine and chatting with the friendly family who runs the shop. We let them pick the wines that we tried, since they knew the best varieties. It was a lovely evening and a highlight of our time in Dubrovnik. 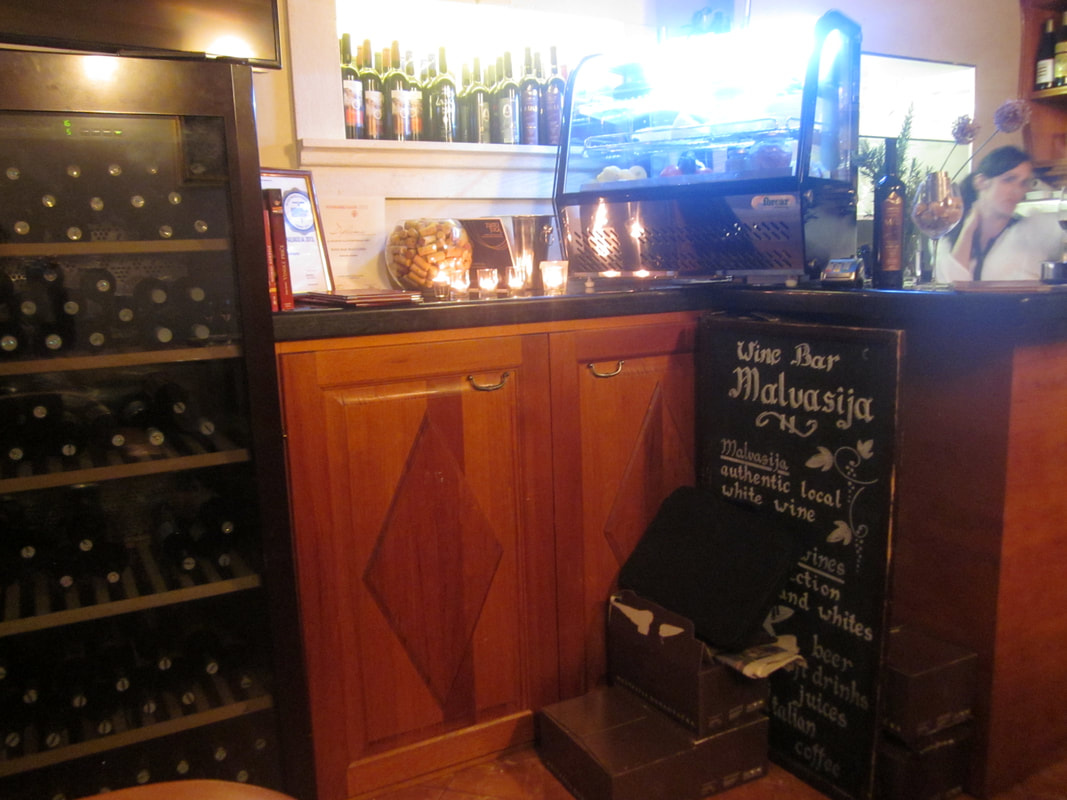 Malvasija Wine Bar, Dubrovnik, Croatia 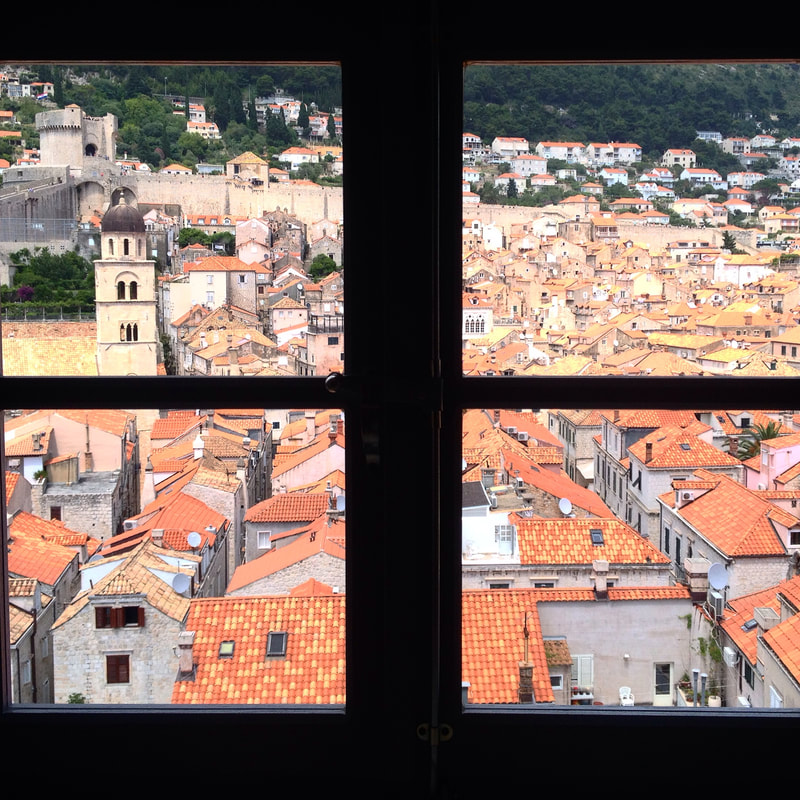 Picture Perfect Views, Dubrovnik, Croatia WHAT I WOULD DO DIFFERENTLYIf I were to return to Croatia tomorrow, I would change a lot of things about my time in Dubrovnik. First, I would not book accommodation in Old Town Dubrovnik. Prior to visiting, I felt like I had to stay in Old Town, in order to be close to the "cool" things. This backfired when we were stuck with overpriced, touristy restaurant options for every meal and had tourists looking into our window from the medieval city walls. The Airbnb was very nice and clean, but I would prefer to book accommodation outside the city walls or even in a nearby, smaller town. This would allow us to take advantage of cheaper lodging prices, relax and enjoy the beautiful seaside location away from crowds, spend less money on subpar food, and still head into Dubrovnik if we wanted to. Second, I would try to limit my time within the Old Town walls to early morning or the evening, when the cruise ships have not yet arrived or have already departed. By doing this, I would minimize my time spent fighting crowds and explore at a more leisurely pace, as well as take pictures without a hundred people in them. Third, I would perhaps spend half a day in the Old Town, but I would want to explore more of the region on a return trip. There is SO much more to do in this region than Dubrovnik's Old Town. We narrowly focused our sights on things inside the city walls, but felt like we had seen a lot of it within a single day. For example, Cavtat, a small, less touristy town only 30 minutes from Dubrovnik, with its own Rector's Palace, beautiful architecture, and beaches. Plus, it's connected to Dubrovnik by public bus. Or what about Montenegro, less than 2 hours from Dubrovnik? It has rugged mountains, sandy beaches, red roofed towns, and its own UNESCO World Heritage Site - the walled city of Kotor. Mostar in Bosnia and Herzegovina is also a daytrip from Dubrovnik. It's a charming little town, with scars from the Yugoslav wars still visible, a well-photographed bridge, and an old bazaar for shopping. I could spend a day exploring vineyards of the region, either independently or with an organized wine tour. The options seem endless, varied, and exciting. 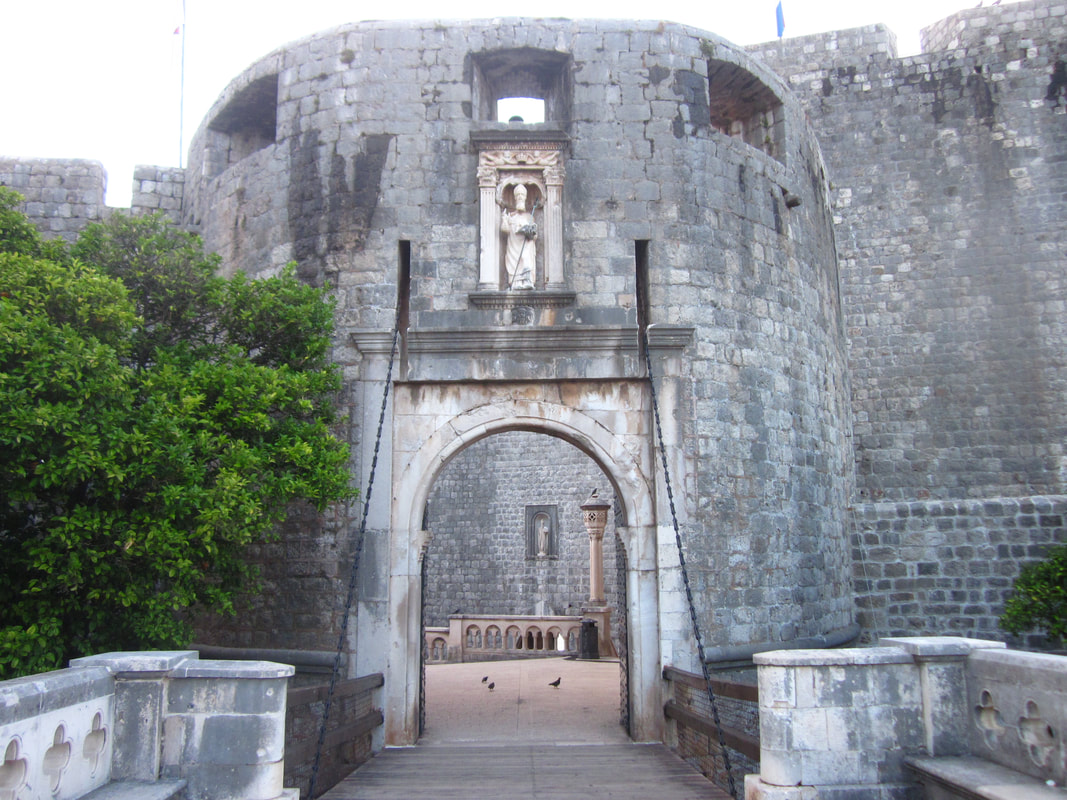 Entrance to Old Town, Dubrovnik, Croatia I expected to fall in love with Dubrovnik. There's a lot to love, but its growing popularity as a tourist destination rubbed me the wrong way. It's a shame that we ended up eager to leave Dubrovnik pretty quickly. We were not prepared for how expensive it would be or how crowded. But, it was also such a lovely piece of the past, with the medieval passageways and stone buildings. In hindsight, I realized that I didn't dislike Dubrovnik. I just didn't do Dubrovnik correctly. I hope that I get the opportunity to give it, and the surrounding area, another chance.
This is a continuation of my series on the Annapurna Circuit Trek, which we trekked in late November. Check out our itinerary here. 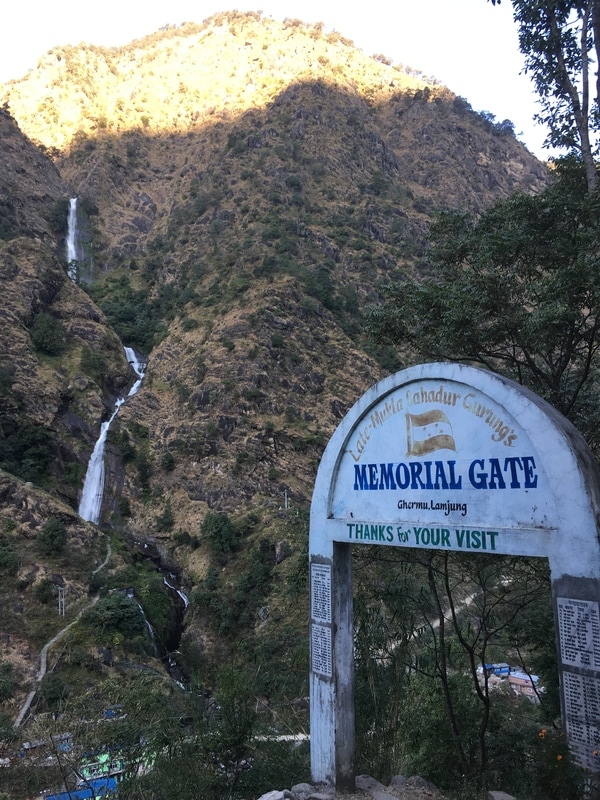 Leaving Ghermu with a waterfall cascading in the background, Annapurna Circuit, Nepal Our second day on the Annapurna Circuit began with breakfast on the porch in Ghermu. My breakfast was oatmeal and black tea. Unfortunately for me, I really dislike oatmeal, the world's easiest breakfast when trekking. However, I knew I would need energy for a full day of trekking, so I ate the oatmeal. We lingered a bit over breakfast, since the morning view from the porch over the fields and mountains was so lovely. Our new British and Belgian friends had long since left. Panicked about the idea of trekking during the hottest part of the day, they had set off as early as possible. After a leisurely breakfast, we wrestled our belongings back into our packs, paid the teahouse owners, and headed out on the trail. 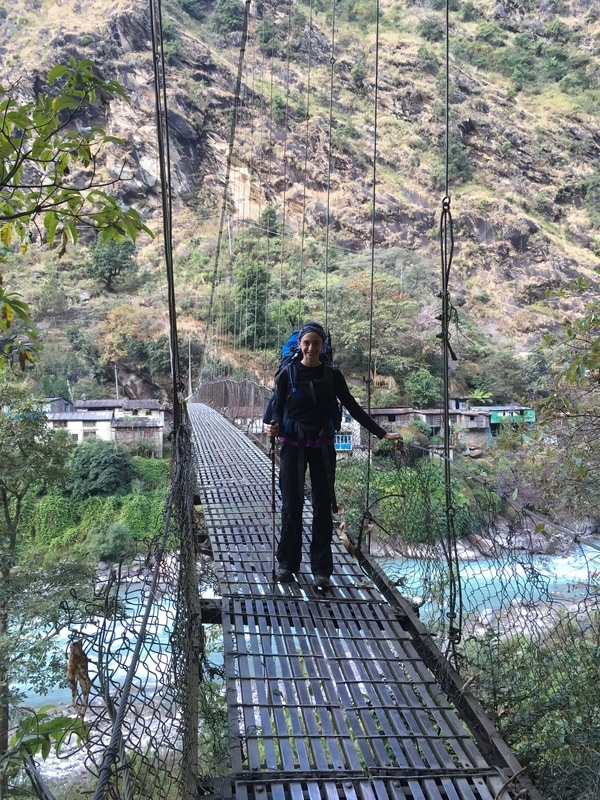 One of many suspension bridges, Annapurna Circuit, Nepal We immediately crossed a suspension bridge and immediately realized that there were a lot more buildings and teahouses in Ghermu. This was the point when we realized that we should walk further into each town before selecting a teahouse. All along the trail we saw signs pointing toward Manang, as shown in the photo below. Parts of the trail were also marked by red and white blazes, though this was inconsistent in some areas. If we were unsure about which way to go, we asked the locals by pointing and saying the name of the next town ("Chame?"). Everyone we met along the Circuit was super helpful and friendly, and, even if they didn't speak much English, they pointed us in the right direction using gestures. 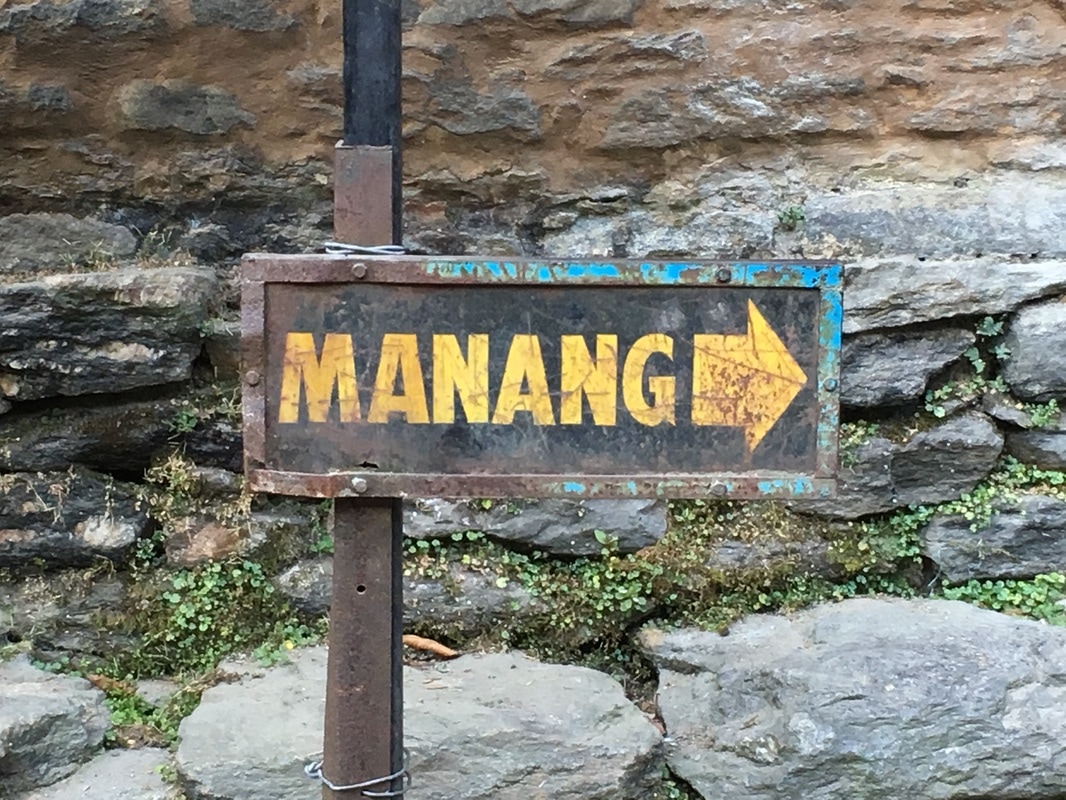 This way to Manang, Annapurna Circuit, Nepal 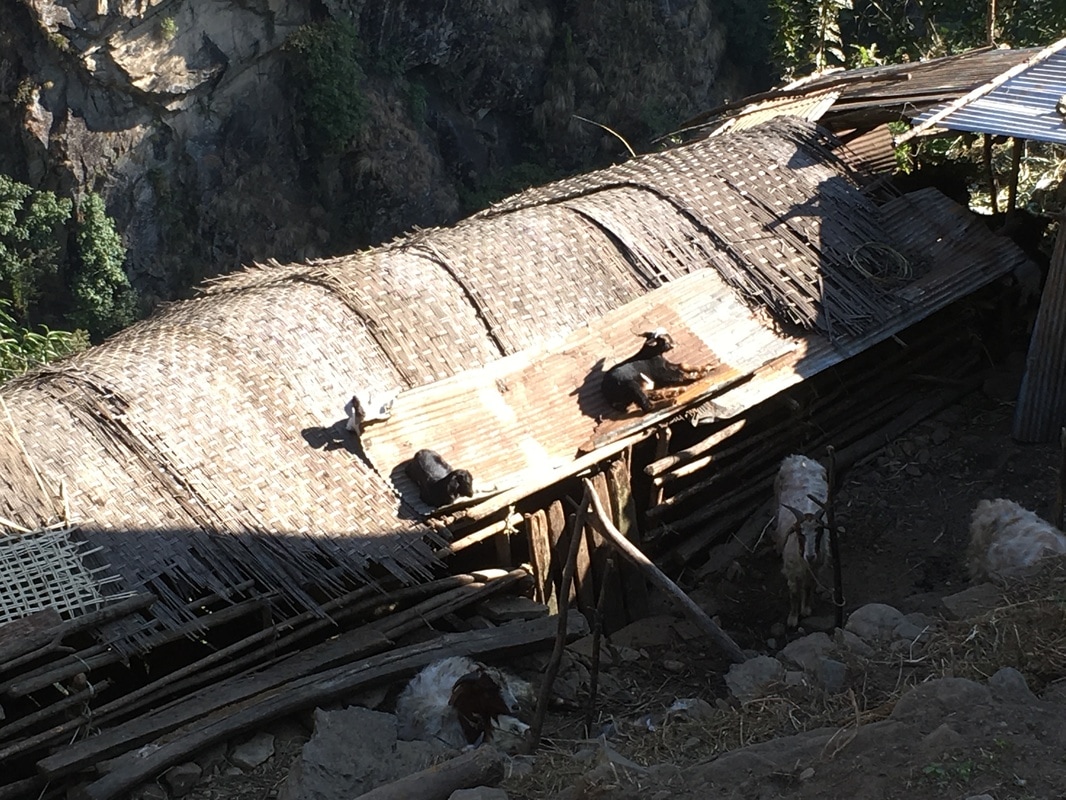 I call this one "Goats on Roof", Annapurna Circuit, Nepal Most of our morning was spent trekking on the newly "constructed" road. I say "constructed" because the dirt road was extremely bumpy, filled with uneven rocks and potholes. We had to stop frequently to let jeeps and motorbikes pass. Though the road is technically two-way, there is really only space for one vehicle at a time. Each time a vehicle passed, dust and exhaust was kicked up. Eventually, we learned to look away and cover our faces with a shirt or a scarf. The road extends all the way to Manang, previously reachable solely by foot or animal. Before coming to Nepal, I had read numerous blogs or articles complaining about the road and how it is ruining the Annapurna trekking area. I get it. I get how trekkers dislike having dust kicked up in their faces and hearing the roar of motorbikes rushing past. But I can't complain too much. Imagine living in a place where the only way to get help, supplies, everything is walking for days at a time. We choose to trek for a short period of time, but this is daily life for so many people and the road will only make their lives easier. I can't expect them to reject progress so that I can spend two weeks away from cars. As the NATT Guide says, "In fact a road means a better possibility to sell theirs own farm products like apples, thus earning more, and in the same time other goods brought by the road are much cheaper than carried by mule or porter. This results in a higher life standard." The Annapurna Circuit is not a "get away from people and lose yourself in the wilderness" kind of trek. You are passing through towns, sleeping in teahouses, having someone cook for you, and interacting with locals. I had never been on a backpacking trip like the Annapurna Circuit, and I loved how it combined STUNNING scenery with local villages. All you can do is enjoy the trek for what it has to offer, bring a scarf/buff/bandana to cover your nose and mouth, and take the NATT scenic trails as much as possible to avoid the road. NATT stands for New Annapurna Trekking Trails. In 2006, the Annapurna Conservation Area Project began planning alternative trails so that trekkers could enjoy the area while avoiding the new road. We downloaded this version of the NATT Guide for free, printed it out, and used it along the trek. This version was published in 2011, but, while it is already 5 years old, it is SO HELPFUL. The NATT Guide is packed with great information, indicating when there is an alternative trail option, providing information about trekking times, and giving tips for safety.  Church in Jagat, Annapurna Circuit, Nepal We passed through the village of Jagat, with its brightly painted buildings. Just past Jagat, there were hot springs, a 10 minute climb down from the road to the river. We did not choose to go down to the hot springs, since it was still early in the day, we had a lot of trekking left to do, and we did not want to be wet for the rest of the day. We continued through the small village of Chamje, where we diverged from the road onto one of the NATT trails. This trail was a beautiful, shaded path through lush, green forest and past a cascading waterfall. 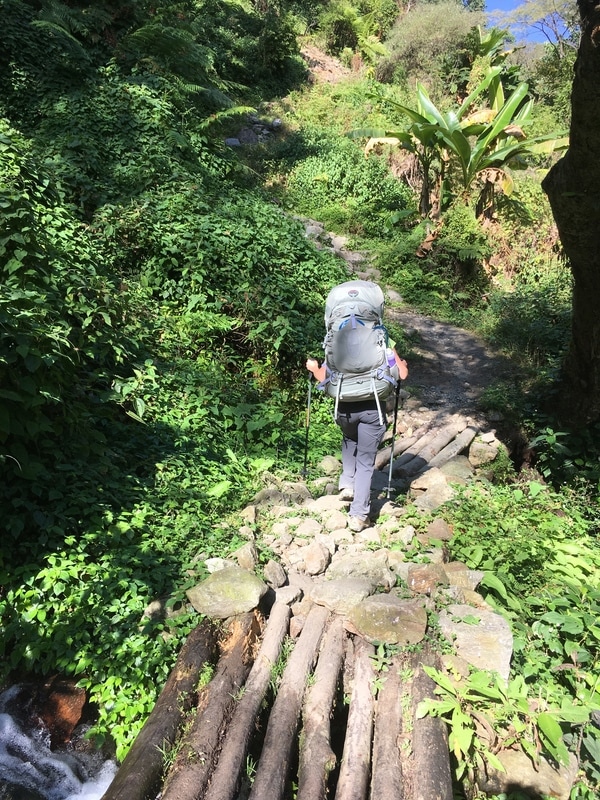 NATT Trail near Chamje, Annapurna Circuit, Nepal 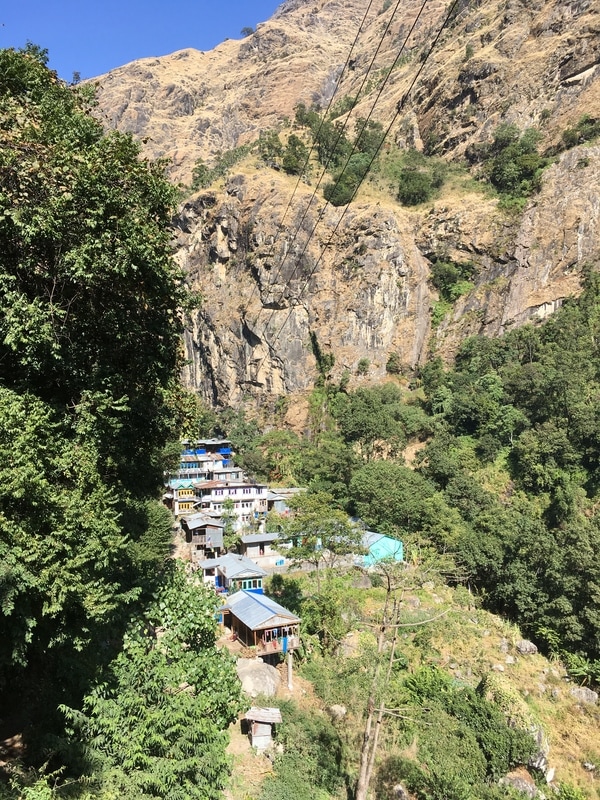 Hillside village, Annapurna Circuit, Nepal 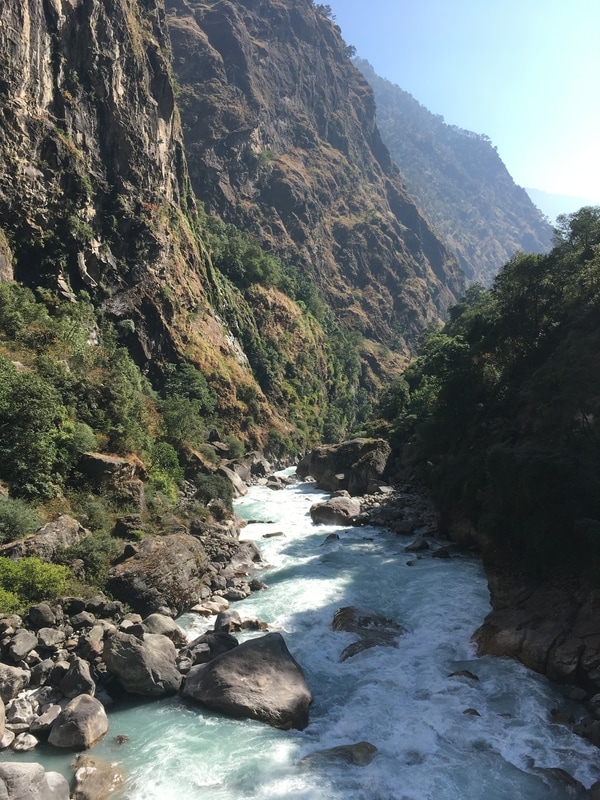 Marsyangdi River, Annapurna Circuit, Nepal 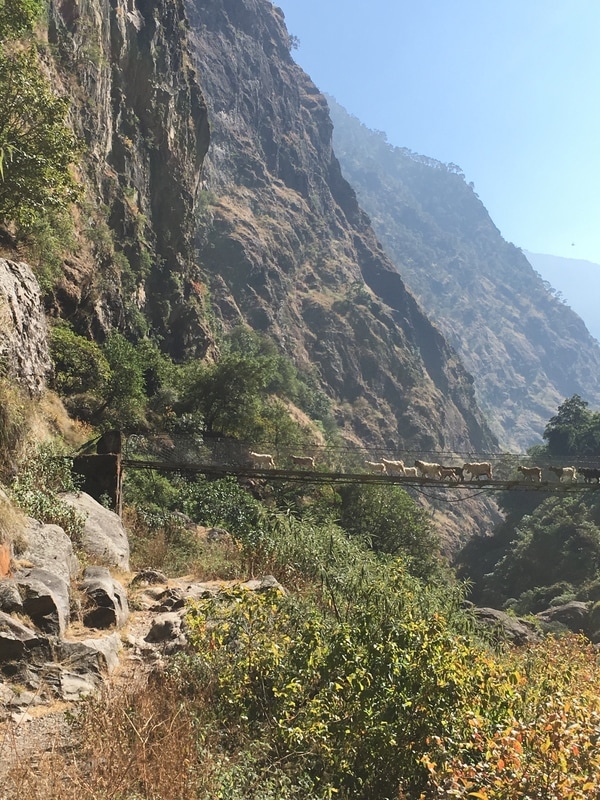 Goats on bridge, Annapurna Circuit, Nepal After exiting the forest, we joined a herd of goats in crossing the Marsyangdi River and began the very steep climb to Tal. Luckily for us, the road stayed on the opposite side of the river. At this point, I was really feeling the trek in my legs, particularly with the steep climb before Tal and all the stone steps that we ascended throughout the day. I took my time with the ascent and reminded myself that lunch awaited me in Tal. At the top of the hill, we found the sign pictured below, with altitude trekking times. I took a picture of it, and we constantly referred to the photo throughout the trek. Every day, multiple times per day, because it was so accurate. We might think that we were hiking faster than normal or taking an extra long break, but somehow the time between villages was always right on target!  The most helpful sign, Annapurna Circuit, Nepal 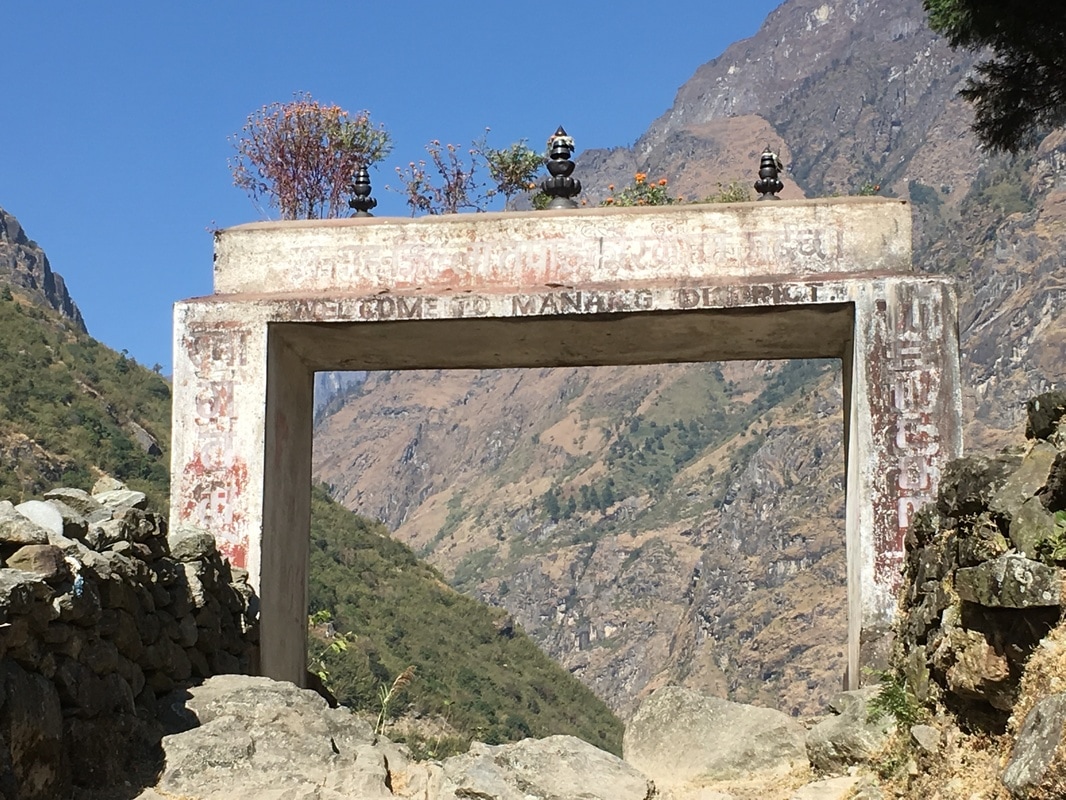 Gate entering Manang District, Annapurna Circuit, Nepal Lunch in Tal was glorious. Tal sits right on the river and is filled with charming teahouses. We found this adorable pink and green teahouse with a lovely, well-kept garden where we sat at an outdoor table, took our packs off, and enjoyed the afternoon sun. The sweet lady who ran the teahouse made truly excellent dal bhat and momos. It was the best food we ate on the trek. Also, she had a big container of boiled water where we could fill up our water bottles before continuing on our hike, and the bathroom situation was better than most. Overall, a truly lovely lunch stop. 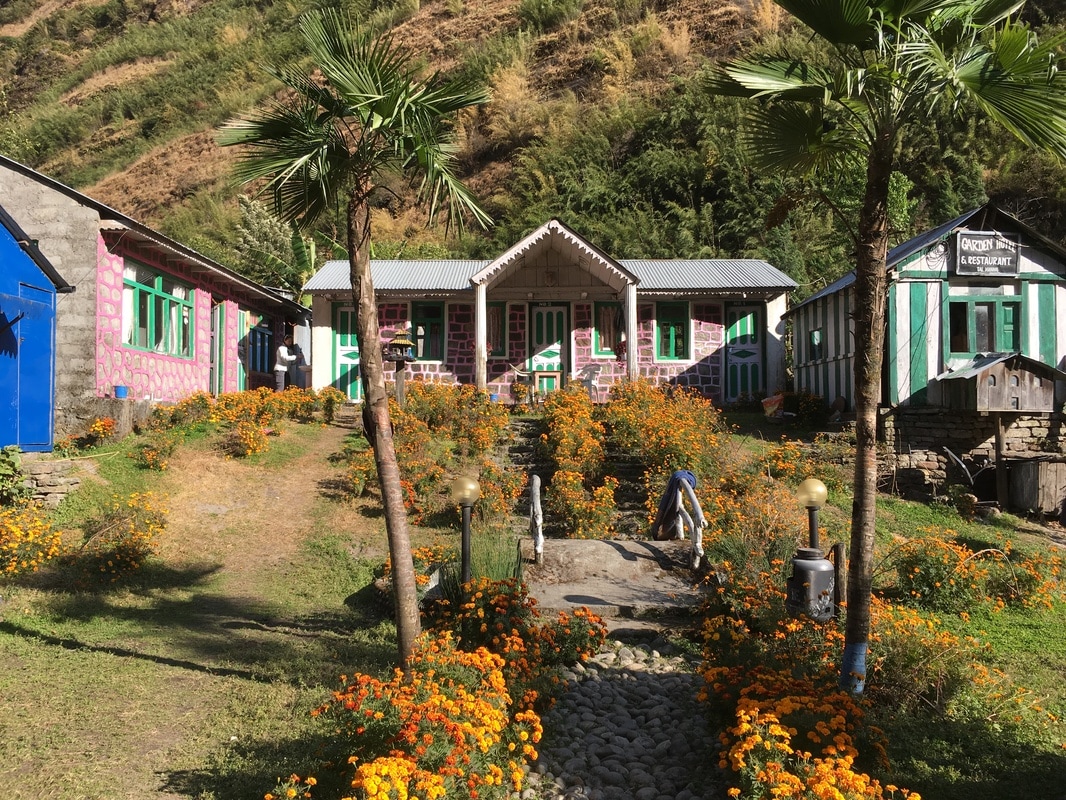 Our lunch stop in Tal, Annapurna Circuit, Nepal From Tal, we had about 2 hours left to trek until we stopped for the night in Dharapani. I can't lie, motivation was difficult after our relaxing lunch. But, the trekking wasn't too challenging. When we got to Dharapani, we reminded ourselves to keep walking further into the village before selecting a teahouse. Unfortunately, this led to some indecision and resulted in us walking through the village 4 times before selecting a teahouse. Dharapani is quite spread out, so it was hard to tell whether there were more options down the trail. We did find a nicer teahouse further into the village and settled into our triple room that had a clothesline to hang our sweaty clothes. The teahouse had a gas-powered shower for 100 rupees, which seemed like a good idea at the time. I opted to take a shower because I had been sweating the past two days and I didn't know when my next opportunity to shower would be. Unfortunately, with the gas shower, the window in the shower room had to remain open. As the sun had gone behind the mountains, the temperature had dropped drastically and cold air poured into the room, negating any warmth from the hot water. I was already wet, so I shivered through shampooing my hair and washing my body, telling myself, "Almost done." Easily the coldest shower of my life. After drying off and bundling up, I headed down to the dining room. Tonight, Rachel was exhausted and climbed into bed early, as I had the previous night. Ciara joined me in the dining room after her shower, and we met a female trekker from Colorado who was doing the circuit by herself. Spending time with fellow trekkers in the teahouses at night was one of my favorite parts of the Annapurna Circuit. I felt like I got to meet so many people from around the world. I was still fairly full from our late lunch in Tal, so I opted for hot tea and sharing a dessert with Ciara. As we waited for our food, we realized that a yak was being chopped up in the kitchen. I was exhausted from the day, so I enjoyed my tea, chatted for awhile, and then headed to bed. 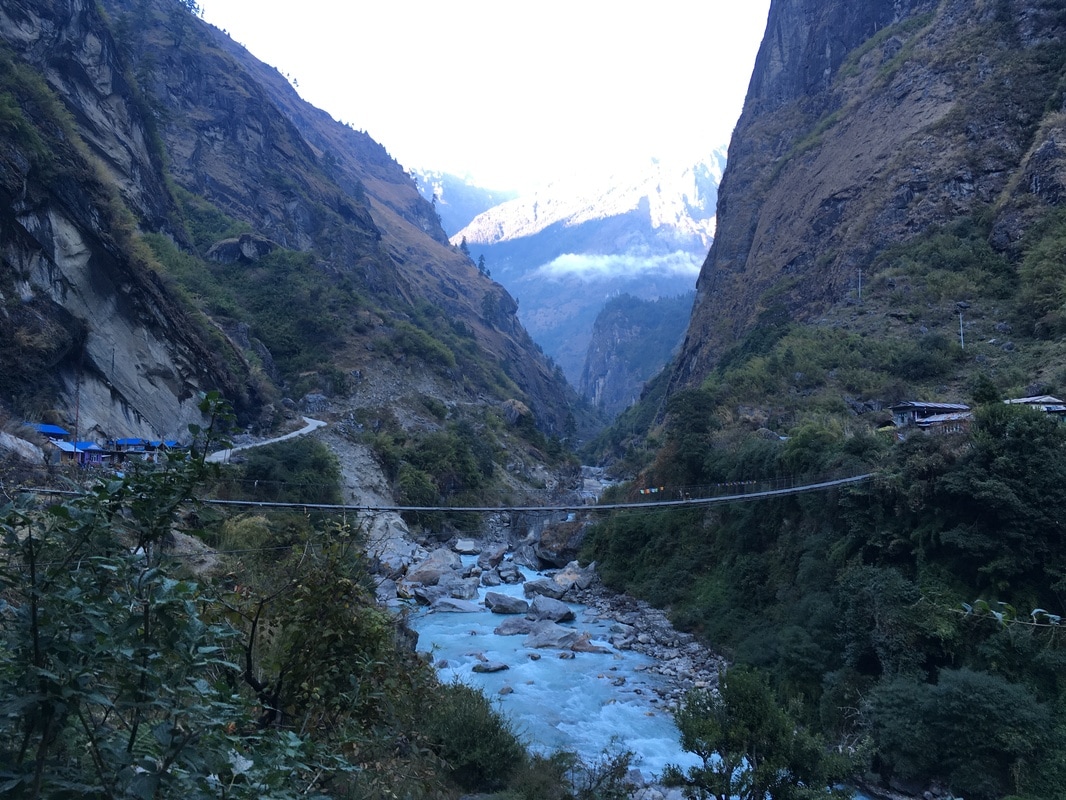 Looking down the valley from Dharapani, Annapurna Circuit, Nepal Daily trekking distance: 18 km
Total trekking distance: 31 km Starting elevation (Ghermu): 1130m/3707 ft Ending elevation (Dharapani): 1900m/6234 ft Costs Lunch Tal: 383 NPR ($3.52) Dinner + Shower + Room + Breakfast Dharapani: 800 NPR ($7.35) This is part of my series on the Annapurna Circuit Trek, which we trekked in late November. Check out our itinerary here. 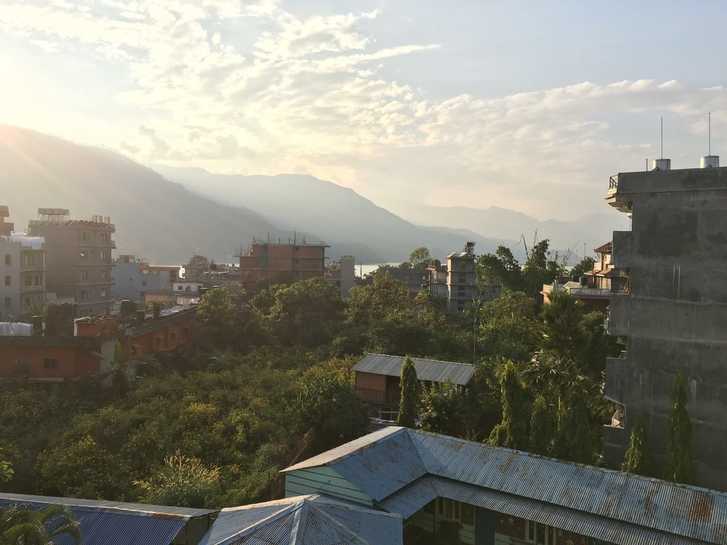 View of Pokhara from The North Face Inn Our first day on the Annapurna Circuit began in Pokhara, the city that serves as the departure point for treks in the Annapurna region. We departed The North Face Inn early for the tourist bus station. The North Face Inn was an amazing place to stay, right in the lakeside area of Pokhara and run by the nicest family. They helped us arrange bus tickets, made a phone call to our hostel in Kathmandu, gave us advice about the circuit, and had a safe drinking water station where we could fill our water bottles. We saw them constantly cleaning the place, which was particularly great after the trek - to return to a clean place to stay. We were able to store some of the things that we wouldn't need on the Annapurna Circuit at The North Face Inn and come back for them after the trek. We packed up everything we needed and took a taxi around 5:30am to the tourist bus station, where we would catch the 6:30am tourist bus to Besishahar. Thanks to the helpful owners of the North Face Inn, we already had our tickets in hand for the 6:30am bus, which cost 500 rupees per person (~$4.59). We were told that there was also a local bus station with public buses to Besishahar, but, given our less-than-stellar experience later on a public bus, I am so glad we opted for the tourist bus in this instance. The tourist bus station ended up being no more than a fenced in lot with buses parked around the edge. There was no building or waiting room. We worried that we wouldn't be able to eat breakfast before boarding the bus, but I felt confident that some enterprising Nepalese people would be selling food at the bus station. Sure enough, there was a little stand with some tables where we each had a hot drink (tea for me, coffee for everyone else) and a pastry. The other tables were occupied by a variety of people and their backpacks, indicating that they too were headed for a trek. As we enjoyed our breakfast, the sun began to rise, revealing a clear, cloudless sky and majestic snow covered mountains in the distance. Mt. Machhapuchhre, also known as Fishtail, stood out clearly with its unusual shape. Seeing the pink morning light on the Himalayan mountains only increased my excitement for trekking. Before we boarded the bus, I ran to the restroom at the bus station, a small building behind some of the buses. Sitting outside the restroom on a bucket was a woman with cleaning supplies, and there was a sign requesting donations in exchange for keeping the restroom clean. I had left my pack with the others at the food stand, so I ran back to grab a small bill. This was a reminder that things that I take for granted in America, like people who are employed by bus stations to keep restrooms clean, are not necessarily a given in Nepal. 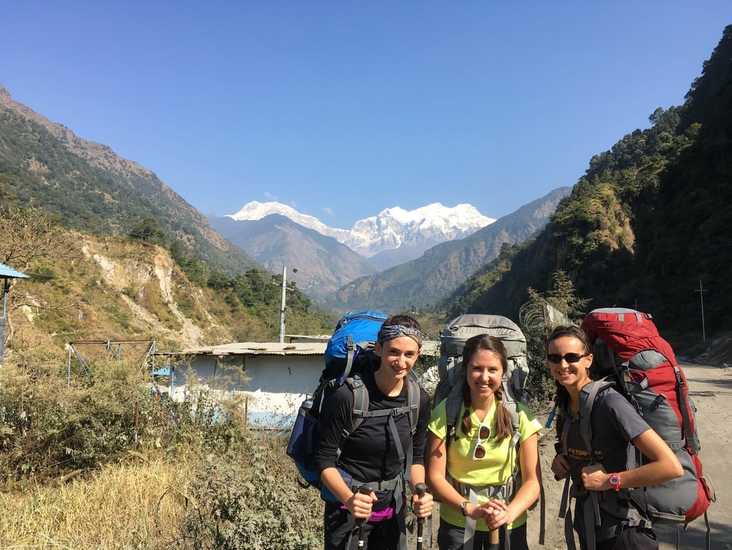 Beginning our trek in Bhulbhule When we boarded the bus, we passed our backpacks up to a man standing on top of the bus. He grabbed them one by one, along with everyone else's luggage, and placed them on top of the bus, within a little rectangle of railings. Then, our luggage was covered with a tarp and tied down with ropes. Initially, I was unsure how well this system would hold, but we went through some bumpy and winding mountain roads during our time in Nepal and nothing was ever lost. Our bus ride to Besishahar, the beginning point for the Annapurna Circuit Trek, lasted approximately 4 hours. At the beginning of our bus ride, the majority of passengers were trekkers. As we made our way through the city of Pokhara, some Nepalese people got on as well, until the bus was full and passengers began standing in the center aisle. The roads outside of Pokhara were so bumpy that my head hit the ceiling on more than one occasion. We stopped once for a restroom break, and, about halfway through the bus ride, the driver turned on some Asian music videos accompanied by loud pop music. I cannot say whether the videos were Nepalese or from another country, but they got progressively stranger and more suggestive throughout the bus ride. Finally, we arrived in Besishahar and all filed off the bus. Luggage collection involved standing next to the bus and trying to catch your pack as the man on top of the bus handed it down. Our plan was to cut out some walking by taking a jeep from Besishahar to Bhulbhule, since we had a limited amount of time for the trek. As we caught our backpacks from the bus, we met three other trekkers who were willing to split the cost of a jeep with us. The total amount of 2000 rupees would be divided six ways, 333 rupees per person (~$3). One of our fellow trekkers tried to negotiate a lower price, but the jeep drivers knew that they had the upper hand and refused to lower their price. I was fine with that because I had already planned for the cost of a bus plus jeep. 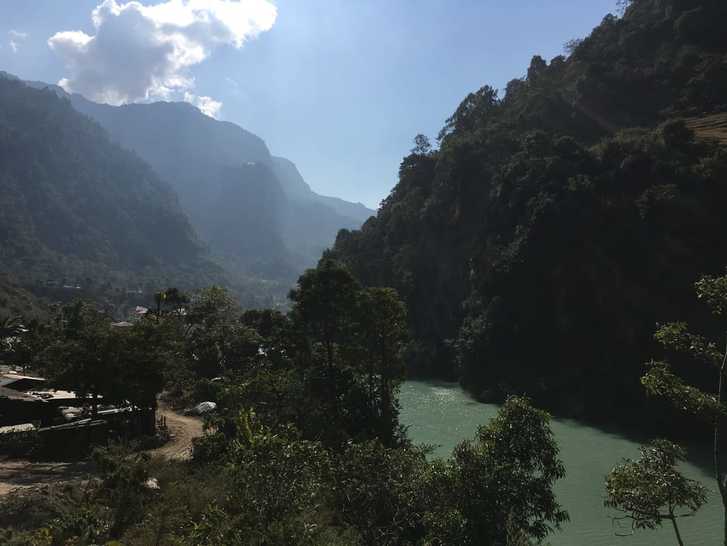 Marshyangdi River on Day 1 of the Annapurna Circuit From Bhulbhule, we began walking along the road. Our plan was to reach Ghermu, 13 km away, by the end of the day. When researching the trip, I focused a lot on the temperature at the top of Thorong-La Pass and the gear I would need to stay warm....but I hadn't realized how warm I would be at the beginning of the trek. Bhulbhule is only at 2756 feet, and we climbed to 3707 feet at Ghermu. The sun was beating down on us, we had heavy packs on our backs, and we spent a lot of the afternoon ascending. I was definitely sweaty. We spent the afternoon walking along the Marsyangdi River, which we would follow all the way to Manang. We trekked through the small villages of Ngadi and Bahundanda, up and over hills with terraced rice fields and haystacks. We passed small farms and quite a bit of livestock - goats and chickens and even two puppies. Everyone we walked by greeted us with "namaste" - the Nepalese word for "hi" and "bye" - and some people asked, "Where going?" We also walked along the road for awhile with a man who was carrying a plastic grocery bag filled with bloody meat, which he told us was buffalo before inviting us to eat at his restaurant. We unanimously decided to be vegetarians for the rest of the trek. In the late afternoon/early evening, we suddenly found ourselves trekking past neatly uniformed children on their way home from school, herds of goats, stray dogs, and farmers carrying huge loads of branches and straw - or, as I liked to call it, "rush hour on the Annapurna Circuit". 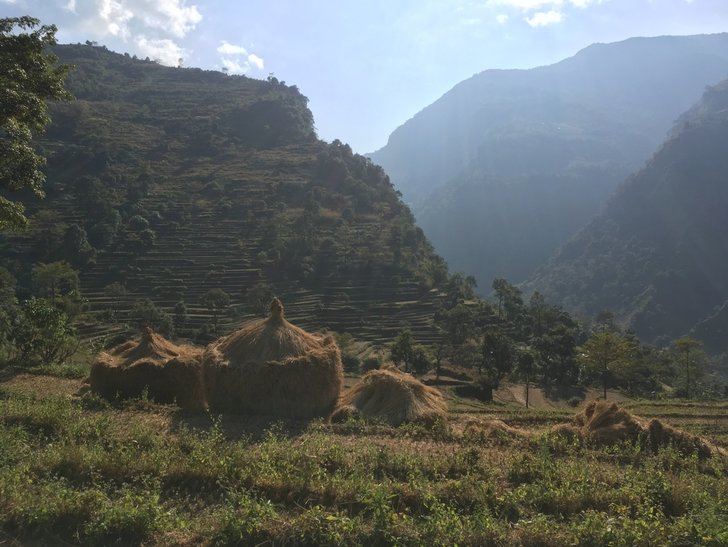 Terraced rice fields and haystacks, Day 1 on the Annapurna Circuit For the first part of the afternoon, we walked with the three trekkers who had shared the jeep with us, but they stopped for the night in Bahundanda while we continued on to Ghermu. On the trial, we came across a trio of guys from England and Belgium, who also stopped for the night in Ghermu. None of the guys had known each other prior to the trek - they had met in the airport and decided to make a trekking group. When we came to Ghermu, we stopped at the same teahouse as them, in order to hang out with our new trail friends at dinner. Unfortunately, we hadn't yet heard the advice for choosing a teahouse - don't stop at the very first one you see in a village. Often, the main village is a little further along, containing more options with better amenities. Our teahouse for the first night was fine though very basic, even for the Annapurna Circuit. It had 2 beds per room (and one MASSIVE spider) and a porch on the upper level, where we ate dinner. Looking back, it was nice to have one night where it was warm enough to eat outside with just a fleece on. I was so tired that the teahouse quality barely mattered to me. While Ciara, Rachel, and our new trekking friends chatted before dinner, I actually fell asleep on the table. I would have just gone to bed, but we hadn't had lunch and only snacked on trail snacks, so I needed some dinner. In each town, the teahouse menus have to be approved by the tourist board and they are pretty standard throughout the Circuit, except for the prices, which increase as you go higher in altitude. The menus offer the Nepalese staple of Dal Bhat (rice, lentils, and curry), curries, fried rice, noodles, potato dishes, soups, oatmeal, muesli, chapati (flat bread), tea, coffee, and some desserts. Dinner for me was potato curry - cheap and filling. We also shared an "apple pie" for dessert. Cutting into it, we knew that the filling was not apples, though it tasted somewhat similar. Shortly after eating the "apple pie", the lack of apples was confirmed when we ordered oatmeal with apples for breakfast and were told that they had "no apples". To this day, I have no idea what was in our "apple pie". 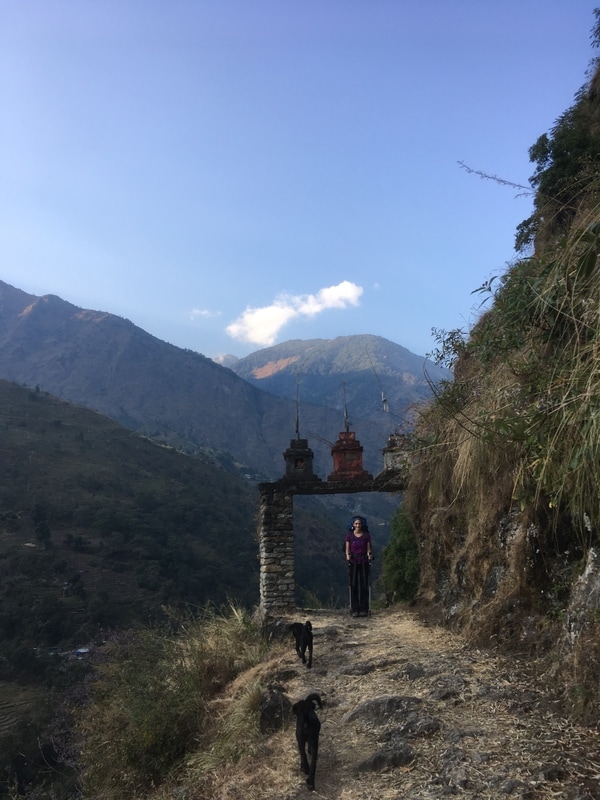 Daily trekking distance: 13 km
Total trekking distance: 13 km Starting elevation (Bhulbhule): 840 m/2756 ft Ending elevation (Ghermu): 1130m/3707 ft Costs Bus Pokhara to Besishahar: 500 NPR ($4.59) Jeep Besishahar to Bhulbhule: 333 NPR ($3.06) Room + dinner + breakfast Ghermu: 467 NPR ($4.15) *They keep track of all expenses at the teahouse and you settle up in the morning after breakfast.* 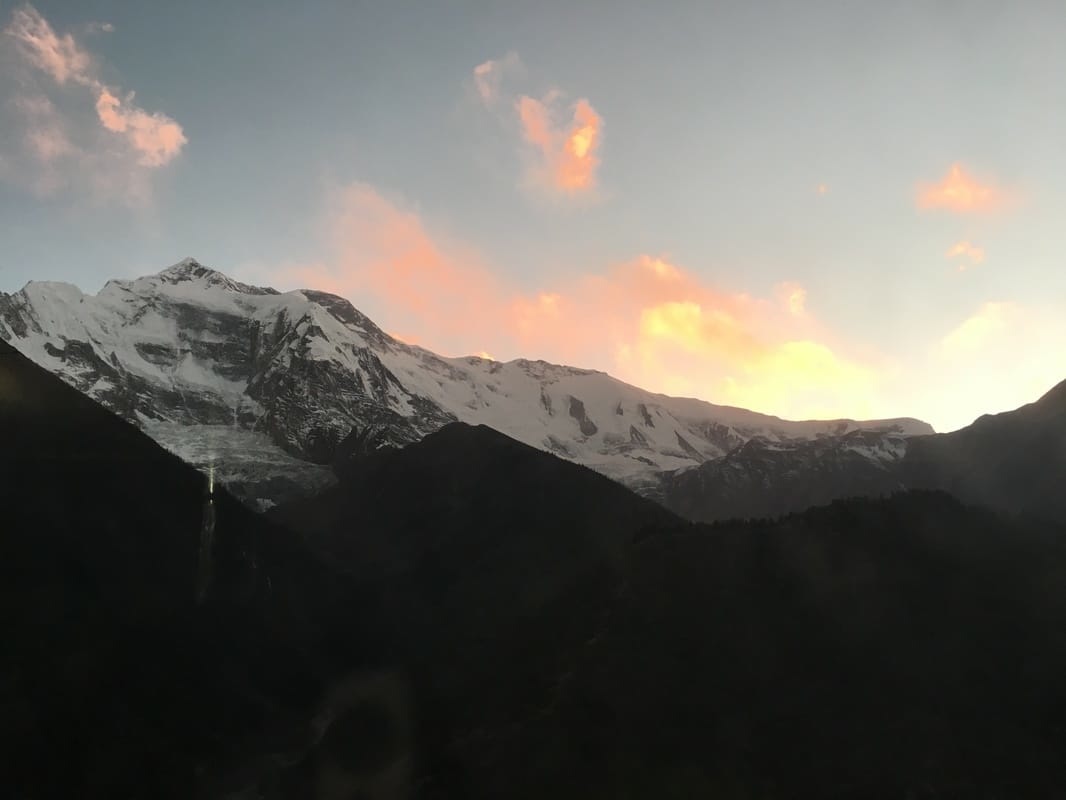 Sunset and Annapurna II The reason we traveled all the way to Nepal was to trek the Annapurna Circuit, or "Round Annapurna" as the locals called it. The whole circuit takes about 20 days. We had two weeks off from work and, when we added in multiple days for flights and getting to the start of the trail, there was just no way to make the math work - we couldn't do the entire thing. So, we scoured the internet for information about which parts were must-see, which parts we could shorten, and how much we could pack into the little time we had. I have to say it: the whole thing is a must-see. Don't shorten it if you don't have to. We had to cut out much of the second half and now my friends and I are planning a trip back to complete the circuit and do the Annapurna Base Camp trek. I will add detailed posts about each day, the scenery, the distance and difficulty of hiking, and the teahouses where we stayed as I complete them! To get you started, this was our itinerary as we made our way Round Annapurna. Our 11 Day Itinerary on the Annapurna CircuitClick on a picture to read the blog post about that day's trek. Day 1: Pokhara to Ghermu (13 km) We took the earliest tourist bus out of Pokhara, departing at 6:30am. A bumpy 4-hour bus ride brought us to Besishahar, the official starting point for the Annapurna Circuit. To shorten the trek a bit on the front end, we took a jeep from Besishahar to Bhulbhule, cutting out 9 km of walking. We trekked from Bhulbhule to Ghermu (13 km), where we stayed the night. Day 2: Ghermu to Darapani (18 km) Our first full day on the trail was long and filled with steep stone steps. The steep stone steps really got me because your legs have to push your body weight plus your pack weight up over and over. I find a gradual uphill trudge to be easier, but I know that not everyone does. We passed through some really charming towns, following along the river, across suspension bridges, and past a beautiful waterfall. Just before Tal, we climbed steeply for quite awhile. But, after we descended, we stopped for lunch in Tal, at a pleasant garden teahouse with DELICIOUS food. Probably my favorite food we had on the circuit. From Tal, we continued about 2 hours to Darapani. Day 3: Darapani to Chame (16 km) Our third day, in my opinion, was easier than the second day. It was slightly shorter and, though we did some climbing, it seemed less intense than the previous day. Or my body was starting to get used to trekking day after day. Most of the towns that we passed through were quite small. We also got our first views of snow covered peaks today! We stopped in Chame, and there were many shops where we could buy things like hand sanitizer, snacks, and even clothing. I had major panic about being cold, so I bought a fleece-lined hat for less than $2.50 and a knock-off North Face long sleeved shirt for $7. It smelled like a plastic bag but made me feel better to have an extra long sleeved shirt. Day 4: Chame to Upper Pisang (14.5 km) One of my favorite days on the trail! The day started with a trek through pine forests, which smelled lovely, with the Marsyangdi River rushing along below us. We passed through an apple orchard, along the road with views of snow covered mountains constantly in sight, and through another dense forest. We stopped for lunch in Dhukur Pokhari, sitting in the sun with views of the mountains, and then continued to Upper Pisang for the night. When we trekked into Upper Pisang, we noticed that the village went up the hillside toward a monastery perched at the top. We also noticed that there were insane views of Annapurna II, and, tired as we were, we decided that we had to stay at the teahouse highest up on the hillside. The dining room had a fireplace to keep us warm and unobstructed views of Annapurna II. We dropped our packs and immediately went to visit the monastery. The entire day was wonderful, from the scenery to our leisurely lunch to the monastery to the views of Annapurna II as the sun went down. Day 5: Upper Pisang to Manag (19.5 km) There are two options to get to Manang: the Upper Pisang trail and the Lower Pisang trail. I'm not going to lie - the Upper Pisang trail was extremely challenging, but the views were amazing and the traditional villages along the way were interesting. Additionally, the upper trail is GREAT preparation for the steep climb to High Camp and over Thorong-La Pass. The trail ascends steeply between Upper Pisang and the next village, Ghyaru. It is a long slog with switchback after switchback, and I was really feeling the effect of the altitude on my breathing. But, at the top, there were amazing views of Annapurna II, III, and IV. Later on, to counter the ascent, there is a steep descent as you move toward Manang. At the end of this day, nobody in our group was speaking because we were so exhausted and were literally hobbling into Manang. But, I still think that the Upper Pisang route was worth it, especially since it is followed by a rest day. Day 6: Rest Day in Manang (0 km) The rest day in Manang was glorious. We didn't have to pick up our packs at all. We went to one of the bakeries to have coffee and tea, met fellow trekkers, and saw a movie. Day 7: Manang to Letdar (10 km) This day went very quickly for us, as it was considerably shorter than the previous trekking days we had done. The landscape was stark and barren, and we passed by some Maoist graffiti. In Letdar, we had finally reached the place where we were no longer connected to the outside world by technology. There was no wi-fi at our lodge in Letdar, but we spent a fun afternoon and evening chatting with our fellow trekkers and soaking up the warmth from the fireplace in the dining room. Letdar was the first place where we had a really lively crowd in the dining room at night, most likely due to the lack of lodging options. Day 8: Letdar to High Camp (6 km) Once again, our day seemed super short in comparison with earlier days on the trail, but we had to keep the mileage short in order to ensure that we did not gain too much elevation too quickly. Between Letdar and Thorong Phedi, we passed through a landslide area, which made me nervous initially, but we didn't see a single rock falling or sliding. We rested in Thorong Phedi for a short while before tackling the final push to High Camp. As I mentioned before, I was extremely grateful that we had done the Upper Pisang trail because this section (Thorong Phedi to High Camp) was very similar, steep with switchback after switchback. We knew how to tackle it after completing the Upper Pisang trail, slow and steady with breaks to catch our breath. We arrived in High Camp before noon and spent all afternoon and night in the dining room, hanging out with our trail friends. Day 9: Crossing Thorong-La Pass: High Camp to Muktinath (15 km) Crossing Thorong-La Pass seems to be the pinnacle of the Circuit, what everyone had been working toward as we climbed day after day, higher and higher. A very long day, we woke up around 4:00am, ate breakfast, put on all our warmest clothes, and hit the trail by 5:30am, in order to cross the pass before 10:00am when the winds pick up. The ascent was tough and cold and I once again felt the effects of altitude on breathing. I didn't realize at the time that I also had a cold, which was making it even more difficult to catch my breath. We reached the pass by about 8:00am, quicker than the time estimates, and it felt joyful to know that we had reached the top of the Annapurna Circuit. On top of the pass, we encountered most of our trail friends, took lots of pictures by the sign, and strung prayer flags, all while we tried to stay warm. From there, we spent the rest of the day descending and shedding layer after layer of warm clothing until we reached Muktinath, a holy city for Hindus and Buddhists, where we relaxed and took hot showers. Day 10: Muktinath to Tatopani by Jeep It was very strange to have completed our walking on the Annapurna Circuit. I didn't want to be done, but we had to start making our way back. Initially, we thought, "There's no way that it will take two full days to get back to Pokhara." Then, we experienced transportation in rural Nepal. We should have gone to the jeep stand a lot earlier in the day. As it was, we caught a jeep to Jomsom at 11:30am with 9 other trekkers, so we were able to split the cost. In Jomsom, we had to wait for the jeep drivers to finish lunch before we could get another jeep to Tatopani. We arrived in Tatopani about 7 hours later - 2 hours to Jomsom, waiting in Jomson, 4.5 hours to Tatopani. Day 11: Tatopani to Pokhara by Bus & Jeep On Day 11, we officially left the Annapurna Conservation Area. We took a local bus (rookie mistake) to Beni and had to put up with attempts to rip off the tourists as well as a bus ride that was reminiscent of riding a mechanical bull. There was literally a Nepalese man vomiting out the window in front of me. That bus left at 8:30am-ish and the ride took about 4 hours. From Beni, we paid for another jeep for the final leg to Pokhara, where we arrived about 3 hours later, bruised and exhausted from the bus and jeep rides. 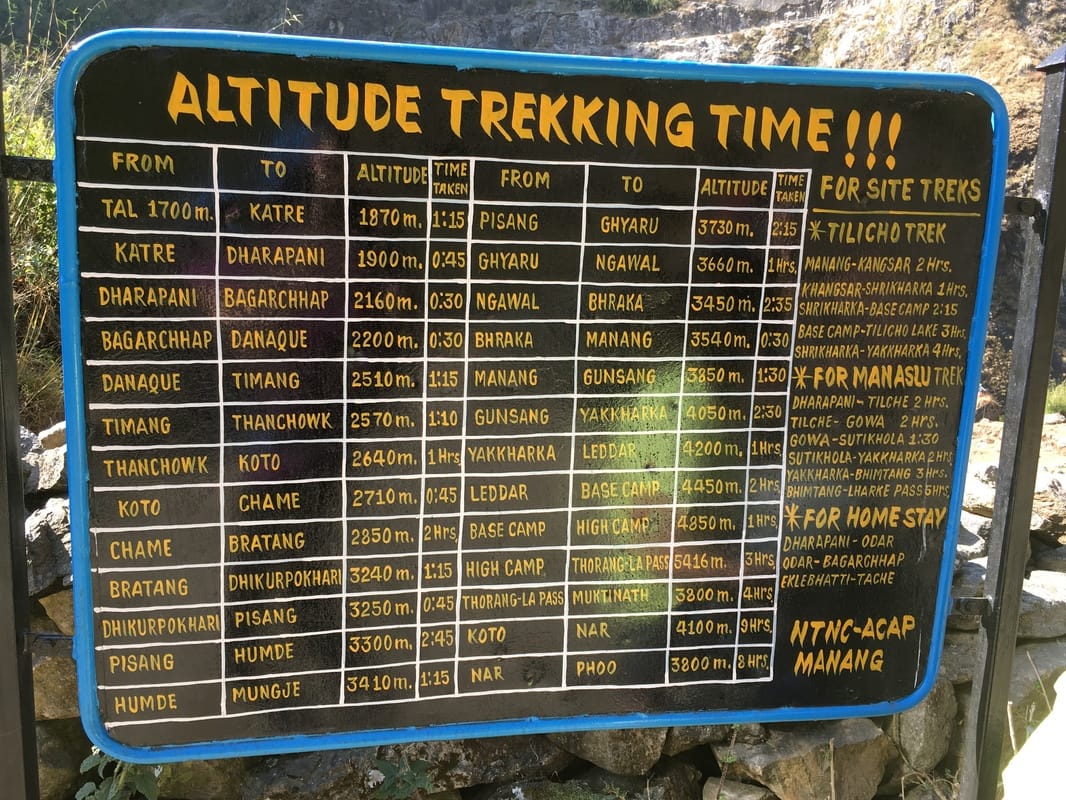 This sign was eerily accurate in its trekking time estimates. We referred to it constantly. 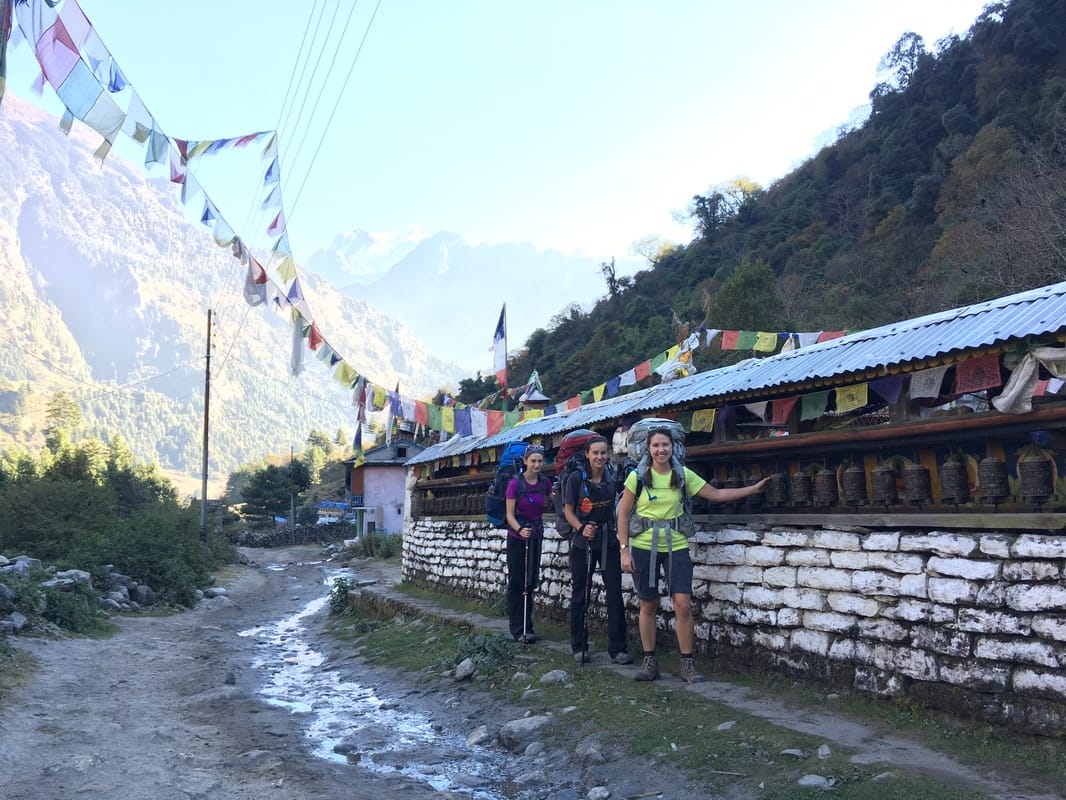 Trekking past prayer wheels on the Annapurna Circuit 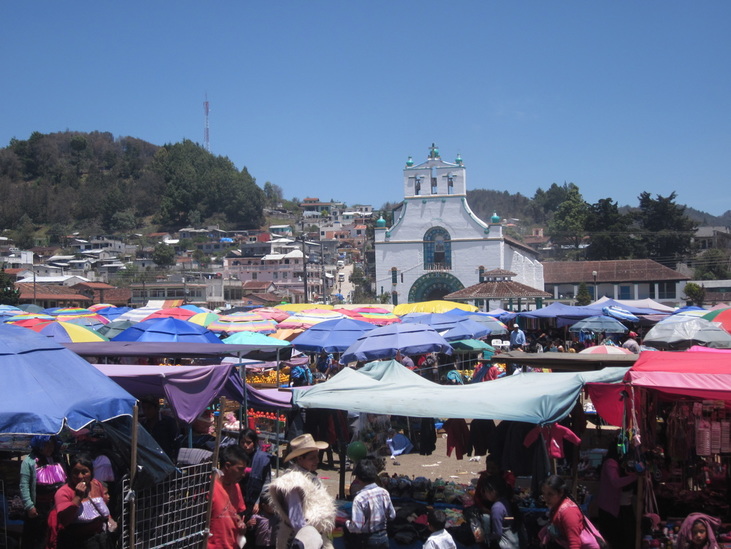 Market and church in San Juan Chamula On Easter Sunday, we found ourselves in the middle of an exuberant procession, drums pounding, flags waving, incense wafting our way. A church with the dates "1525-1535" painted near the top towered over the square and the hoards of people celebrating. At unpredictable intervals, fireworks boomed around us, surprising me every time. The men carrying statues of saints were clothed in wool ponchos and the women donned wool skirts, woven shawls, and colorful blouses. Inside the church, straw covered the ground, making the floor slippery. We saw more than one person fall and almost followed suit. The inside of the church was an open space, with no benches, pews, or chairs to be seen. Groups of worshippers knelt on the ground in front of statues of saints, burning candles and making sacrifices to heal themselves. The procession of men, flags, and statues rounded the square before heading inside, pressing everyone more closely together. It was loud, exciting, and different than any worship I had experienced before. We were in the Mayan village of San Juan Chamula, only 10 km from San Cristobal de las Casas, Mexico but very distinct in traditions, culture, and language. Chamula is made up almost entirely of indigenous residents who speak Tzotzil. The town is autonomous, with their own religious leaders, town leaders, and police force. Experiencing the unique culture of San Juan Chamula and San Lorenzo Zinacantán, another autonomous Mayan village, was one of the highlights of our trip to Chiapas. 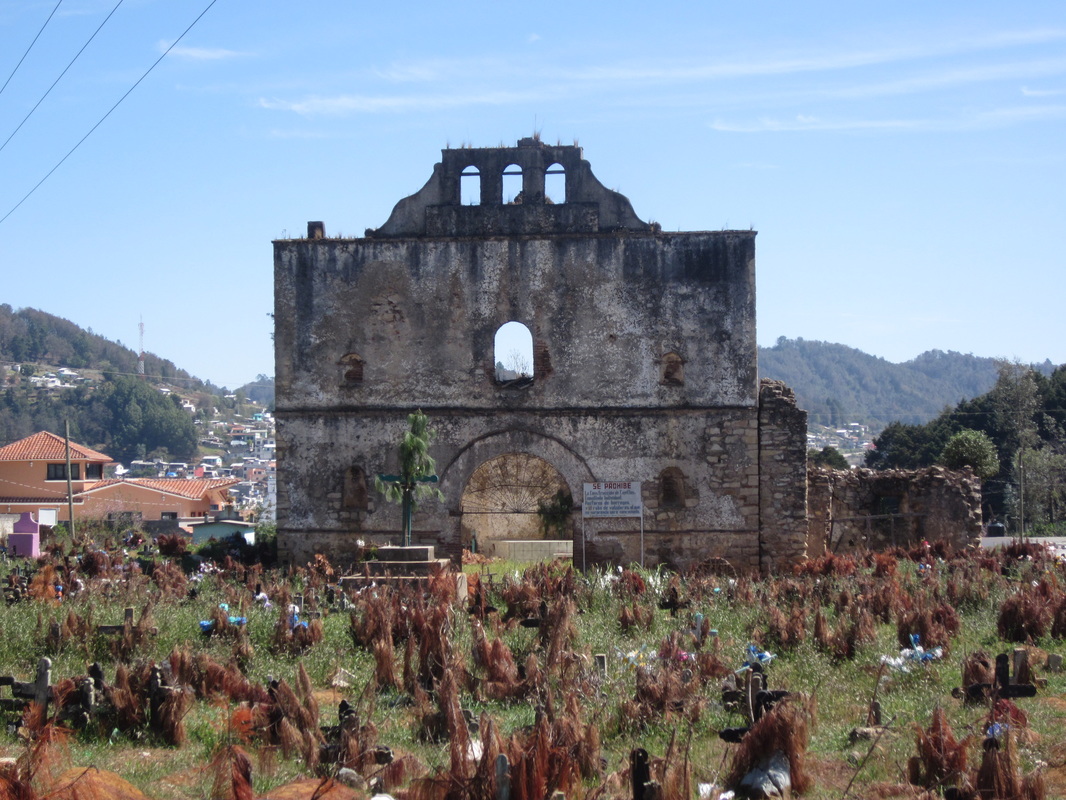 Mayan cemetery in San Juan Chamula We signed up for a tour through Alex y Raul Tours at the recommendation of our Airbnb host. The host called the company to reserve our spots. The only information we had was to show up in the main square of San Cristobal de las Casas at 9:15am on Sunday and look for Caesar. Luckily, we found him standing very obviously in the center of the square. They divided us into an English-speaking group and Spanish-speaking group, and we were off to San Juan Chamula. I HIGHLY recommend the Mayan villages tour with this tour company. Our guide for the English-speaking tour, Raul, was superb. He told us that his father owns the tour company, and he helps out by giving tours on weekends. During the week, he teaches college history and language courses in San Cristobal. His English was excellent, he ensured that the group stayed together, he was friendly, and he had a wealth of information about the villages. When we first signed up for the tour on Easter, we were concerned that there wouldn't be anything to see, since we are used to restaurants and shops being closed for the holiday. However, as Caesar assured us, it was the exact opposite. The villages were bursting with life to celebrate Easter, a special occasion we would have missed on any other day. 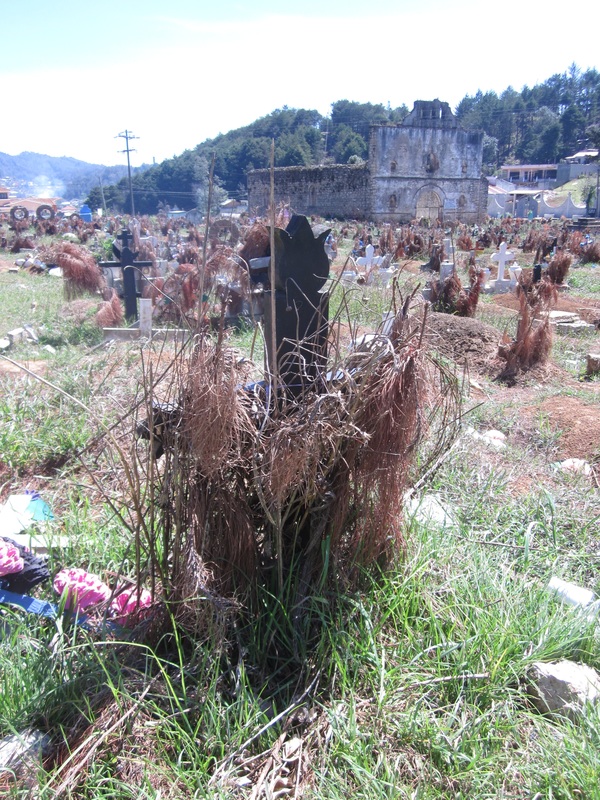 Mayan cross in the cemetery In Chamula, we started the tour by a cemetery and abandoned church. The cemetery contained graves with multiple crosses on each grave, the stone crosses representing Catholicism and the wooden crosses traditional to the Mayans. Raul explained that the Mayans of this village have blended their traditional religious beliefs with Catholic beliefs introduced by the Spanish in colonial times. In Chamula, they revere St. John the Baptist above all others and consider themselves children of St. John - hence the name San Juan Chamula. While people in Chamula say they are Catholic, their church is not recognized by the Vatican due to the differences in their beliefs from Catholic doctrine. For example, during a healing ritual, worshippers in the church kneel in front of particular saints, burn candles, present chickens, and drink posh, an indigenous liquor from sugar cane. We entered the home of a religious leader, who had a curtain of plants set up to protect the statue of the saint in that house. Raul explained that it is an honor to be a religious leader in the town and that men who are chosen for that year quit their jobs to devote all of their time and money to the saint they represent. The leader was tending to the altar as we talked, setting up candles and changing the plants. We presented a donation to the leader and took a small sip of posh, the liquor used in religious ceremonies. Next, lead by the sporadic booms from fireworks, we headed to the church where the Easter procession was in full swing. On the way, we passed markets and stands selling everything from mangoes to seafood, wool clothing to kitchen tools. The previous days, I had observed women and children selling trinkets, shawls, and other handicrafts in the streets of San Cristobal, all wearing furry wool skirts wrapped with belts and colorful blouses. I had wondered whether this was actually traditional or whether these clothes just made them look more authentic to tourists. I was happy to see in San Juan Chamula that all the women and young girls were wearing this same outfit. I saw very few people wearing Western clothes, often the men who travel outside the villages. I was assured by Raul that this was the traditional dress of Chamula. He explained that Chamula is known for wool products, used in the skirts, ponchos, and other clothing items. Raul informed us that we were not permitted to take photographs of the church, the celebrations, or the people, as they believe photographs steal your soul. I wish I would have been able to take pictures of the beautiful dress or the inside of the church, but it was important to be respectful. Raul let us know that the townspeople might demand to delete the photos or take your camera if you violated this request. One thing that I found odd was that a few people said we could take photos for 10 pesos (about 60 cents). Some tourists in our group took the residents of Chamula up on this offer. I understand that many of the townspeople are very poor, but all I could think was, "If they truly believe that photographs steal souls, did they just sell their souls for 10 pesos?" Rather than take photographs, Brett and I donated our pesos to the religious leader we visited, the Mayan woman who made us tortillas, and one of the churches we entered. 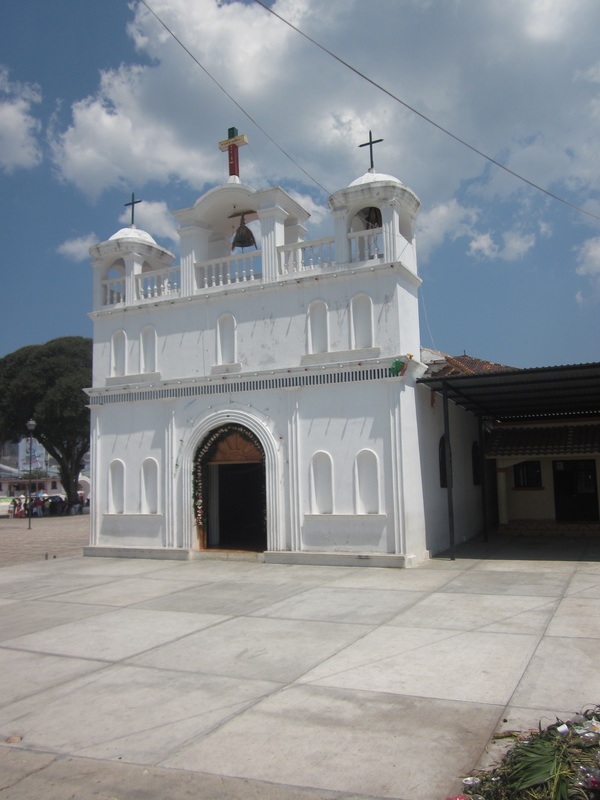 Church in San Lorenzo Zinacantán After eating lunch in Chamula, we headed to San Lorenzo Zinacantán, also a Mayan village, also autonomous, but quite different from Chamula in many ways. Zinacantán is known for flowers and cotton, giving their traditional garb a different look than in Chamula. The women's skirts are cotton and the blouses and ponchos worn by the men have elaborate, colorful, floral embroidery covering them. I preferred the clothing in Zinacantán, probably because I love bright colors and thought the floral embroidery was incredibly beautiful. We started in one of the main churches of Zinacantán, this one recognized by the Vatican, as Zinacantán has become more assimilated to the outside culture than Chamula. In this town, as you might guess from the name, the patron saint is San Lorenzo. This church had elements that we saw in Chamula, such as statues of the saints around the inside, but also elements that you would see in a Catholic church in the United States: candles on tables instead of the floor and pews to sit on. After viewing the church, we walked to a local house, where the women of the house welcomed us. They showed us how they weave with a back-strap loom and made blue corn tortillas over a fire. We tried the corn tortillas, still hot from the fire, with ground pumpkin seeds wrapped inside. Before leaving, we examined the traditional clothing that they make by hand and were able to try on some pieces. I loved their beautiful embroidered shawls, but ultimately bought a handmade scarf that I knew I could wear more often. My simple scarf was also less expensive than the elaborately decorated blankets and shawls. I was pleased to learn that each woman keeps the money that she earns from weaving. When we wanted to buy an item, the girl or woman who made it was called to name the price, since she was the one who put in hours and weeks and months of work to craft the piece. 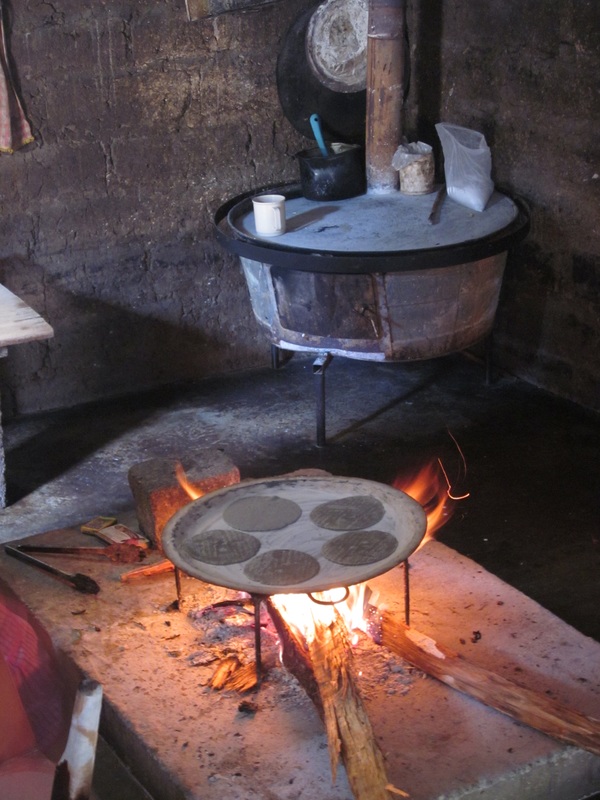 Homemade blue corn tortillas over a fire If you are in San Cristobal de las Casas, you must do the Mayan villages tour. San Juan Chamula and San Lorenzo Zinacantán are distinct from the city of San Cristobal and offer a glimpse into a different culture. It is possible to catch a bus or taxi to these places, but you will miss out on key information, interesting stories, and meeting residents of the town without a knowledgable guide. Book with Alex y Raul Tours (250 pesos per person + guide tip) and you will be in good hands! Read more about our Chiapas trip with my blog posts about the Sumidero Canyon and San Cristobal de las Casas.
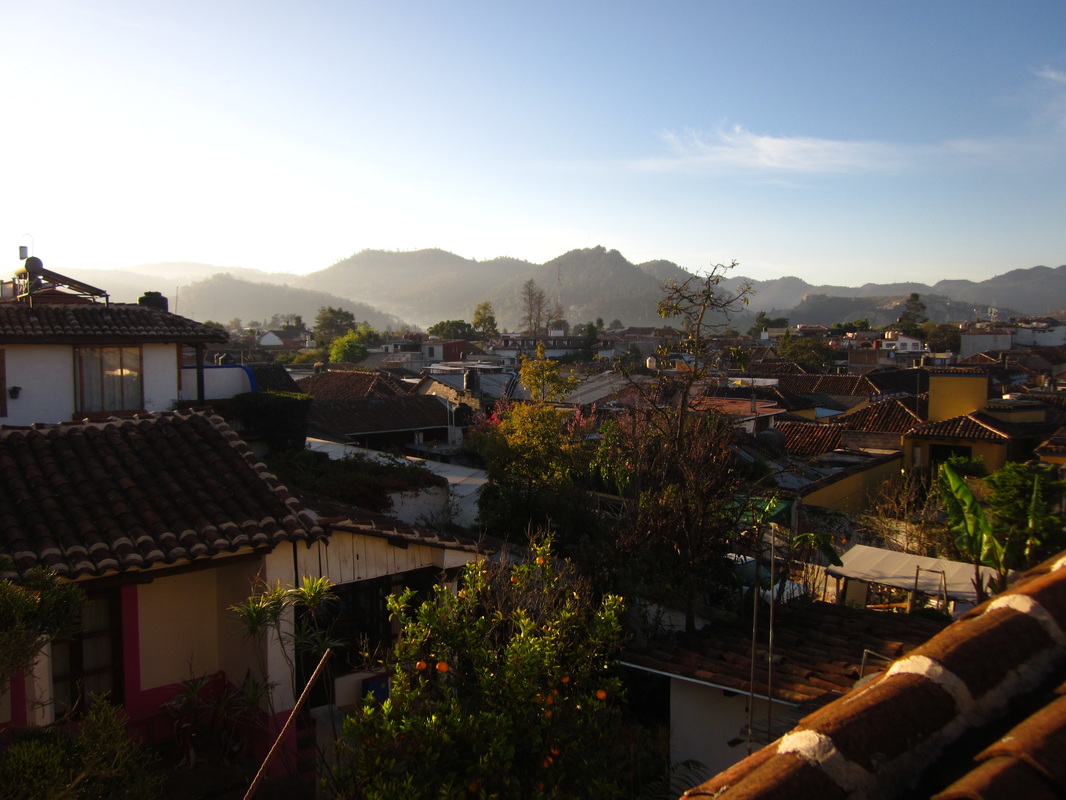 What comes to mind when you think of Mexico? Sandy beaches? Tropical drinks? Handmade tortillas? Over Easter weekend, we traveled to Mexico and only experienced one of those....which was a great thing! My prior experience with Mexico was limited to resorts in the Yucatan, but, when my cousins suggested that we meet up with them in the state of Chiapas, we jumped at the chance! Though the beaches are beautiful, it was great to see a different facet of the country and experience some of the culture. We spent a long weekend in San Cristobal de las Casas, a mountain town located at 7200 ft. The state of Chiapas is located in the southwest of Mexico, bordering Guatemala. It is a mountainous region known for coffee growing and Mayan heritage, meaning that there is excellent coffee to try, Mayan ruins to explore, and a fantastic mix of Mexican and Mayan influence. San Cristobal is a colonial city with a cool, laid-back vibe and BEAUTIFUL scenery. I immediately loved the colorful buildings and the mountain views. If you are concerned about the safety of traveling to Mexico, note that there is no travel advisory for the state of Chiapas. I cannot emphasize this enough - I never felt unsafe in San Cristobal or Chiapas. Just follow common sense rules of travel and you should be fine. 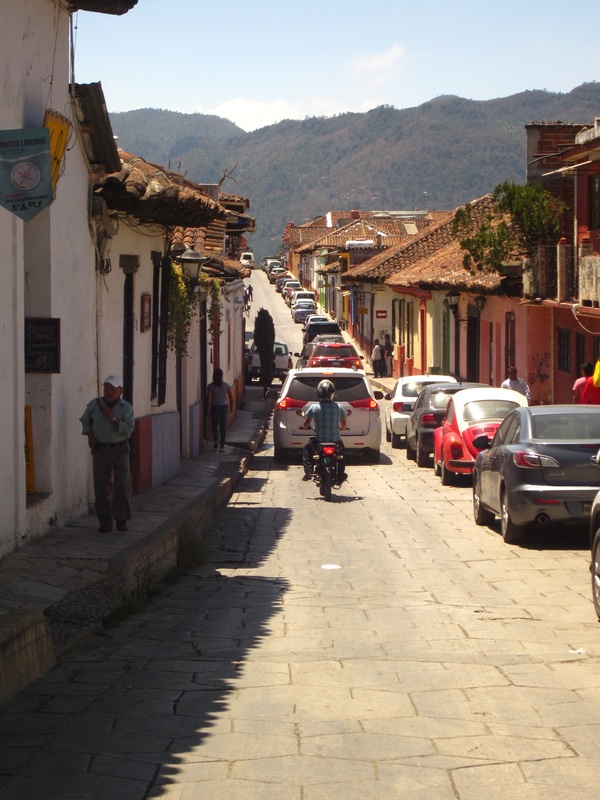 Getting ThereI can't lie - getting to San Cristobal was a process. We drove from Austin to San Antonio for our flight, since flights were significantly cheaper from San Antonio. We flew on Interjet, a Mexican low-cost airline that I highly recommend. Interjet flies to numerous locations in Mexico as well as limited international locations, including some US cities. On American carriers, we are accustomed to jamming as many people as possible on an airplane, bumping our knees on the seat in front of us and climbing over our neighbor's lap to get to the bathroom. Interjet reminded me of the "good old days" with plenty of leg room. Now, I am short so legroom doesn't affect me much, but my husband really appreciated it. All of our Interjet flights had friendly flight attendants and free chips as snacks. I can't remember the last time I got a snack on a flight operated by a US carrier. Overall, a pleasant experience, despite one delay out of four total flights. We flew San Antonio-Mexico City-Tuxtla Gutierrez. Tuxtla is the main airport for Chiapas, and, when you land, you have to catch a bus to San Cristobal de las Casas. It is only about 37 miles, but it's 37 miles on winding, mountainous roads, so it takes a little over an hour to climb the 5500 ft to San Cristobal. At the Tuxtla airport, we bought tickets on an OCC shuttle to San Cristobal for 210 pesos ($12) each. Buying bus tickets was simple, as the ticket counter was right by the baggage claim. The shuttle drops off at the OCC bus terminal in San Cristobal. From the bus station, we took a cab for 30 ($1.73) pesos to our accommodations. Exploring the City
 Final ThoughtsI've read some other travel blogs that complain about the city being over-run by American hippies and expats rather than an authentic experience. I did not have this experience at all. We felt like the majority of the travelers roaming the city on Easter weekend were Mexican families. True, we saw some of the dreadlocks and granola bunch, but, at least when we visited, it was by no means a majority. Something that may have contributed to this was staying in an Airbnb rather than a hostel. By doing this, we encountered neighborhood inhabitants out for a stroll rather than backpackers looking for a place to crash.
Chiapas has the highest poverty rate in Mexico - over 70% of the residents live in poverty. As you walk the streets, you will be approached by many women and children selling handicrafts or begging. It is very difficult to say "No, gracias" to the small children. Usually their wares are inexpensive, though I have to admit that they all start to look the same. The women and teenage girls carry large piles of wool scarves/shawls that all have similar patterns, and many of the little children sell bracelets and small purses. San Cristobal de las Casas has a lot of character! I loved the colonial buildings, the bright colors, and the vibrancy of the city. We spent three days eating well, relaxing with local coffee, learning about Mayan culture, enjoying mountain views, and stumbling across new sights at every turn. For me, it was a new side of this diverse country. I would love to continue exploring Mexico's colonial cities in the future. Check back for more blog posts about our boat ride in the Sumidero Canyon, Easter Sunday in Mayan Villages, budget tips for travel to San Cristobal, and details about our itinerary! I love planning travel. I'm energized by the possibilities of new places, new discoveries, and new cultures. I get excited by piecing together transportation options and finding new ways to use my airline points. It's like a puzzle to me, so, when I'm looking for something to entertain me, I plan hypothetical trips, thinking maybe someday I might need a 6-week itinerary to Peru and Bolivia or details for a 10-day trek in Alaska. I do this so often that I had to stop and think when a friend recently asked me, "How do you plan for a trip?" She wanted to go on a trip with her siblings, a sister and brother, and wanted to keep it budget friendly. From there, she wasn't sure where to look next for locations, deals, and activities. I think that a big trip can seem overwhelming when there are so many details to arrange and things to decide. Plus, you feel like it's a big expense so you don't want to screw it up! This inquiry presented the perfect opportunity to blog about some of my trip planning techniques and favorite sites. Here's how I plan for travel! Throughout this post, I will use our 3-week summer trip to Europe as an example.  1. Determine your limiting factor(s)Pretty much everyone has at least one limiting factor on travel plans. Your limiting factors will help you pick a place to travel. These are some of the most common:
You might be looking at the list and thinking, "ALL of those are my limiting factors." You very well might have more than one! Once you determine your limiting factors, you will have a better idea of where you can go. When I was planning our summer trip, all of the mentioned limiting factors were at play:
These limiting factors led us to choose a trip to Europe, primarily Eastern Europe, which is cheaper for travelers than Western Europe.  2. What Kind of Traveler Are You?Some people prefer to see a lot when traveling. Some would rather lay on the beach. Some people want to try new cuisines. Others still want to experience the great outdoors through active travel. Many people like a mix of these things. What do you want out of this particular trip? Are you stressed at work? You might need a low-key getaway. Hate feeling constantly connected? Find somewhere off-the-grid. Love hustle and bustle? Look into big cities with lots to do. Answering these questions for yourself will help determine specifics of where to go. Brett and I love the outdoors, trying new food and drink, and immersing ourselves in the culture of a place. We wanted to be active on our travel and move between multiple cities. This gave me a framework for what to plan: multiple countries in Europe and accessible ground transportation (trains, buses) to move around easily. My favorite websites when looking into destinations are Wikitravel, Rough Guides, and Nomadic Matt's Travel Guides. Type in a city or country of interest on Wikitravel and get a general sense of things to do, how to get there, and the safety/security of a travel destination. My absolute favorite part of the Rough Guides website is the "Things Not to Miss" for each country, a slideshow of the highlights in beautiful pictures. Check out this example of "Things Not to Miss" for Slovenia. Nomadic Matt has amazing tips on budgeting and how much you should expect to spend in a country.  3. Find Your AirfareStart with airfare because your arrival and departure determines the number of nights you need for accommodation, as well as the amount of time you have for exploration and fun. It's also likely to be one of the biggest chunks of your budget, unless you are using rewards points to book airfare. My favorite websites to use when searching for flights are the ITA Matrix by Google and Airfare Watchdog. You can't book directly from the ITA Matrix but you can compare various airlines, write down the flight numbers, and search for those cheap flights on the airline website. Tips for affordable airfare
 4. Research Other TransportationIf you're planning to stay in one place for the duration of your travels, skip this step! Transportation within or between countries determines a lot about your itinerary. Flying between cities will save you time but will cost more. Trains and buses are affordable but take time. Again, look at your limiting factors! Do you need to save time or money? In planning for Europe this summer, Brett and I had settled on Eastern Europe for budgetary reasons. But, Brett really wanted to try Trappist beer in Belgium. For the sake of time, I decided we would have to fly between Belgium and Eastern Europe, so I turned to the RyanAir Interactive Route Map to find out where they flew from Brussels. I discovered cheap flights between Brussels Charleroi Airport and Budapest. This saved us time and, actually, money because the flights were priced so low compared with train travel. From there, I looked at the rail networks in Europe - where could we travel easily from Budapest? Ultimately, I picked Slovenia and Croatia. Transportation pulled together the details of our itinerary, allowing me to see how much transport time we needed between places and how much time we could spend in each city. My favorite website for researching train travel is The Man in Seat 61. This guy is amazing. He has guides for train travel across the world. Prior to reading his website, I assumed I would have to purchase Eurail passes to travel between Budapest, Slovenia, and Croatia, which would have cost us over $300 for two travelers. Using The Man in Seat 61's tips, I discovered that there is a train between Budapest and Ljubljana, Slovenia for 19 Euros per person. He detailed how to book these cheap fares and whether it was better to book in advance or buy tickets at the station. With these tips, I have pieced together train and bus routes around Eastern Europe for about $160 total - 50% of the cost for Eurail passes! For bus travel, google "bus between [city A] and [city B]". Travel forums and blogs are helpful for this. I typically look at forums and blogs as a starting point. People will share comments like "We took a bus using [company X]. It cost this much". Then, I google that bus company to look at prices and schedules. You might not be able to book the ground transportation now or even before you go, but it's a good idea to research how long transport will take in order to determine your itinerary and book accommodation. In your research, you should be able to find out whether you can book ahead or buy your ticket in person at the train station.  5. Make a working itineraryIt's not complete yet but you need a working itinerary so you can plan for accommodation Some people don't like to plan. If you want to just buy a train pass, hop on the train, and find accommodation when you get to each place, go for it! I like to have accommodation and know how long I will be in each city, but I enjoy scheduling tours and activities when I arrive, based on the recommendations of locals. To make a working itinerary, list the dates of travel and start filling in the things you know from researching transportation. It might look like this: May 28 - Fly out of Austin, TX (overnight) May 29 - Arrive in Brussels, Belgium (midday) May 30 - May 31 - June 1 - June 2 - Fly Brussels to Budapest June 3 - You should have blank spaces by some of the days! This allows you to fill in what you will be doing when you're not traveling between cities, which might look like this: May 28 - Fly out of Austin, TX May 29 - Arrive in Brussels, Belgium (midday), train to Ghent May 30 - Ghent May 31 - Ghent June 1 - Ghent June 2 - Fly Brussels to Budapest June 3 - Budapest Since it's a working itinerary, you can move things around and change ideas. You can also add in ideas for day-trips or excursions if you would like. By doing this, you will be able to determine how long you will be in each city, so you can book accommodation!  6. Book AccommodationYou know where you're going and how long you'll be in each place! Yippee! Now you need a place to stay. Here are some budget-friendly options: Airbnb My new go-to spot for budget accommodation is Airbnb. Since Brett and I got married, I have realized that those hostel dorm prices don't look quite as low when doubled, since they are listed per person per night. Plus, there is no privacy for a married couple in a 14 bed dorm. I've realized by doing a price comparison that I can often find an AirBnB room or apartment that works out to be cheaper than a hostel for two and offers more privacy and flexibility with cooking and coming/going. Hostels Hostels offer a safe and social space for travelers to interact. The cheapest option is typically a large dorm. Most hostels offer mixed dorms as well as same-sex dorm rooms. When we travelled to Ireland, my friend and I stayed in a female dorm in Dublin and a private room in Galway because the private room was equal in price to a dorm. In addition to being a great place to interact with fellow travelers, hostels offer a variety of amenities, from breakfast to free wifi to luggage storage. Luggage storage can be a huge help if you have to check out but want to continue sightseeing before your flight or train. When hiking in Chilean Patagonia, our hostel stored our extra luggage for the entire 5 day, 4 night trek. My favorite website to find and compare hostels is HostelWorld. Camping If you are going on an outdoorsy trip or a trek, camping might be your only option. Or you might wan to camp in order to save even more money. Check out these beautiful campsites around the world. Of course, you will need to have or purchase camping gear and carry it with you as you travel. Unusual Accommodations Did you know you can work on an organic farm in exchange for accommodation? The organization is called WWOOF, World Wide Opportunities on Organic Farms. You can also stay in monasteries around the world fairly cheaply.  7. Fun Fun Fun!You know where you're going, how you're getting there, and where you're staying. Now it's time for the fun part! You can either sit back, relax, and wait for your trip, or you can plan things you want to see and do when you get there! Start googling!
For our European trip, I wanted to leave plenty of time for unstructured exploration because I love the surprises you can find while wandering around a city. However, I looked up how to get to the Trappist brewery in Belgium, since that was the one thing Brett requested that we do. I also looked into allergy friendly restaurants in each city because I am allergic to gluten and Brett is allergic to dairy. It was important to me to find some allergy-friendly restaurants beforehand. While doing that research, I found these travel cards that explain Celiac Disease in various languages. The tips and helpful hints available on the internet these days are truly amazing. Happy travel planning, everyone! Day 1: SantiagoOur group of friends flew overnight from the US to Santiago, Chile, arriving in the morning. We spent the rest of the day exploring Santiago. Opting to walk around and just see what we saw, we wandered into the Santiago Museum of Contemporary Art. As the workers were on strike, we were able to just walk in, with the option to donate to the museum in lieu of the typical entrance fee. One of the best experiences of the day was climbing up Santa Lucia Hill, a hill in the middle of Santiago with great views over the city. Accommodation: The Princesa Insolente Hostel Santiago Day 2: Travel to Puerto Natales In order to access Torres del Paine National Park, we needed to fly to Chilean Patagonia, which meant an in-country flight to Punta Arenas and a bus ride to Puerto Natales. Punta Arenas has the main airport for Chilean Patagonia, and it's located about 3 hours from Puerto Natales. We woke up before early to get our flight down south. When we arrived, we were assured that a bus headed to Puerto Natales would soon arrive. Now the Punta Arenas airport only has three gates, and, as we waited on the curb, we watched our flight crew, airport workers, and other people slowly trickle out of the airport until we were basically the only people at the airport. But, we remained on the curb, confident that some sort of bus would eventually show up. Over an hour later, we hopped on a bus headed to Puerto Natales. It cost approximately $5, and we all promptly reclined our seats for a nap. The bus pulled into Puerto Natales and dropped us near our hostel. That afternoon, we checked in, attended the (free) Erratic Rock info session on trekking in Torres del Paine, rented a few pieces of gear, and shopped for food. That night, we packed our backpacks, prepared to leave on the morning bus for Torres del Paine to begin the W-Circuit. Accommodation: Erratic Rock Hostel **At Erratic Rock, we got a free information session (open to all), ate a delicious home-cooked breakfast, and were able to store our luggage at the hostel for the entire length of our hike. Winner in my book. Day 3: W-Circuit, Torres del Paine National Park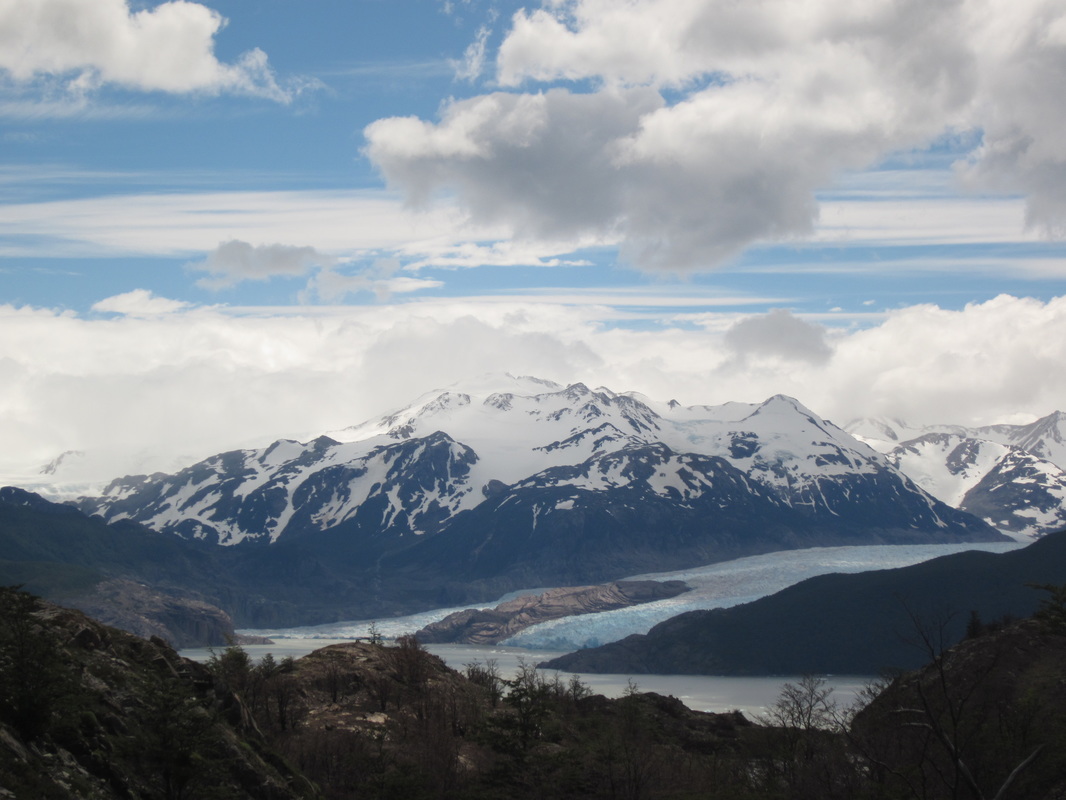 Our first day of hiking! We took a 7:30am bus from Puerto Natales to the park. We were able to purchase bus tickets to the park from the hostel, which made the morning easy. The bus stopped to let us pay our entrance fee before dropping us by the catamaran. We wanted to trek west to east, so we had to start by taking the catamaran across Lago Pehoe to the start of our trek. The first day, we hiked to Refugio Gray, past Glacier Gray. For a rundown of our hike and the distances, see my Hiking Torres del Paine National Park post. Accommodation: Camping near Refugio Gray Day 4: W-Circuit, Torres del Paine National Park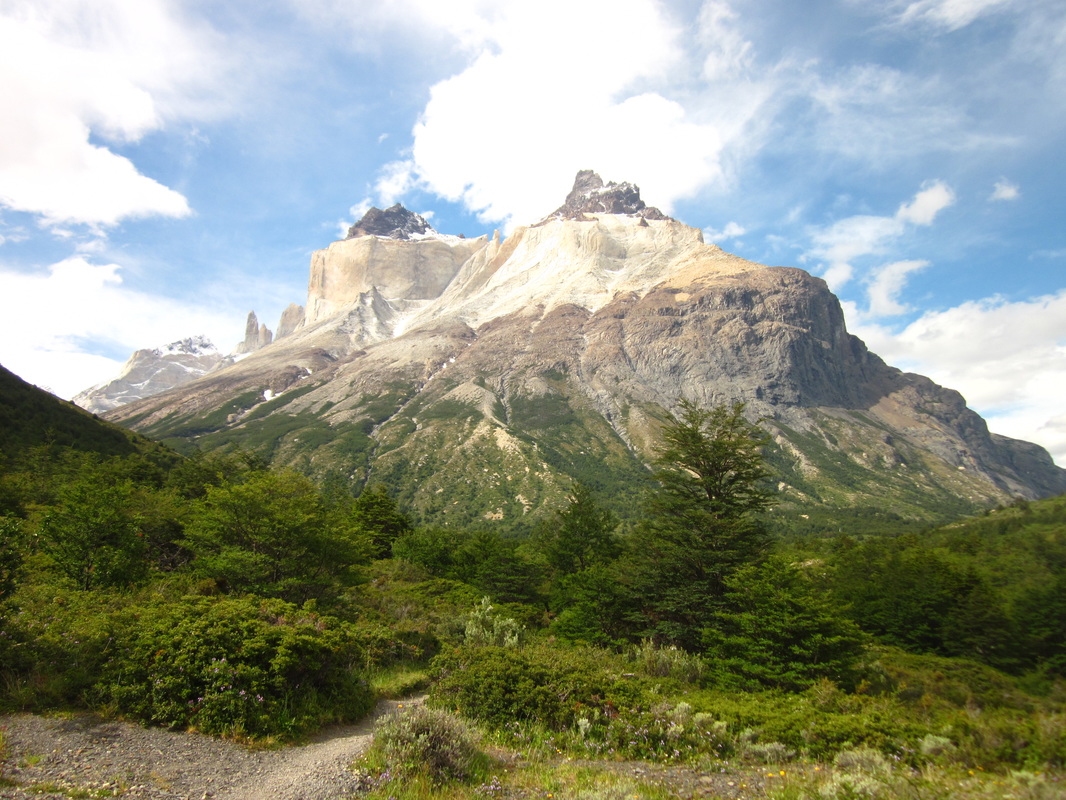 Our second day of trekking in Torres del Paine National Park involved retracing our steps and continuing on to Camp Italiano. For a rundown of our hike and the distances, see my Hiking Torres del Paine National Park post. Accommodation: Camping at Camp Italiano Day 5: W-Circuit, Torres del Paine National Park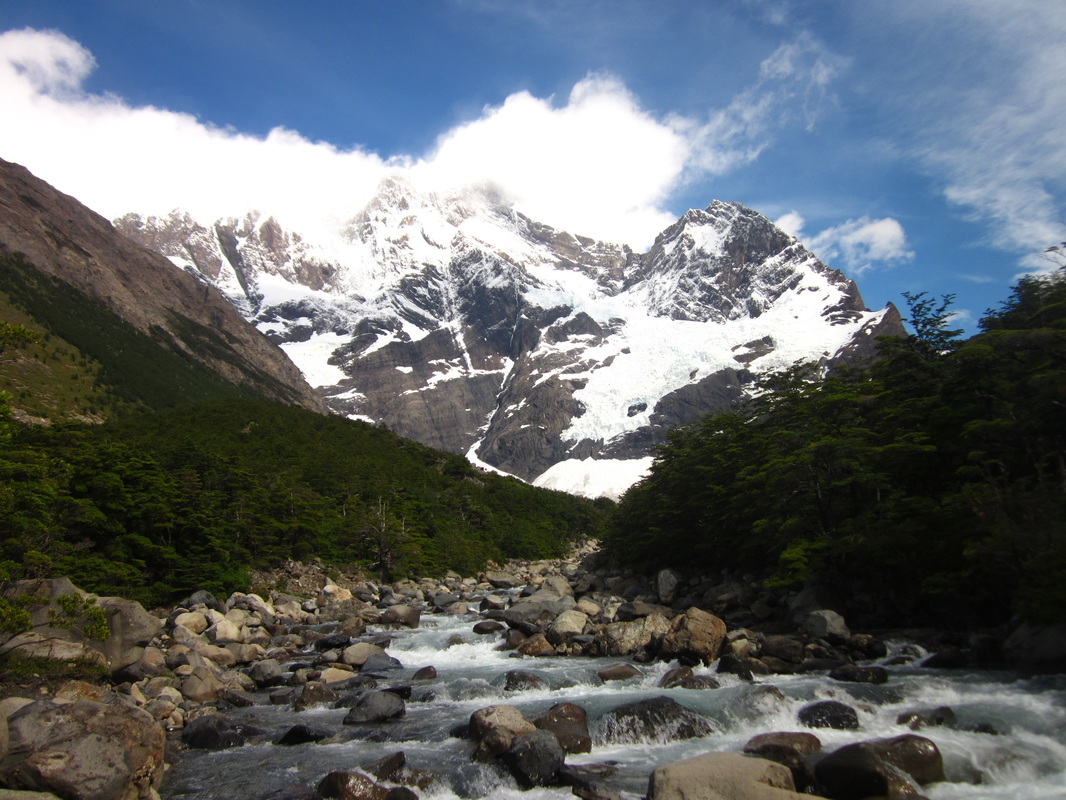 The third day of the W-Circuit involved a trek into the French Valley and then back out to our campsite at Los Cuernos. For a rundown of our hike and the distances, see my Hiking Torres del Paine National Park post. Accommodation: Camping at Los Cuernos Day 6: W-Circuit, Torres del Paine National Park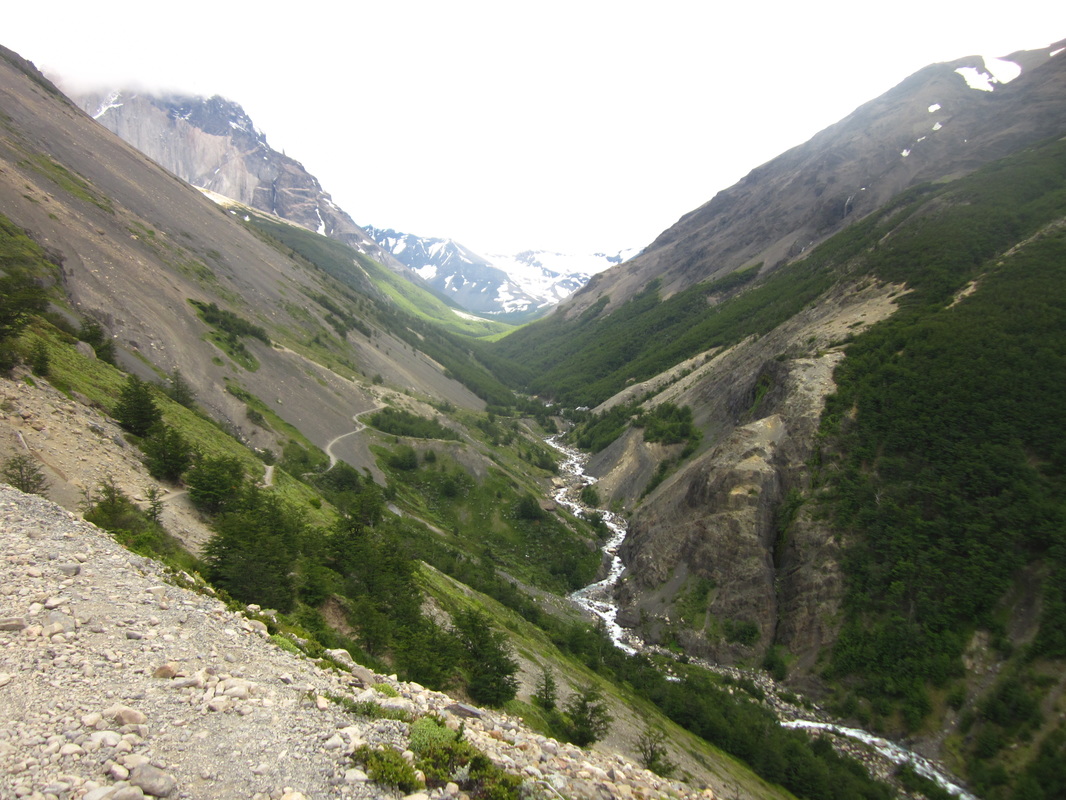 Day number four brought us to the base of the Torres del Paine. We camped at Campamento Torres, in order to wake up early and see the sunrise at the towers. For a rundown of our hike and the distances, see my Hiking Torres del Paine National Park post. Accommodation: Camping at Campamento Torres Day 7: W-Circuit, Torres del Paine National Park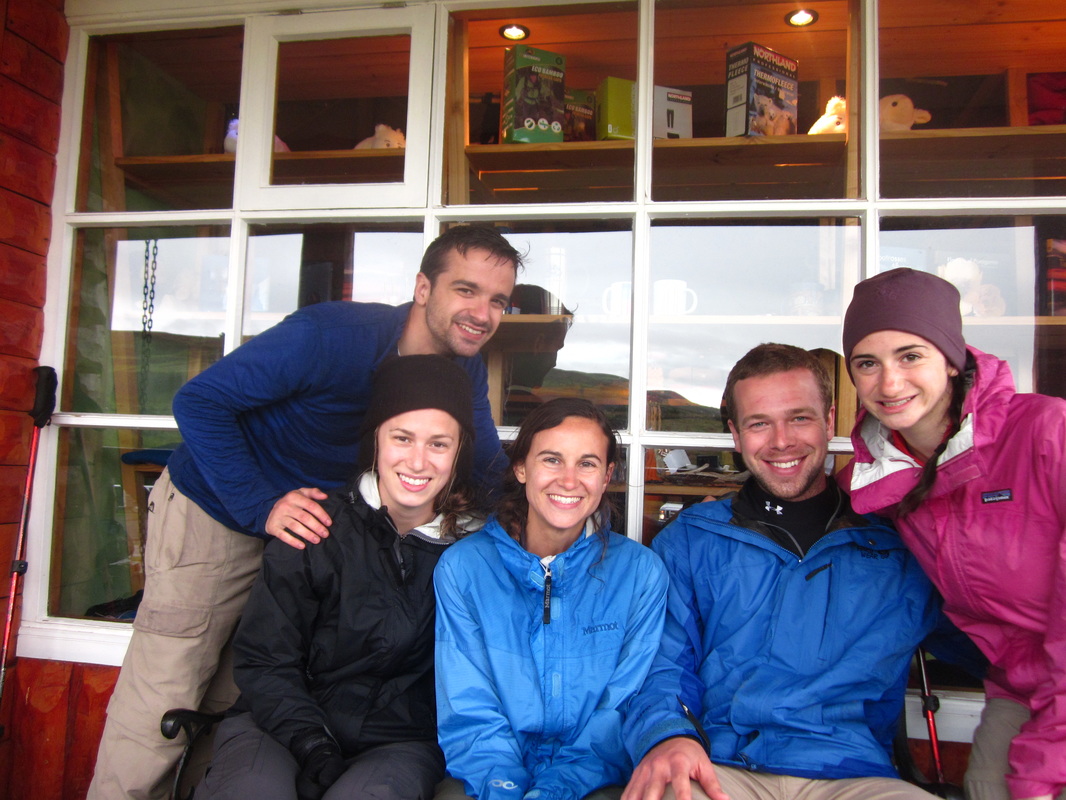 Our last day of hiking in the national park, intended to be our opportunity to see the famous Torres del Paine. We hiked out and caught a bus back to Puerto Natales, where we warmed up with hot showers, pizza, and wine. For a rundown of our hike, why we didn't actually see the Torres, and the distances, see my Hiking Torres del Paine National Park post. Accommodation: Erratic Rock Hostel Day 8: Puerto Natales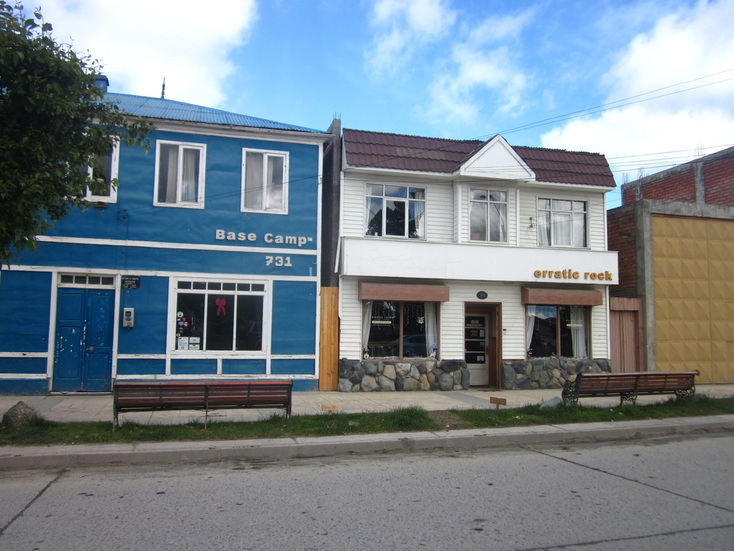 We built in a rest day in Puerto Natales, thinking we could either leave a day later and use it to prepare before the hike or rest post-hike. Ultimately, we were so excited to start trekking that we took our rest day after the five day W-Circuit...and, boy, am I glad that we did! Our day in Peurto Natales involved sleeping in, eating a homemade breakfast at the hostel, reading and journaling, doing laundry so that our hiking clothes weren't smelly, wandering around town, grabbing some hot chocolate at Patagonia Dulce, and enjoying a leisurely dinner with views of the water. Accommodation: Erratic Rock Hostel Day 9: Estancia Cerro Guido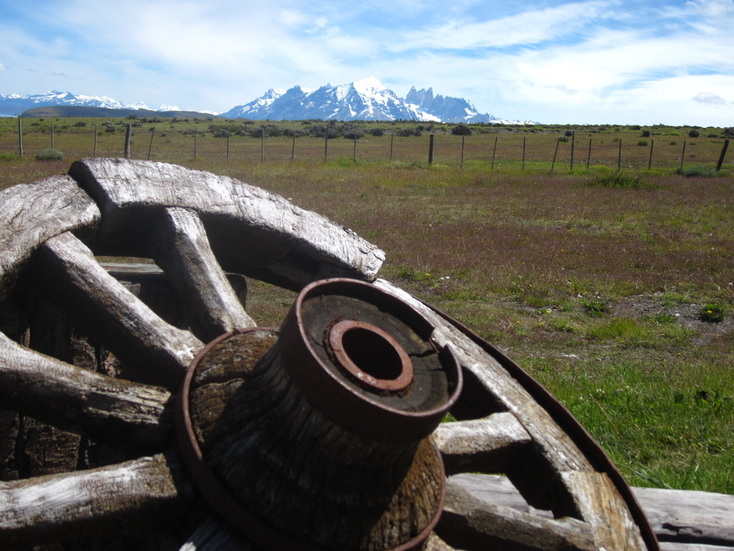 After securing a rental car, we headed out to Estancia Cerro Guido, a ranch with views of Torres del Paine. Renting a car seems to be the only way to get to the estancia, since it's far away from any other towns. For more about the accommodations, activities, and my thoughts on our stay, refer to my Estancia Cerro Guido blog post. Accommodation: Estancia Cerro Guido Day 10: Estancia Cerro Guido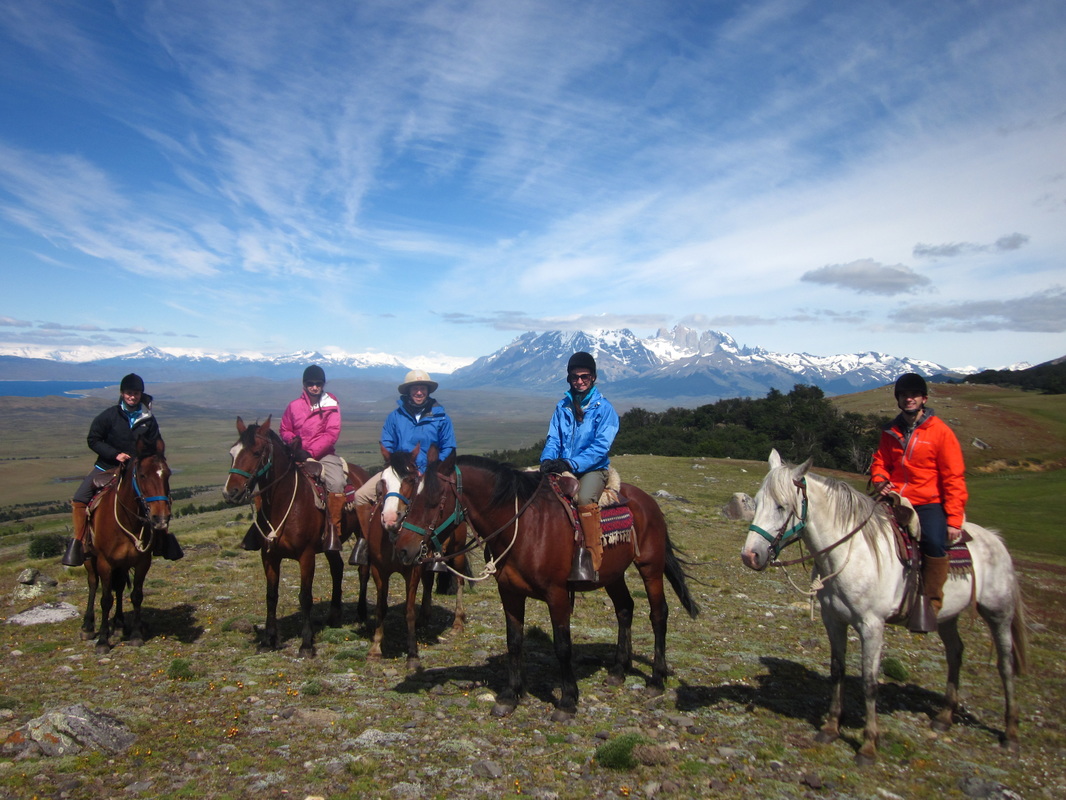 This was our full day on the estancia.We wanted to make sure that we spent at least one full day at Estancia Cerro Guido, particularly since it wasn't easy to access. Our morning was occupied with a horseback riding tour of the estancia property, with views of Torres del Paine National Park in the distance, while our afternoon was a relaxing mix of walking, napping, and reading. At night, we enjoyed a leisurely dinner with friends and amazing food. For more about the accommodations, activities, and my thoughts on our stay, refer to my Estancia Cerro Guido blog post. Accommodation: Estancia Cerro Guido Day 11: Travel to Punta Arenas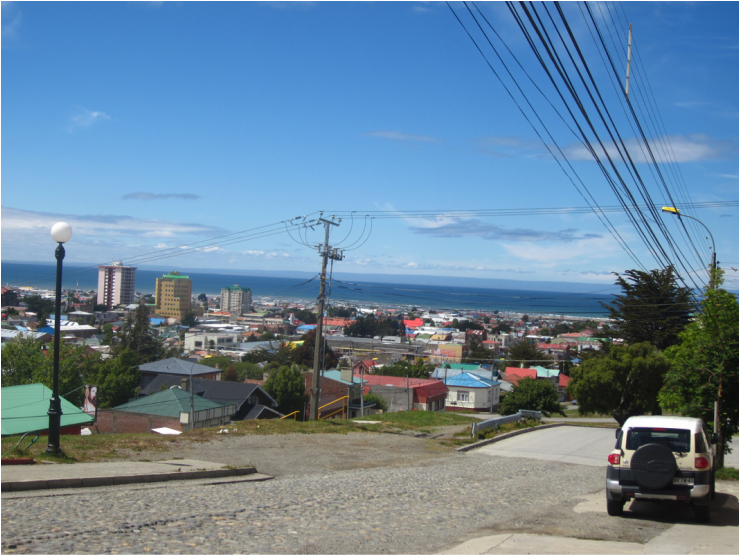 In order to fly back to the United States, we had to make our way to Punta Arenas for a flight to Santiago. So, we drove the rental car to Punta Arenas, a city just north of the Strait of Magellan, where we returned it and spent the rest of the day exploring the city. We checked out a few shops and met up with a fellow backpacker that we had met in Torres del Paine for dinner. Accommodation: Hotel Boutique Antarctica Day 12: Fly home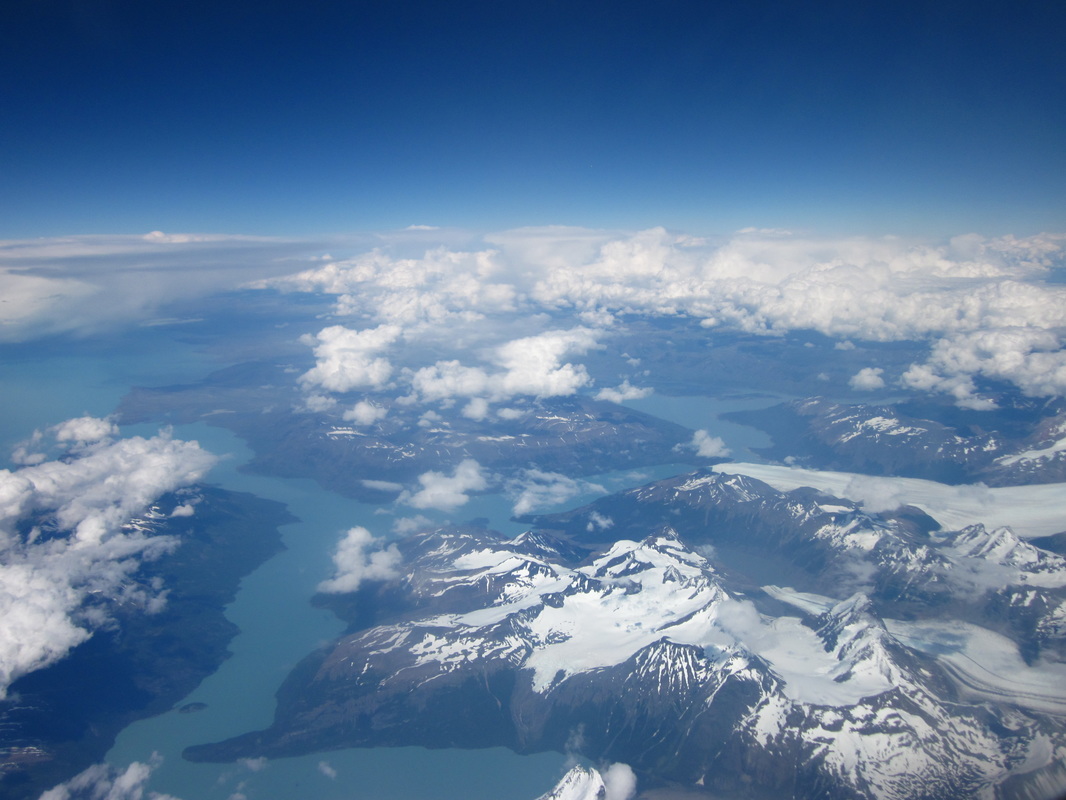 Adios, Chile! We flew from Punta Arenas to Santiago, Santiago to the USA. Over the weekend, Brett and I ventured north to Montreal for the day. Burlington is only about 90 miles from Montreal, and, with the border crossing, it takes approximately two hours. Brett had never been to Canada, and I had only been once, when I took a day trip from Seattle to Vancouver. I was interested to experience Montreal, suspecting that French-speaking Canada would be quite different than the rest of the country. We ended up spending about 5 hours walking around, and, because we're cheap, spent as little money as possible. Below, I break down my impressions of each neighborhood we visited. 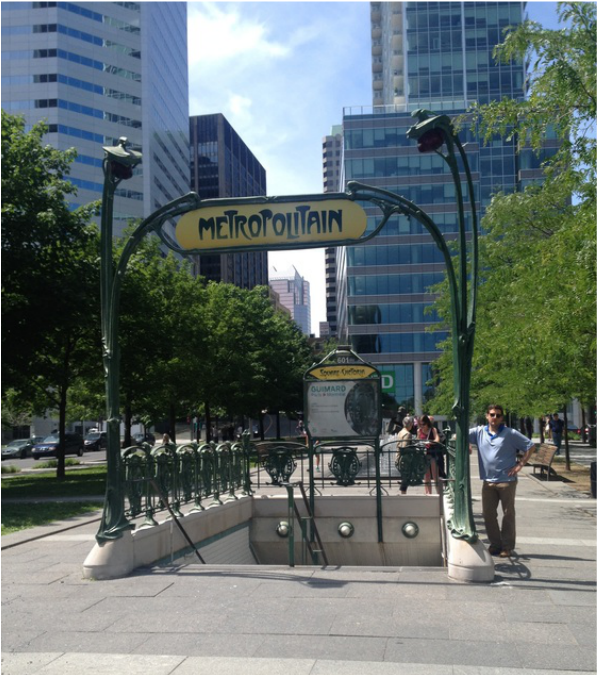 Original Paris Metro sign in Montreal, Quebec Upon seeing this sign for the Metro, I immediately recognized it and said, "It's like the ones in Paris!" I love interesting signs and took note of these art nouveau Metro signs by Hector Guimard when I visited Paris in high school, nine years ago. I even have a similar photo (minus my husband) in a photo album of the trip. This sign is at the Square-Victoria-OACI entrance of the Montreal Metro. It is the only original outside of Paris, given as a gift to recognize the collaboration between the French and Canadians when building the Montreal Metro. You may encounter similar signs in other cities, but they are replicas. 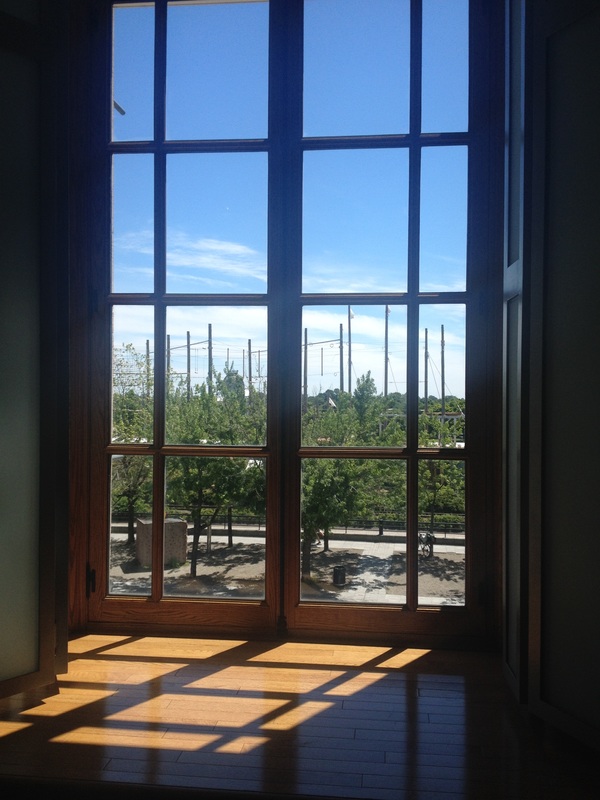 Looking at the Old Port through a window in Bonsecours Market, Old Montreal Vieux-Montreal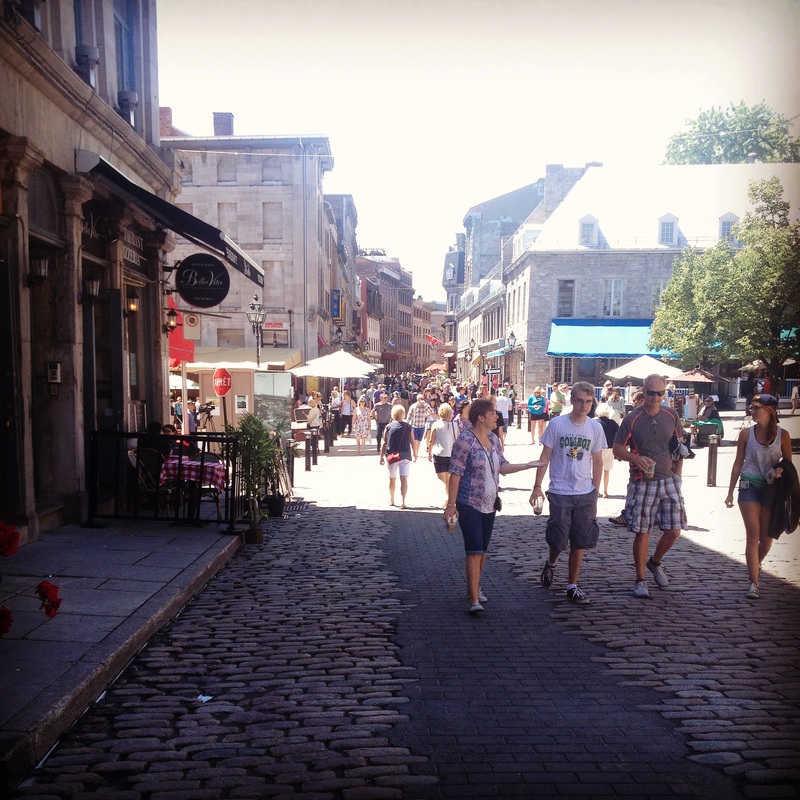 Street scene in Old Montreal, Quebec Probably one of the most well-known neighborhoods in the city, Vieux-Montreal translates literally to Old Montreal. The architecture and atmosphere is completely wonderful. Old brick buildings, some from as early as the 17th century, line cobblestone streets, with people leisurely enjoying brunch at sidewalk cafes. Visually, it looked like I was in Europe. However, I have to admit that I was disappointed by how much the neighborhood caters to tourists. Many of the shops displayed generic t-shirts and tote bags, and the majority of the restaurant menus offered overpriced poutine or Italian food. As a cheap couple on a budget, we struggled to find a restaurant within our budget in this neighborhood. Eventually, we gave up trying to eat in Vieux-Montreal, enjoyed the atmosphere for awhile, and then moved on to another neighborhood for lunch. We wandered into Bonsecours Market, a National Historic Site of Canada, which was the main public market in Montreal for many years. Nowadays, it has been transformed from a farmer's market to an upscale mall with boutiques and cafes. The building is beautiful, and I heartily wish it was still used as a farmer's market today. Our time in the market was short-lived, since upscale boutiques and cafes were not amenable to our budget. The Notre-Dame Basilica is also located in Old Montreal, at the Place d'Armes square. Notre-Dame Basilica is a highlight of the area, and I definitely recommend visiting the square to see this beautiful church. Based on your budget, you can decide whether to explore the interior of the basilica, as there is an entrance fee unless you are there to attend mass. We elected not to pay the entrance fee, so Brett and I admired Notre-Dame for free from outside on Place d'Armes. Recommendation: Walk around Old Montreal to experience the old-world feel of the neighborhood, making sure to stop by the Notre-Dame Basilica and Place d'Armes. To save money on meals, head to another neighborhood for lunch or dinner.
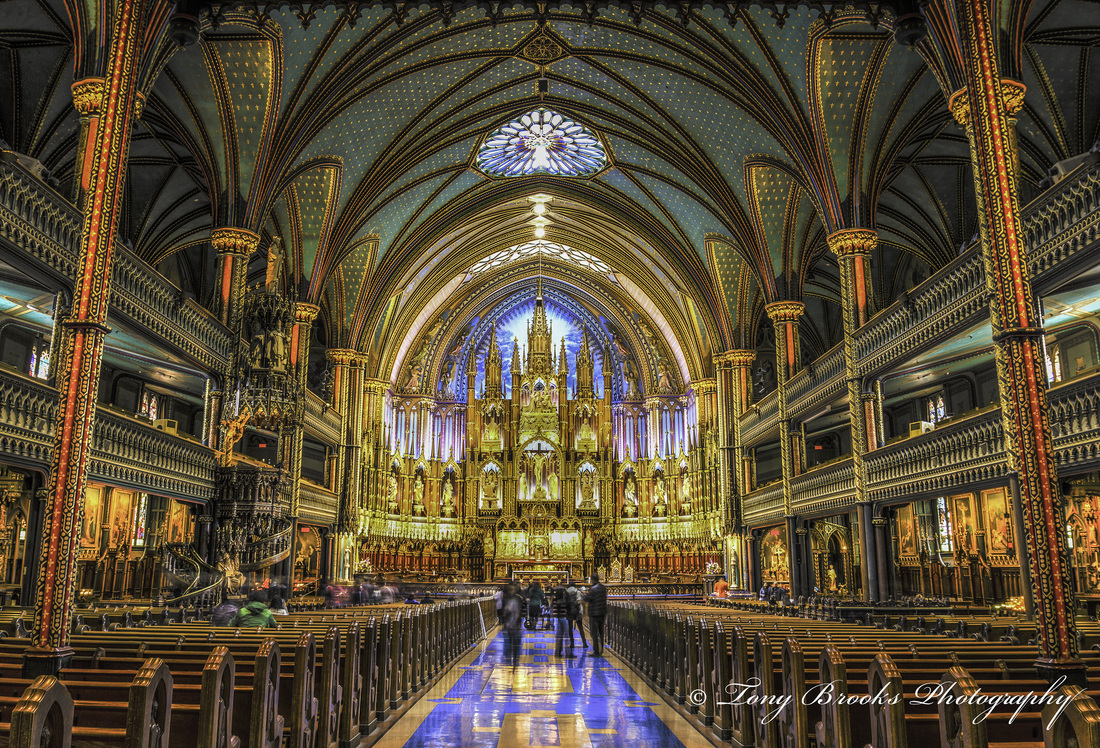 Flickr: Notre-Dame Basilica / Tony Brooks / CC BY-NC 2.0 Chinatown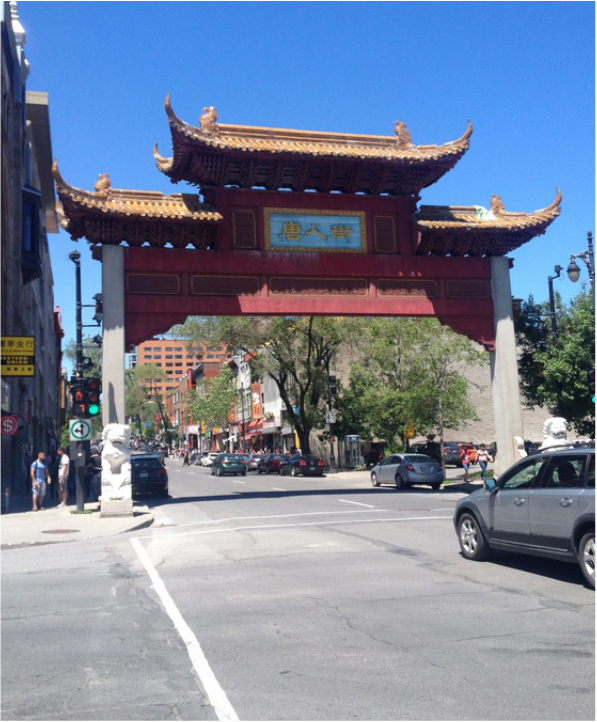 Entrance to Chinatown in Montreal, Quebec Once Brett and I were sufficiently hungry, we walked from Old Montreal to Chinatown for lunch. If you enter Montreal's Chinatown on Saint-Laurent Boulevard, as we did, you pass through this beautiful paifang, or traditional Chinese arch. There is a wide variety of Asian restaurants and stores. We chose to eat lunch at a Vietnamese Pho restaurant, which was budget-friendly and delicious. Sharing an extra-large bowl of Pho and a meat/rice/salad entree cost us less than $20 USD, including tip, which was the price of single entrees at many restaurants in Old Montreal. While the meat/rice/salad entree was acceptable, the Pho was delicious and satisfying. Recommendation: For a budget-friendly meal that won't disappoint, eat at one of Chinatown's many restaurants. We used wi-fi in a coffee shop to look up Yelp reviews before selecting one of the options. The neighborhood borders Old Montreal and downtown, so it is an easy walk if you are already in the tourist areas. Downtown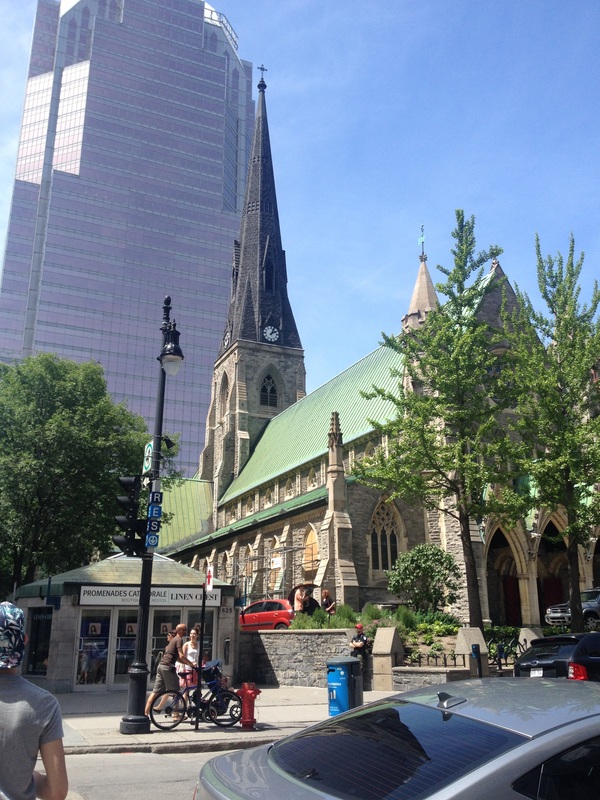 Rue Sainte-Catherine, Montreal, Quebec From Chinatown, we meandered over to Rue Sainte-Catherine, which, unbeknownst to us, is Canada's busiest commercial avenue. Now, to be clear, you could spend a lot of money on this street, lined by stores like Banana Republic, Club Monaco, H&M, and more. As budget-conscious travelers, Brett and I simply enjoyed walking around and people watching. I wish I had been fast enough with my camera to catch a few of the characters we encountered, including a guy with an outrageously patterned suit and a girl wearing shorts smaller than most pairs of underwear I own. People handing out samples were also stationed along Rue Sainte-Catherine, so we took advantage of those freebies to have a snack of gummy bears and iced tea. Interspersed with the modern buildings and department stores were beautiful churches like the one pictured above, providing interesting architectural contrast between old and new. The hustle and bustle of this area was much more characteristic of a major city than the atmosphere of Old Montreal. To be completely honest, we ventured this way looking for Cafe Myriade, a coffee shop that Brett had discovered online and was determined to try. Cafe Myriade has a few locations around Montreal, and, while we picked the closest one within walking distance, we also chose the most difficult one to find. It was located in the basement of Club Monaco on Rue Sainte-Catherine, which is not something that is readily apparent on GPS or from the facade of the Club Monaco store. Once we found it, Brett enjoyed asking the barista about the Montreal coffee scene, and I enjoyed the 1920s-esque flair of the small cafe. Recommendation: Downtown Montreal has the hustle and bustle of a large city that is fun to experience. If you have the willpower not to shop, walking around the area is a free way to get a feel for the city. If you have the time, walk to McGill University's campus, located in downtown not far from Rue Sainte-Catherine, and explore the grounds, another free activity. After all, "Travel + Leisure rated McGill's campus as one of the 17 most beautiful university campuses in the world" (wikipedia). 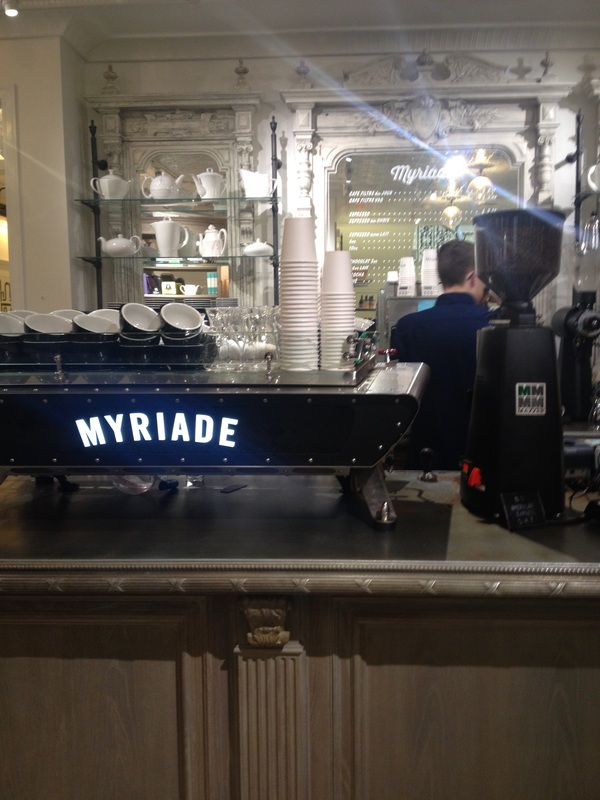 Cafe Myriade in Club Monaco, Montreal, Quebec Observations1. Montreal is an interesting mix of new and old. While walking downtown, if you ignore the signs in French, it feels like just another big, modern city. However, in other areas, such as Old Montreal, the buildings date back centuries, giving a European vibe. 2. If you, like me, try to speak in French, and you, like me, are not awesome at it, people will automatically switch to English. Almost everyone we encountered was bilingual and easily switched between the two. A lover of the French language, I was a little disappointed because I had hoped for some opportunities to use it. However, I haven't been able to practice French since college, and I recognize my own limitations. I admit that switching to English was far easier when I needed help. I did successfully ask a police officer a question in French and receive an answer in French, so that's something. 3. I observed that, in general, people in Montreal are very fashionable. You encounter people in jeans and t-shirts, but, more often than not, I was impressed by the stylish outfits that we passed. 4. You will have to pay for parking if you drive. It's virtually unavoidable in a large city like Montreal. We found a parking lot, conveniently located a block from Place d'Armes, that allowed us to park all day for about $12 USD - not the best but not the most expensive that we saw. All of our exploring was done for free by walking, but the Metro is supposed to be easy to use if you want to venture further from downtown. If I was traveling to Montreal again, I would do some research on parking to find the cheapest possible places. 5. The street signs, construction signs, and advertisements are almost universally in French. Menus and signs in the more tourist heavy areas have English translations as well. I was able to put my high school/college French to use by navigating and translating some signs for Brett. 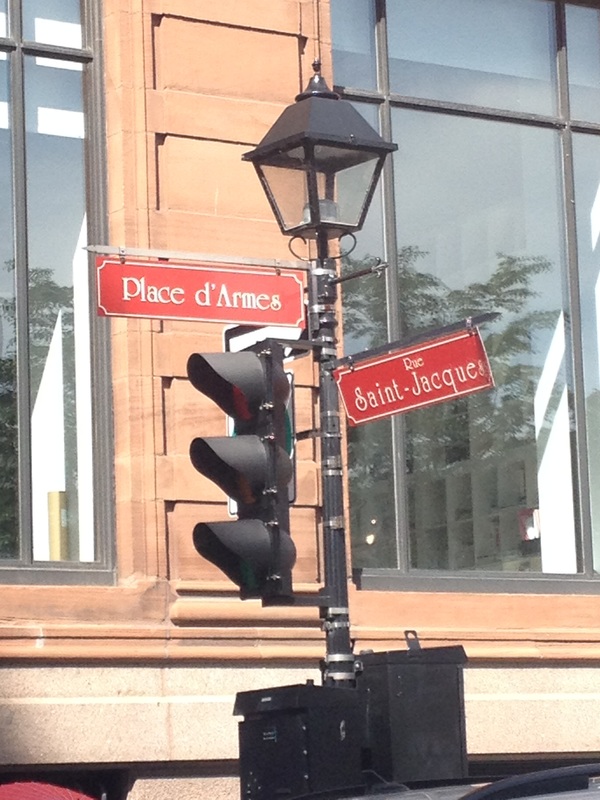 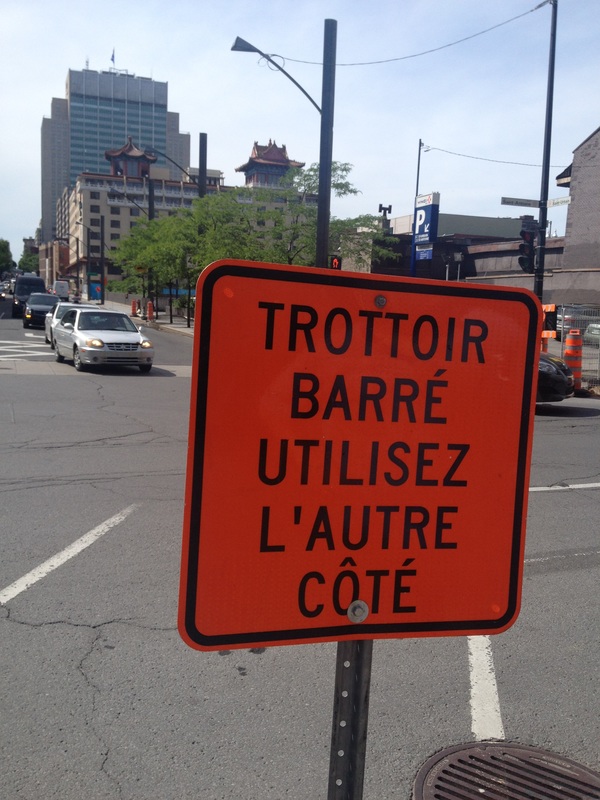 |
AuthorMy name is Alyssa Good and I have a passion for travel, adventure, culture, and new experiences! I focus on budget friendly travel, trip planning resources, and seeking out new experiences. Archives
December 2017
Categories
All
|
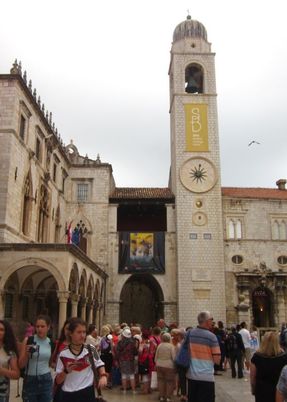
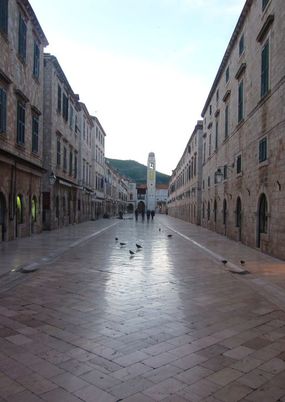
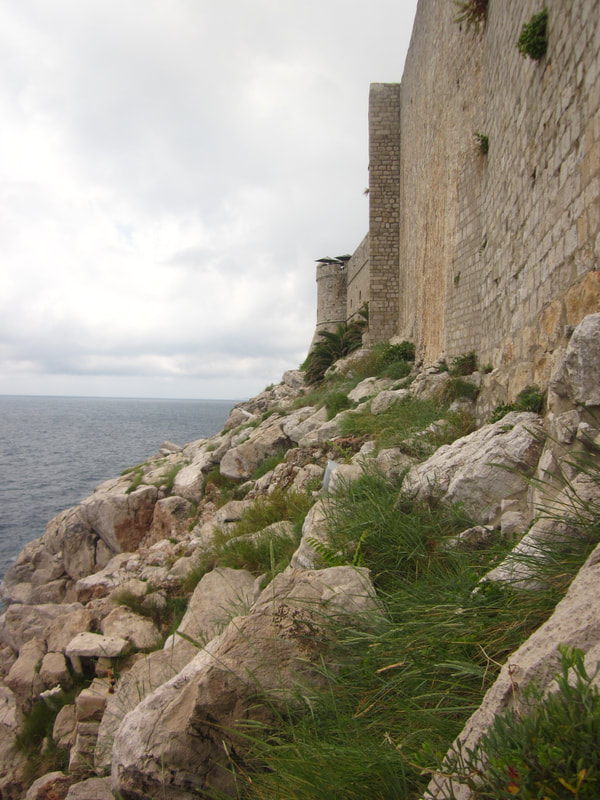

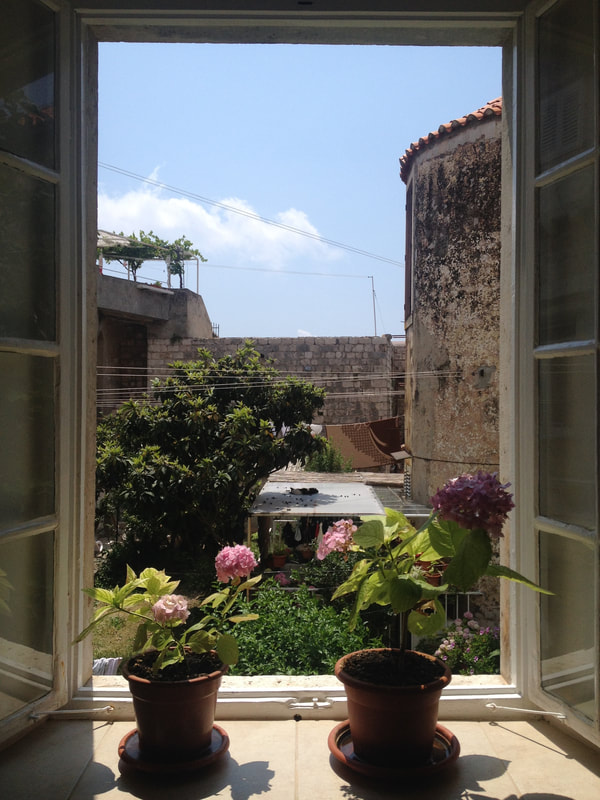
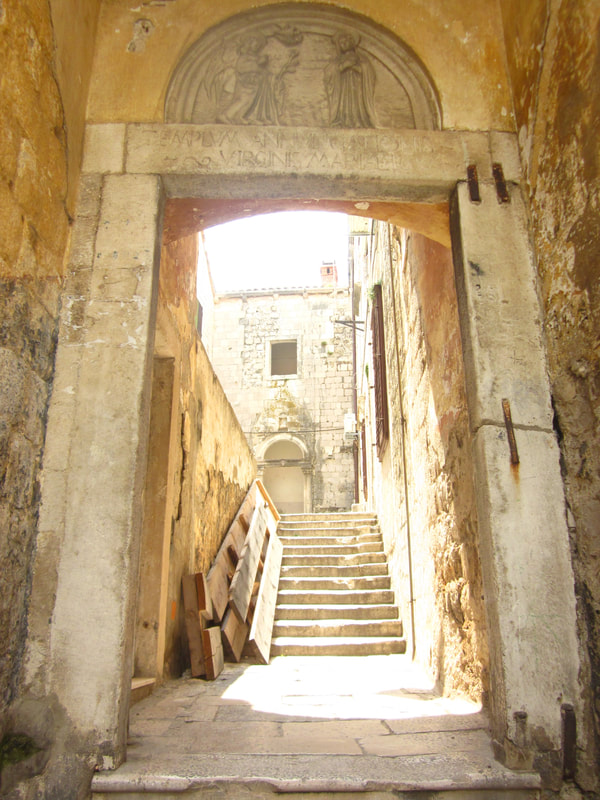
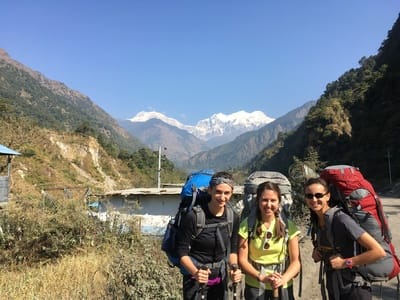

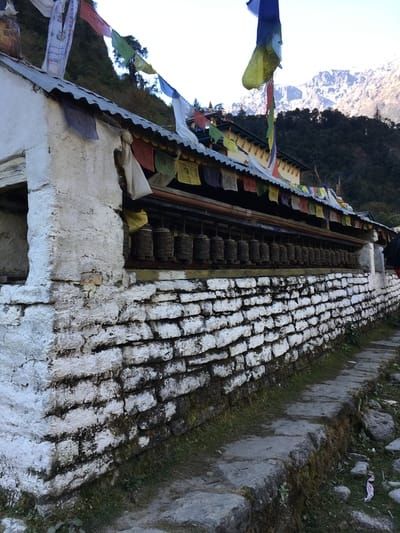
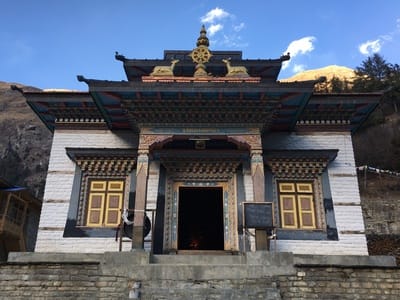
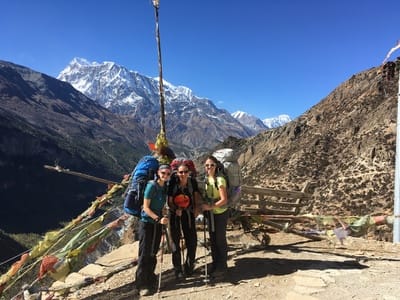
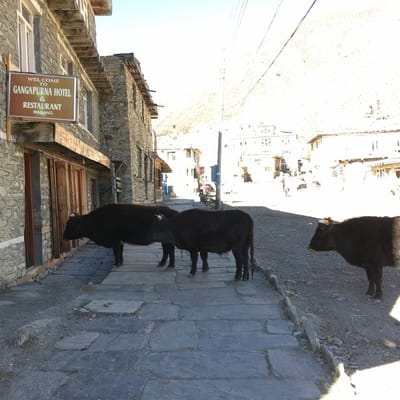
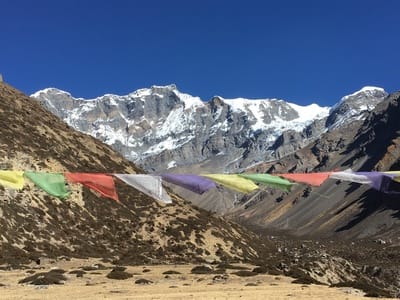
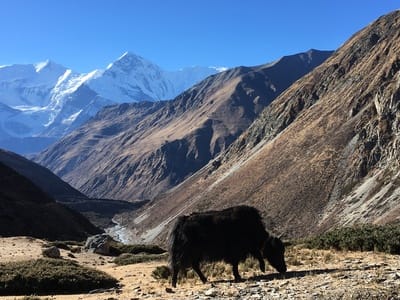
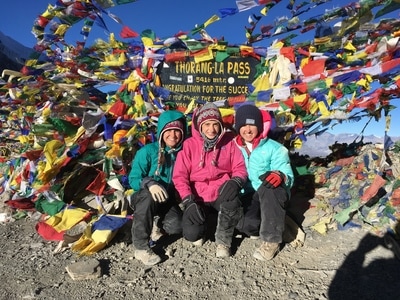
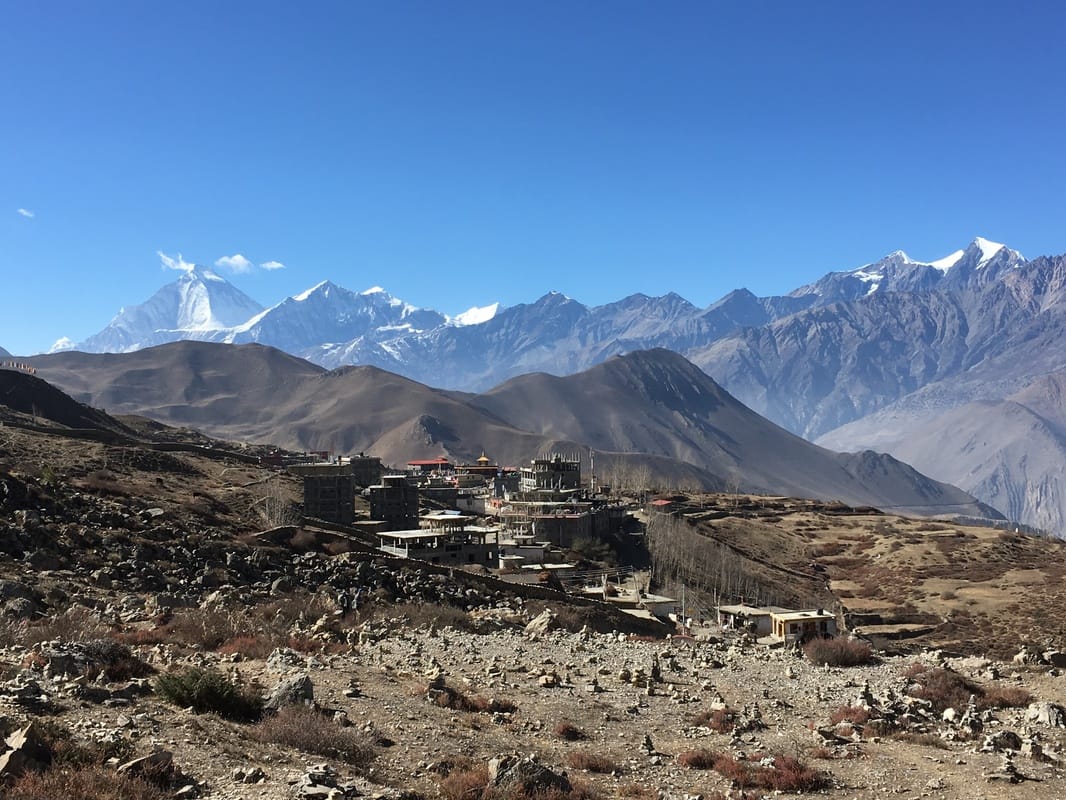
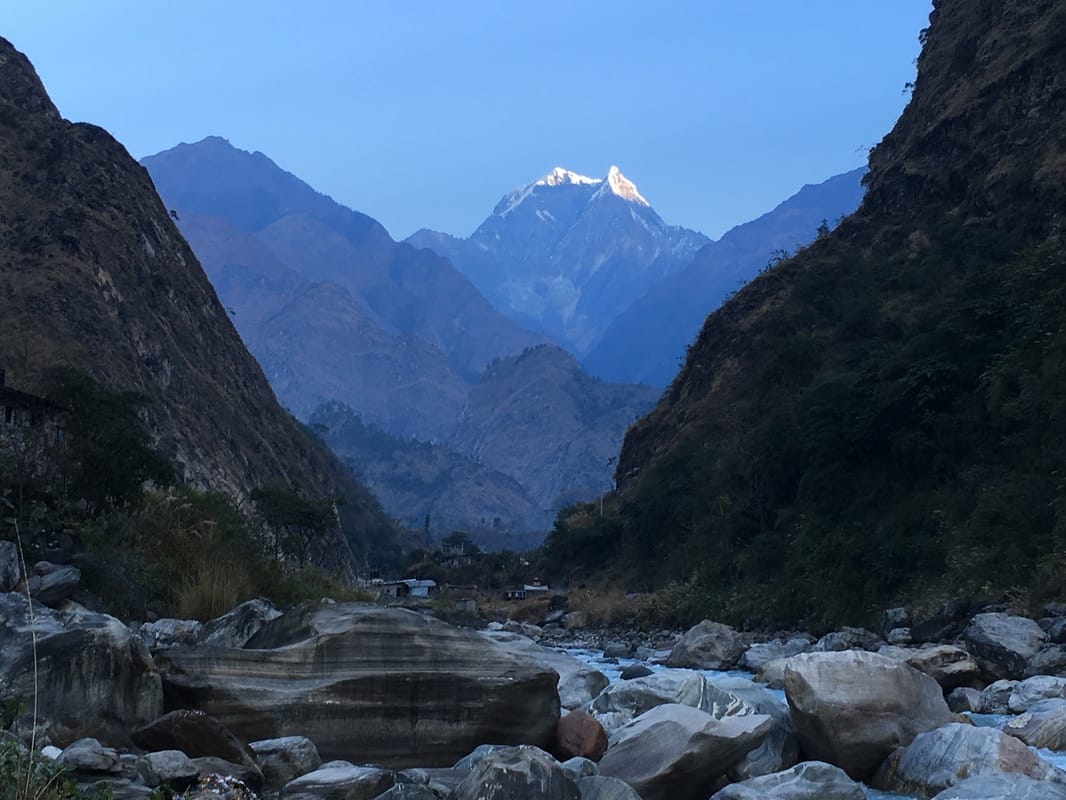
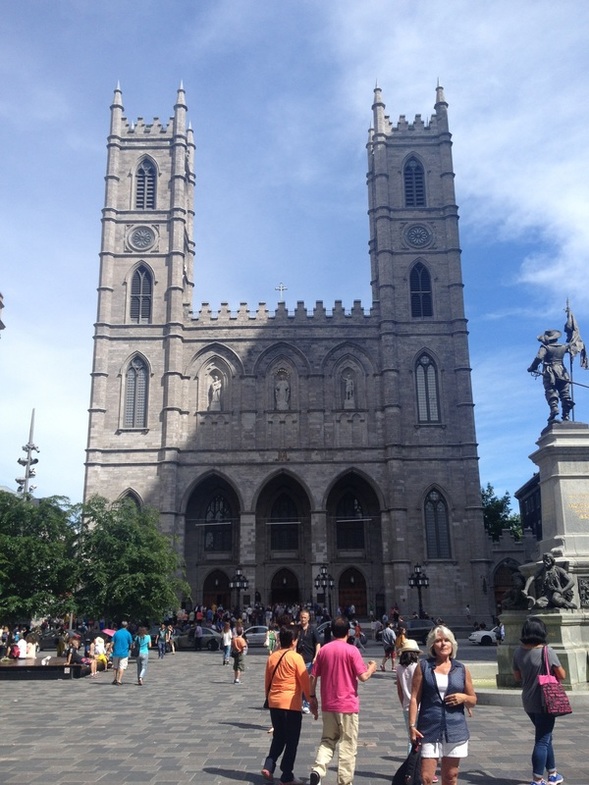
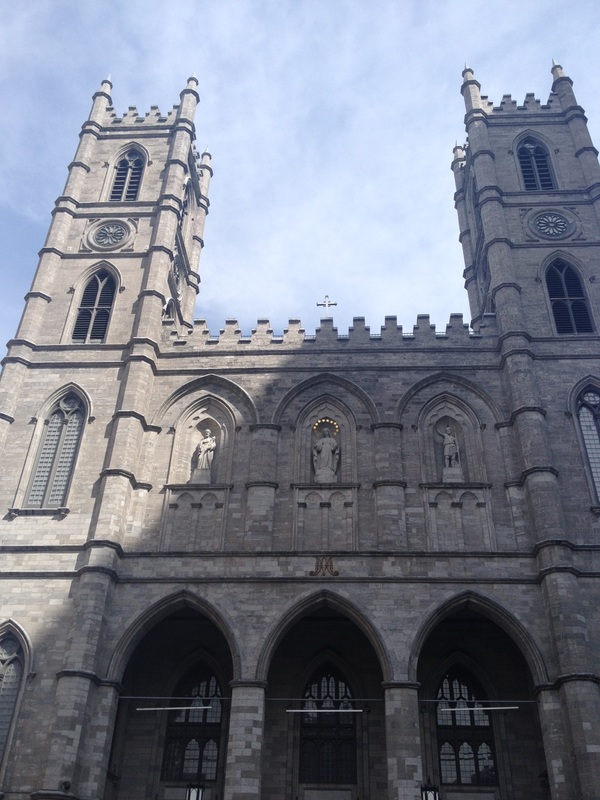
 RSS Feed
